Growing tomatoes is actually easier than you think! All you need is a pot filled with seed-starting mix and a tomato slice to plant and you’re all set.
You can grow tomato plants from a sliced tomato by planting the slices shallowly in seed-starting soil and then watering deeply. After about two weeks, your seedlings should be ready to be transplanted into new containers to fully mature.
How to Plant a Freshly Sliced Tomato Fruit
| Difficulty | Easy ●●○○○ |
| Speed | Fast |
| Materials Needed | • Tomato of choice • Pot Seed-starting mix • Water |
This method is quite self-explanatory and consists of only a couple easy steps. You’ll need to slice your tomatoes into inch-thick slices and plant them lightly in nutrient-rich soil.
It’s best to water sporadically but pay attention to your soil’s condition. Don’t forget to put it in an area that receives a good amount of sun but not too much.
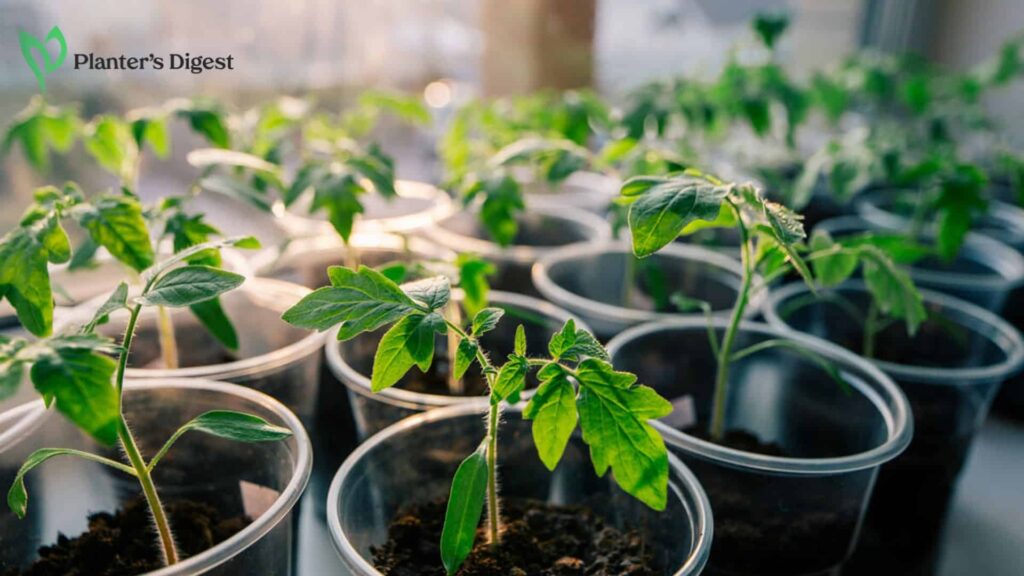
After 1 to 2 weeks, you’ll begin to see the upward growth of your seedlings if germination is successful. From here, you can pick out the strongest of the bunch to transplant.
What To Do:
1. First, select a ripe tomato variety of your choice.
2. Slice the tomatoes into inch-thick cuts.
3. Then, fill a pot with nutrient-rich seed-starting mix until it’s about 95% full.
4. Moisten the soil lightly with water.
You can give the soil a quick spritz of water to ensure that it isn’t too damp. If it’s too wet, you could risk the soil becoming waterlogged.
5. Next, evenly space out your tomato slices, laying them cut-side down.
Ensure that there’s ample room for each slice, giving them about 5 inches in between each other. You can plant about 3 to 4 slices per gallon pot.
6. Now, lightly cover the top of the tomato slices with a thin layer of soil.
Don’t bury the slices completely. Instead, you’ll want to lightly cover it in soil, making it just barely visible.
7. Provide proper care.
Relocate your plant to a sunny location that has adequate ventilation, such as a window sill. Lightly water, keeping the soil moist but not damp.
8. Afterward, monitor the growth of your seedlings.
In about 7 to 14 days, you should be able to notice the seedlings growing upright from the slice.
9. Select the strongest seedlings to transplant.
Among the seedlings, choose those that are already a few inches tall with a couple of leaves to transplant into a bigger container.
How to Ferment the Seeds Before Planting
| Difficulty | Moderate ●●●○○ |
| Speed | Slow |
| Materials Needed | • Tomato of choice • Jar • Cling wrap • Sieve • Paper towel or cloth • Plate • Plastic bag or paper envelope • Pot Seed-starting mix • Water |
If you don’t want to gamble on your tomato slices, then taking the long but steady route is the way to go. While this might take a couple of weeks, the chances of your tomato seeds germinating are higher.
For this method, you shouldn’t be afraid to get down and dirty since you’ll need to thoroughly clean the tomatoes off, scooping out all of the seeds, and placing them into a jar.
Then you can start the fermentation process by covering the jar and leaving it in a warm place without any sunlight for about 4 days. After cleaning and drying your seeds, they should be ready for planting.
What To Do:
1. Select a ripe tomato variety of your choice.
2. Afterward, slice the tomato in half and then scoop out the seeds.
3. Clean the seeds off and place them in a jar.
4. Next, cover the jar with plastic wrap and poke a couple of holes on top.
5. Allow your seeds to ferment by leaving them in a warm place without direct sunlight for 3 to 4 days.
For optimal fermentation,ensure that temperatures don’t go above 70F or 21C.
6. Clean the seeds with lukewarm water through a sieve.
7. Then, lightly pat the seeds dry with a paper towel.
8. Thinly spread the seeds onto a plate to air dry for 5 to 7 days in an area with ample air circulation.
9. Now, plant the seeds in a pot filled with nutrient-rich seed-starting mix. Alternatively, you can store the dried seeds inside a plastic bag or paper envelope in a cool, dry place.
Common Problems When Growing Tomatoes from Sliced Tomato Fruits
While planting tomatoes from their slices seems like a genius idea, it actually comes with a couple of flaws that could affect your success.
Nevertheless, this experiment is definitely worth a try since it only requires a bit of labor and time.
1. Diseases
Since the tomatoes that you buy are probably from the store, it’s unknown whether they contain any diseases that could affect your success at planting them.
Thus, be sure to choose the freshest and healthiest tomatoes of the bunch. Avoid tomatoes with blemishes such as cracks, bruises, or soft spots.
Even better, source your tomatoes from a reliable and reputable local farm that doesn’t use any harmful chemicals.
2. Some Store-bought Could Be Hybrids
The difficulty with growing tomatoes from store-bought ones is the risk of accidentally planting a hybrid tomato. If you do, then it’s likely that the fruits that your tomato tree will yield won’t look like the original tomato that it’s from.
In fact, the difference could go so far as to have a completely different taste, texture, and shape, among others.
Thus, if you’re not into surprises like these, it’d be better to simply buy seeds, so you’ll 100% be growing the tomato varieties advertised on the packaging.
3. Seeds Are Covered in Gel
If you’ve ever opened a tomato fruit before, you would have noticed that the seeds are coated in a gel-like substance. This thick, naturally occurring sap prevents germination.
While it’s possible for your tomato seeds to germinate while encased in these sacks, it doesn’t guarantee that you’ll get to grow a handful of seedlings.
So if you planted a freshly sliced tomato fruit but didn’t see any growth, this is probably why.
How to Maximize Success with the Slice Method
With this method, you can encounter a couple of problems the first couple of tries. To give you an idea of what to do when these problems may arise, here are a few tips!
1. Use fresh and healthy tomatoes from a reliable source
Poor germination can be caused by poor-quality seeds. Thus, it’s important that you source your tomato fruits from a reputable source such as a local farm that doesn’t use any chemicals when treating their crops.
2. Ensure soil temperatures are between 70-80°F or 21-27°C
For successful germination, your soil needs to be kept warm, preferably at temperatures between 70 to 80 F or 21 to 27C. This helps activate enzymes that are responsible for breaking down proteins and starches, which the seeds need for growing.
Aside from that, warmer soil boosts respiration rates which help increase energy needed for proper development. It also elevates microbial activity which can help with releasing more nutrients into the soil organically.
Higher temperatures are also vital in preventing a cold and moist environment, which is where bacteria and fungi thrive. Warmer soil temperatures kill off unwanted pathogens during germination.
3. Keep seeds in the dark to germinate properly
Right after planting the seeds, they need to be kept in a space that is dark but warm until they sprout. Keep them there until they grow their first set of true leaves.
Then, transfer them to a location that receives 14 to 16 hours of sunlight per day. Be careful, though, about hot temperatures, especially in the afternoon, as this could cause sun scalding.
Alternatively, you could use artificial light in the meantime. Then, you can move them outdoors when the weather and temperature are more favorable.
4. Provide adequate drainage and air circulation to prevent fungal diseases
Cold and damp soil can result in fungal diseases that will kill off your tomato seedlings before they can even start developing.
Aside from hindering resource uptake, these will cause pathogens and pests to thrive in the soil. This could lead to a bigger problem if an infestation breaks out in your garden.
Thus, simply water your seedlings as needed by paying close attention to the state of your soil. Be sure that the bottom of your container has a sizable drainage hole for excess water to seep through, too.
FAQs
You can transplant a tomato seedling once it’s a couple of inches tall and has already grown several leaves.
Ensure that its root system has developed enough; it must be white and extend to the bottom of the container. Also, its stem should be sturdy and able to support its own weight, not tilting to the side.
While you can start any kind of soil when starting seeds, it’s best to use seed-starting mix because they come with just the right amount of nutrients for a seed’s nutritional requirements.
Aside from that, seed-starting mix is usually made up of lightweight material that provides enough aeration and air circulation for optimal root growth. It’s also usually very soft and fine, which makes it easy to penetrate.
Yes, you can grow a variety of tomato cultivars from seeds depending on which kind is most accessible to you, has your preferred flavors and colors, and best suits your growing conditions.
After planting, you can expect to be able to harvest tomatoes from your plant after 65 to 80 days when grown in the right conditions. However, this still depends on the variety you’re growing.
There are some cases wherein tomatoes will take more than 100 days before it flowers and produces fruits. Larger tomato cultivars take longer before harvest.


