
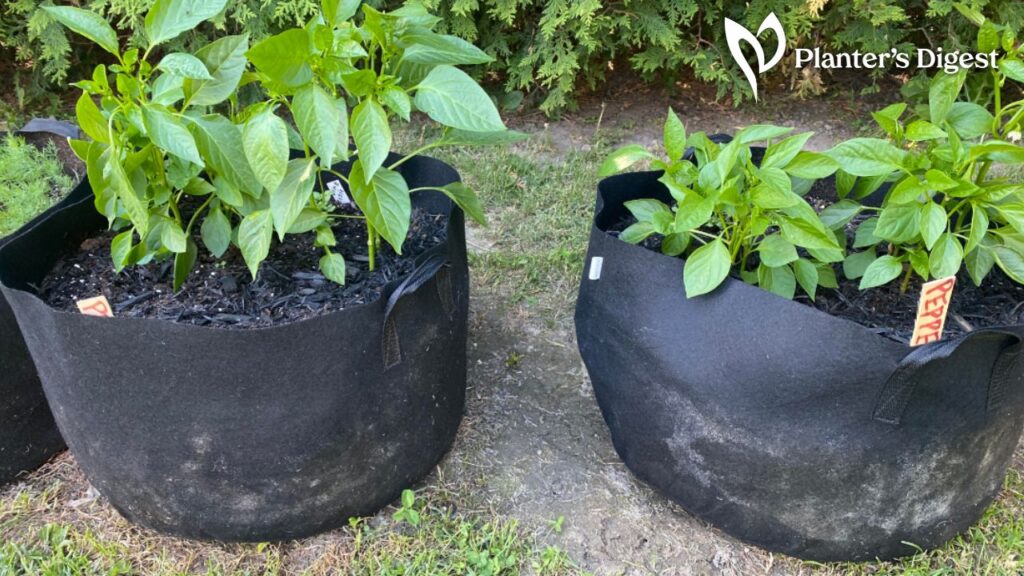
As someone who doesn’t have garden space in their apartment, I’ve resorted to cultivating plants in grow bags. And so far, it’s been great growing tomatoes, peppers, and cucumbers in my own home.
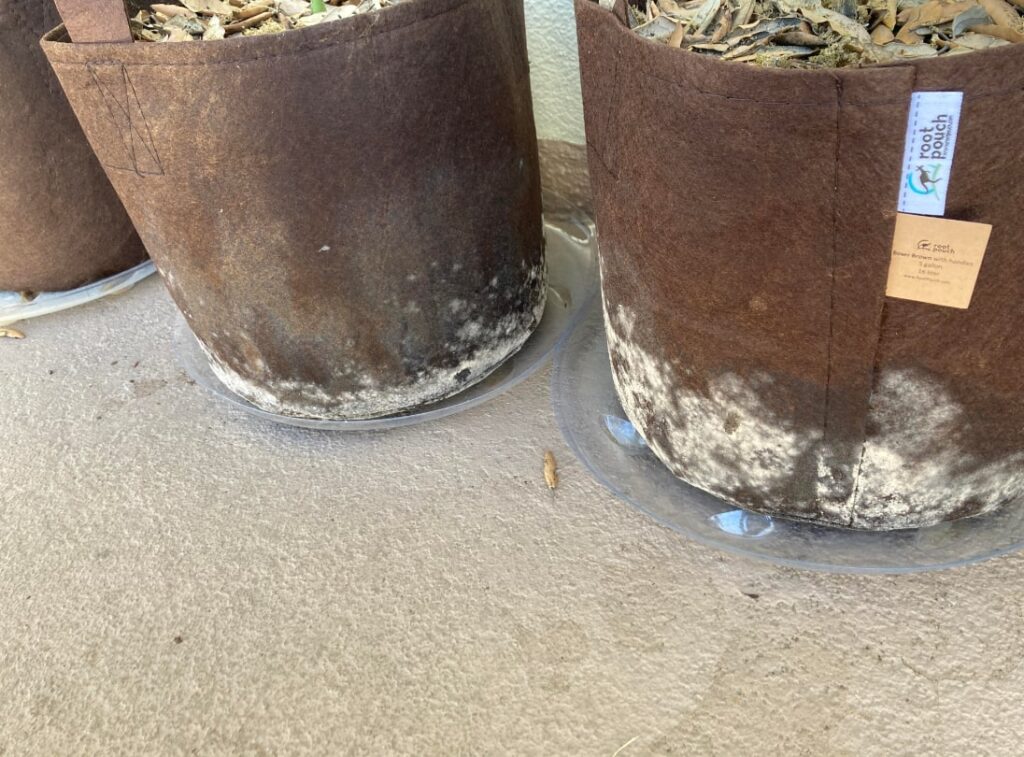
The other day, however, I noticed a bit of mold starting to form in one of the bags. You can probably imagine how panicked I was at first.
But after a ton of research and a calming cup of tea, I’ve learned that this is pretty common. I’ve written this guide to explore why mold shows up in grow bags and how to deal with it.
What causes mold on grow bags?
Presence of Organic Matter
Grow bags are typically full of healthy soil that’s rich in organic matter, such as compost, bark, and wood fibers. All of this combined is meant to create the ideal environment to help a plant thrive. Similarly, it also boosts the development of mold.
In most cases, mold is just a side effect. Its presence is a sign of a flourishing ecosystem for your plant.
Lack of Ventilation
Most grow bags are designed to be breathable, but some types can cut off a plant’s ventilation. Black plastic grow bags, in particular, are notorious for stifling air flow and promoting high humidity.
Humid areas increase moisture levels, which is exactly what mold needs to form. As long as a grow bag is way too damp all the time, mold will continue to spread.
Insufficient Sunlight Exposure
Although sunlight doesn’t directly impact mold growth, it can significantly deter the spread of mold and other fungi. UV rays play a huge role in drying out the soil, creating an unsuitable environment for the development of mold spores.
Without much sunlight, a grow bag will stay humid, and mold will continue to prosper.
Is mold on grow bags harmful to plants?
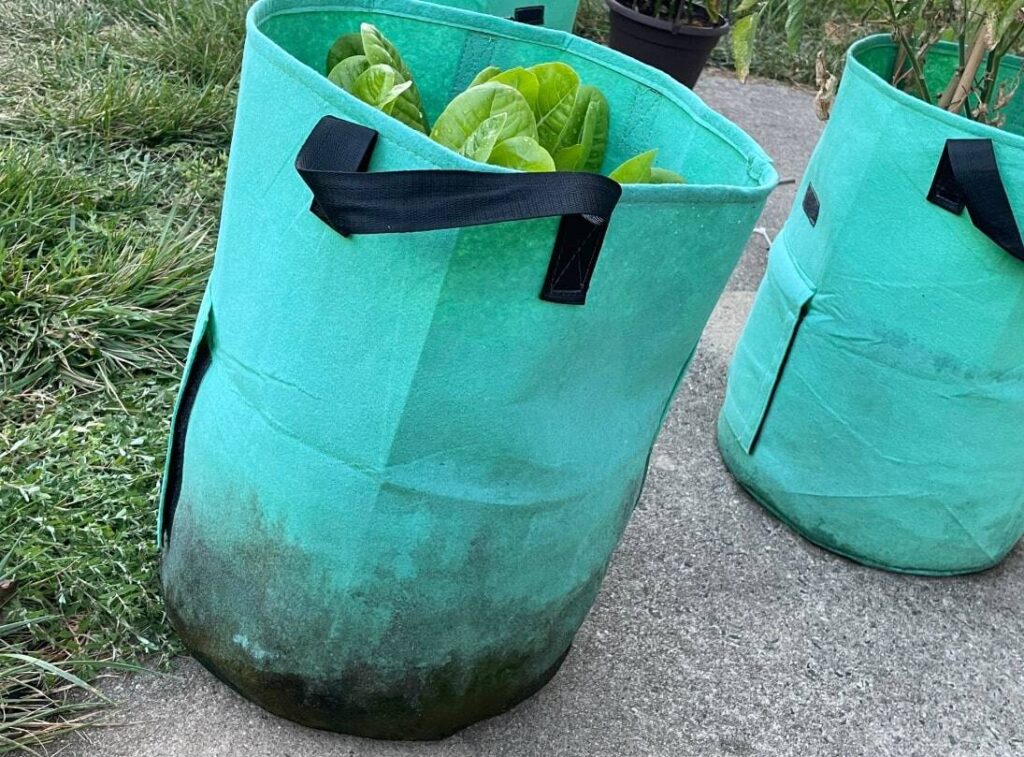
There are types of mold that won’t affect the plants in your grow bags, and types that can lead to their decay. For example, common white mold is typically harmless, while Botrytis and Fusarium will cause your plants to wilt.
Seeing a bit of mold on your grow bags isn’t necessarily bad. It usually just means that your grow bag is good at what it’s supposed to do — growing things.
However, it’s important to recognize when mold stops being a positive sign and starts being an indication of underlying problems. When mold starts spreading too much, it can negatively affect your plant and even cause root diseases.
Thankfully, there are ways to tell whether the mold on your grow bag is safe or if it’s a cause for concern.
Differentiating Between Harmful and Harmless Molds on Grow Bags
You can tell if a mold is harmless through its properties. Odorless, white mold on the bag itself should be safe for your plants. On the other hand, foul-smelling, black, and slimy mold can lead to plant decay.
Harmless Molds
White Mold
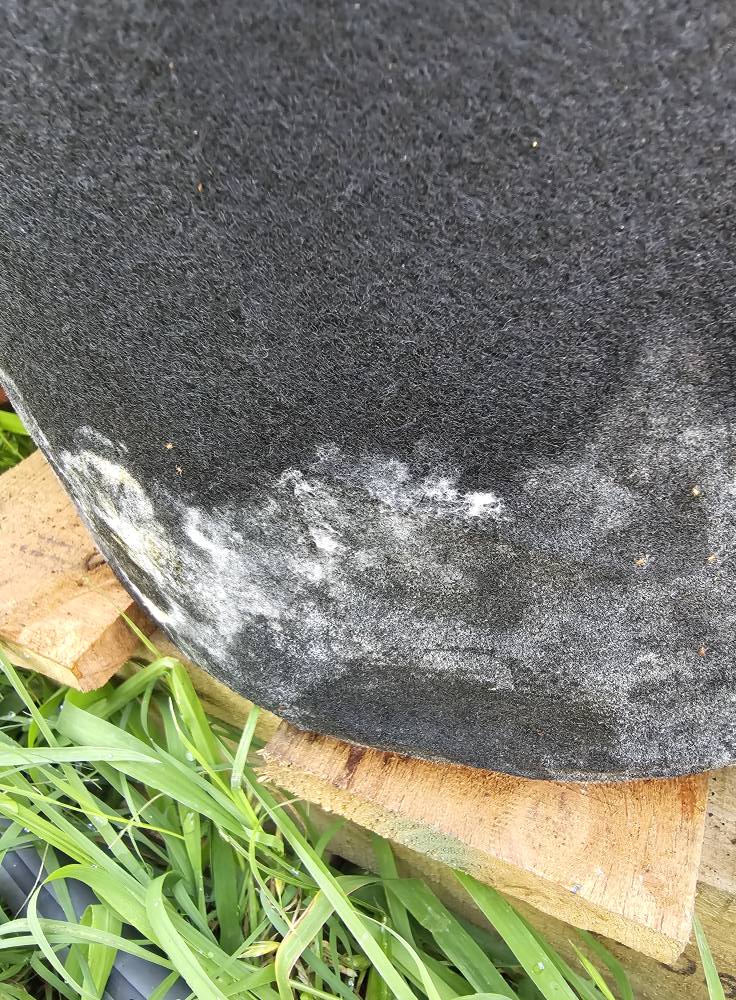
Small spots of white, cottony mold growth are common and harmless. These naturally decompose organic material into plant food.
Slime Mold
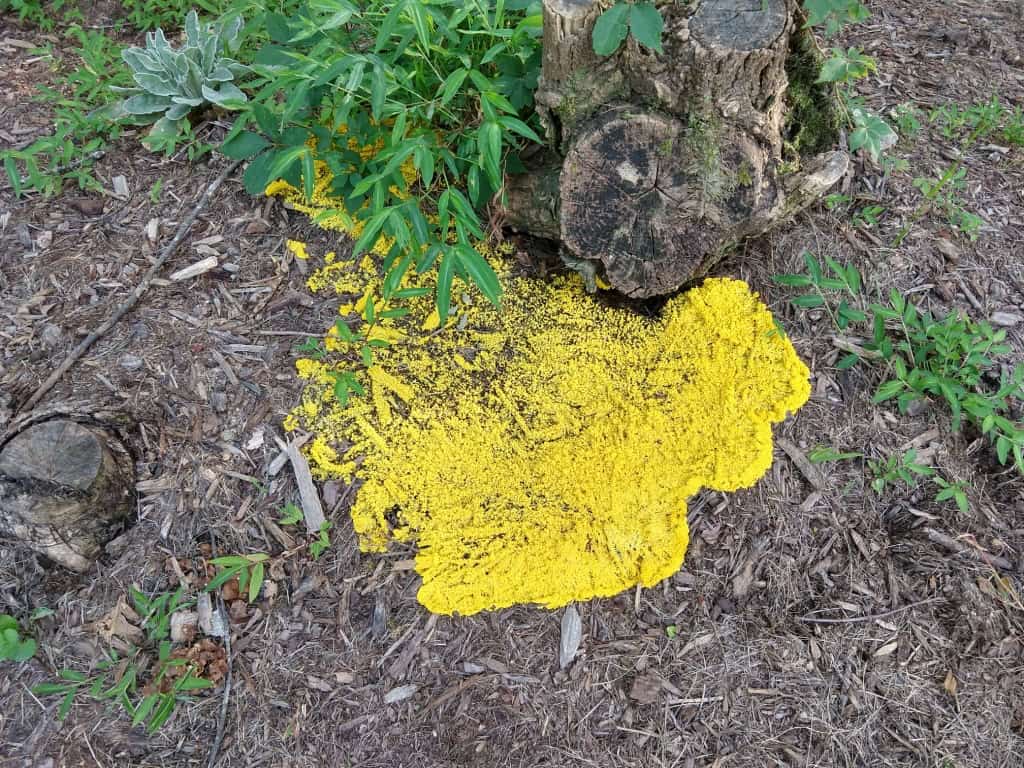
Vibrantly colored slime molds that are yellow, orange, or bright green are perfectly safe for plants. They grow on decaying organic matter and can either be scraped off or left alone.
Harmful Molds
Aspergillus
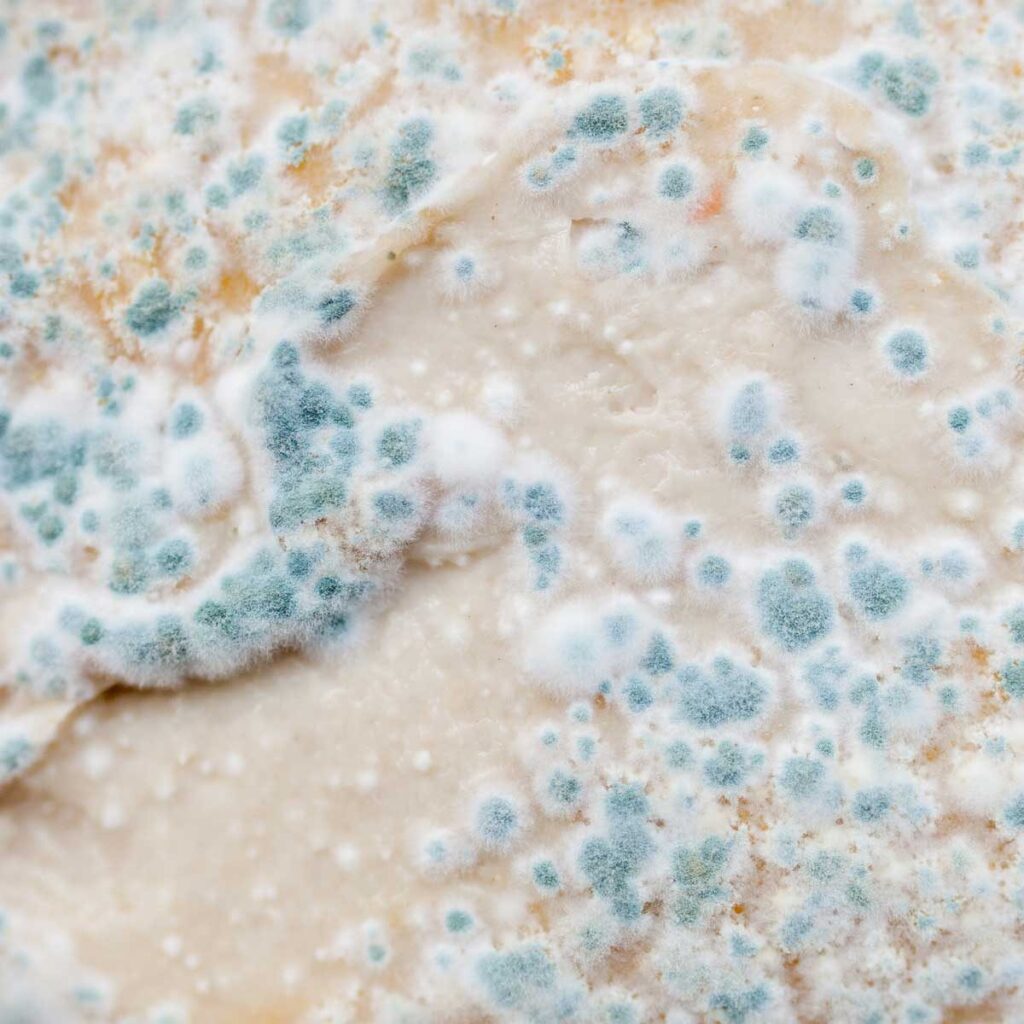
Aspergillus has a dense, fluffy appearance that comes in colors like white, yellow, brown, and black. It spreads fast in warm temperatures, around 20 to 30 degrees Celsius, and thrives in grow bags with lots of dead leaves and dust.
If untreated, it can cause the decay of your plants.
Botrytis
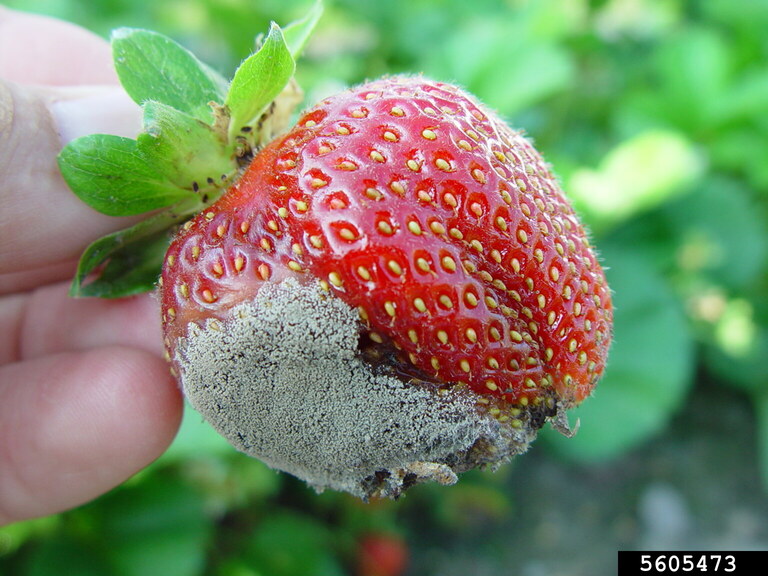
Botrytis is usually seen as rotting spots on a plant or its fruit. It looks fuzzy and gray, and is often found in grow bags that are kept in cool and wet weather.
In the beginning, it’ll feed on your plant’s damaged tissues. But as it spreads, it’ll move onto healthier parts and cause necrosis and wilting.
Trichoderma
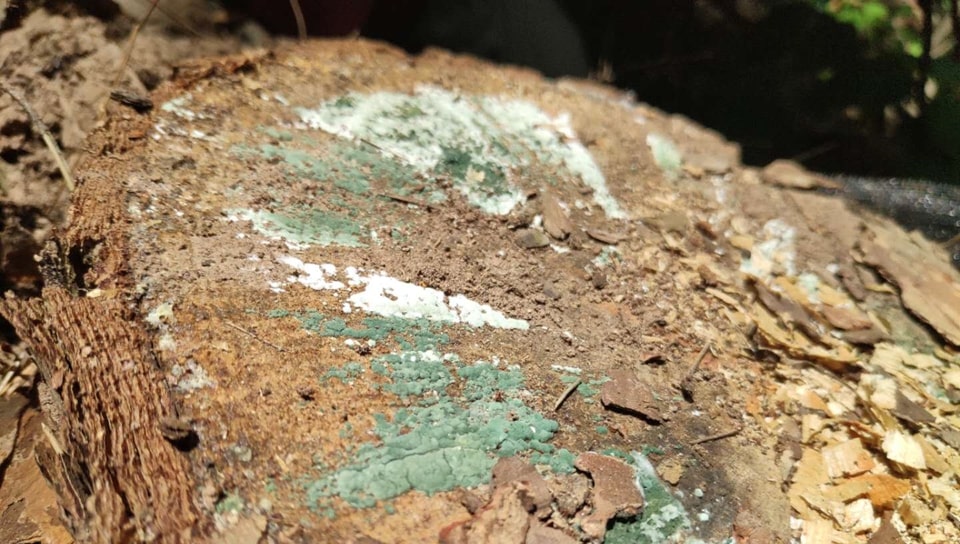
Those who have mushroom grow bags are probably familiar with Trichoderma or ‘green mold’. This type of fungus feeds on the same nutrients that mushrooms do, resulting in their rapid growth and the decay of everything else in the soil.
Once this particular mold shows up, it’s best to dispose of the grow bag entirely.
Downy Mildew
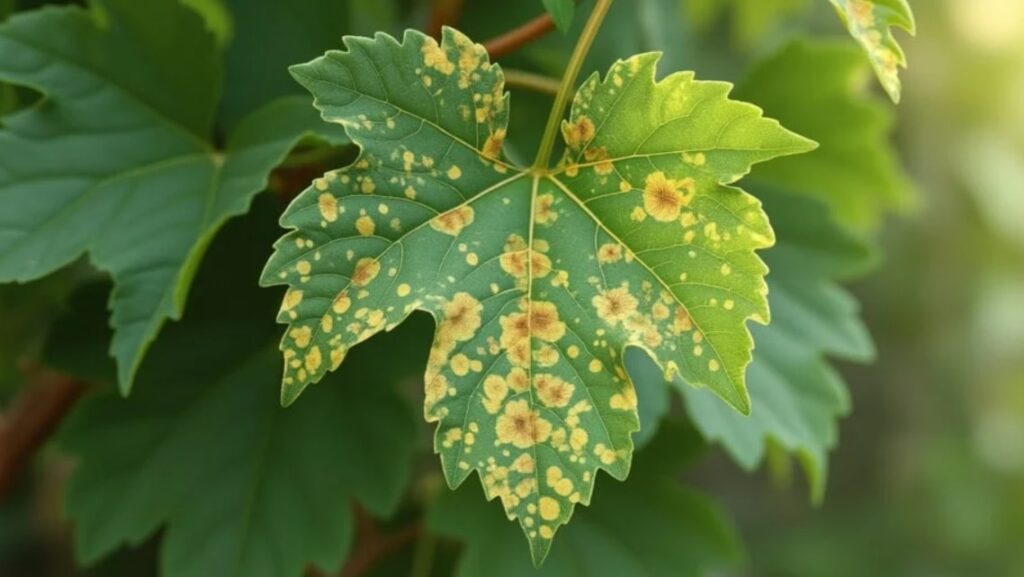
Downy mildew often develops in plants that are grown in crowded grow bags. They appear as yellow or light green spots on leaves, particularly in cucurbits like squash and zucchini.
Over time, they’ll spread and inhibit plant growth.
Fusarium
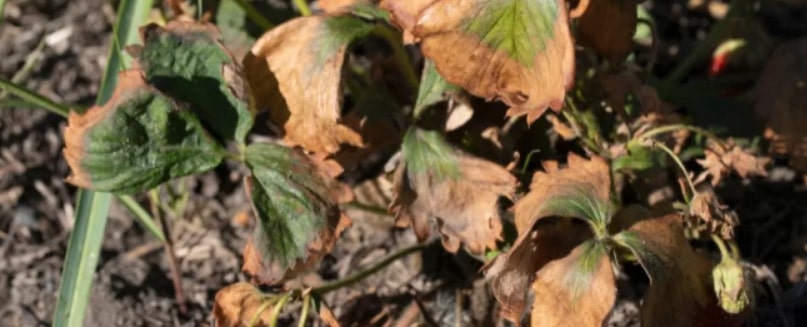
Fusarium typically starts from unsterilized organic matter in grow bags, such as coco coir. Because of this, it can spread even if nothing has been planted in the grow bag.
Most people only start suspecting that their grow bags have Fusarium once their plant’s leaves start to yellow or wilt.
If you suspect Fusarium mold in your grow bags, cut into the stem of your plant and check if there are reddish-brown lines within the tissues.
If there are, you should dispose of the grow bag and sterilize any tools that were used on it.
Ways to Remove Mold From Grow Bags
Natural Methods
Natural methods don’t contain anything harsh or toxic for plants, making them great for addressing small areas of mold.
Lemon Juice and Salt Scrub
Bring your grow bag outside and brush off as much loose mold as you can.
Once that’s done, apply a mixture of lemon juice and salt to all the moldy spots and use a brush to work it into the affected areas. The citric acid in the lemon juice should destroy the spores, and the salt will absorb the moisture.
For best results, expose the grow bag to direct sunlight when you’re done applying the scrub so that the UV rays can further bleach the mold. Afterwards, rinse the bag to get rid of the leftover paste.
Vinegar
As an acetic acid, vinegar is known for being able to kill around 82% of the most common mold species.
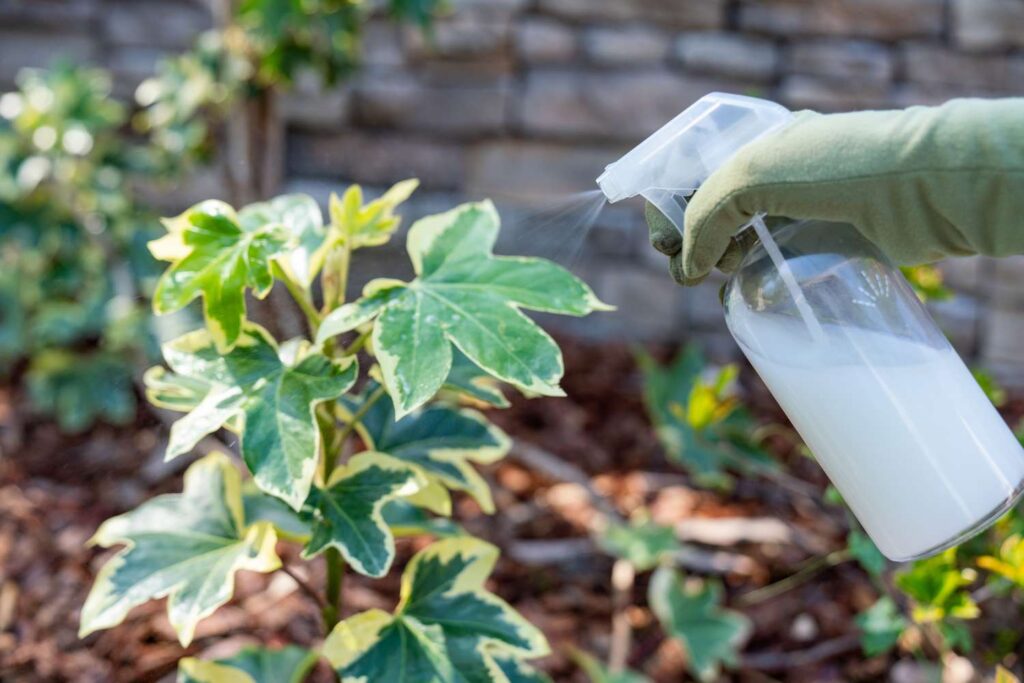
Put some in a spray bottle and spritz it all over the moldy areas in your grow bag. Leave it on for over an hour, and then wipe away with a wet cloth.
Hydrogen Peroxide Spray
Hydrogen peroxide is especially effective in getting rid of mold in the soil and the roots of your plant.
Dilute a 3% hydrogen peroxide solution with some water. There should be a 1:9 ratio to this mixture, with 1 part being hydrogen peroxide and 9 parts of water.
Spray this directly onto the soil, especially where you can see the traces of fungus. However, avoid spraying it on the leaves to minimize damage to the plant. This should be repeated daily until the mold completely disappears.
Chemical Solutions
If the mold in your grow bags has gotten really bad, it’s time to use chemical solutions.
Diluted Bleach Soak
Apply a mixture of 1 cup of bleach per gallon of water to the grow bag to get rid of any traces of mold.
Keep in mind, though, that this solution should only be used on empty grow bags and never on plants.
Commercial Fungicide
You can buy a commercial fungicide from your local agricultural supply store. Depending on what you get, follow the instructions on how to dilute the solution and apply it to your grow bags.
Just make sure that the fungicide you get is safe for the type of plant that you’re growing.
Proven Measures to Prevent Mold on Grow Bags
Avoid overwatering.
Overwatering leads to excess moisture, which serves as a breeding ground for mold.
To find out if you’re overwatering your plants, perform a ‘lift test’ by hoisting up a grow bag. If it feels heavy, the soil should still be moist and doesn’t require watering.
Practice proper spacing to promote airflow.
Grow bags that are placed too closely to one another are more likely to retain moisture, which in turn promotes humidity and results in mold growth.
Give each grow bag ample space, depending on the size of the plant. This will ensure that they each have enough sunlight and air flow to combat the spread of mold.
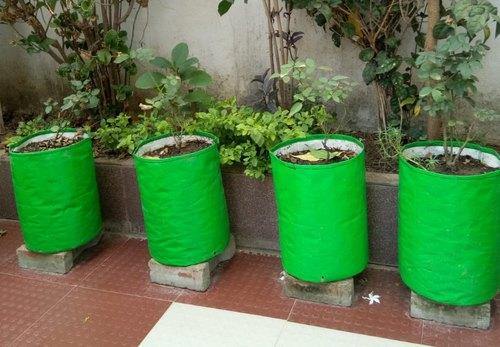
Use pot stands to elevate grow bags.
Grow bags placed on the ground often sit in puddles after they’ve been watered, increasing the chances of mold growth.
Use a pot stand to elevate your grow bags for better air circulation. This prevents any excess water from pooling.
Monitor humidity levels with a hygrometer.
Humidity is one of the biggest culprits behind mold growth in grow bags. To test humidity levels, use a hygrometer. This device tells you the level of humidity in the air and helps you determine if it’s too high for your plants.
Experts say a humidity level of 60% or below should be safe. If the hygrometer shows humidity higher than that, it’s best to relocate your plants elsewhere.
Wash grow bags after each season.
Fabric grow bags are porous and can accumulate moisture after each use. If they’re not disinfected before being reused, they could spread mold from the previous plant onto the new one.
Prevent this by washing your grow bags with a detergent or a commercial fungicide and letting them fully air dry before using them again.
Expose grow bags to direct sunlight.
Grow bags kept in cool and dark places are more likely to be constantly moist. This allows mold spores to thrive and spread.
It’s been proven that UV rays can impede mold growth and ultimately destroy it. Put your grow bags under direct sunlight to dry out your plants and make it harder for mold to flourish.
Use a fan in indoor setups.
Indoor grow bags located in a room with poor air circulation are more likely to develop mold.
To promote air flow, use an oscillating fan on its lowest setting and place it a few feet away from your plants. This will remove the surplus moisture from the soil and dry out any damp areas that could develop mold.
FAQs
Yes, mold can spread from a grow bag to a plant. Fungal spores are airborne, so they can easily travel across nearby surfaces. Plants are especially susceptible, since they’re often damp.
It depends on the type of plant you have and the severity of the mold. If mold is only visible in small areas, you can address the affected parts and clean your grow bag.
But if the mold has become substantial, it’s recommended to throw away the entire grow bag to avoid contaminating other plants.
You should clean fabric grow bags after each growing season. Empty the bag and wash it thoroughly with warm, soapy water. It should be air-dried completely before being stored or used again.