Rototiller sounds like a futuristic action hero who just might be the perfect gardening companion. But if you read it wrong, like we do sometimes, it can accidentally come off as “rotoweiler”, like some sort of robotic dog!
If you’re a budding gardener or just getting started with landscaping projects, you might have heard the term “rototiller” thrown around. But what exactly is a rototiller, and how can it help you achieve your gardening goals?
Let’s dig in!
What is a rototiller?
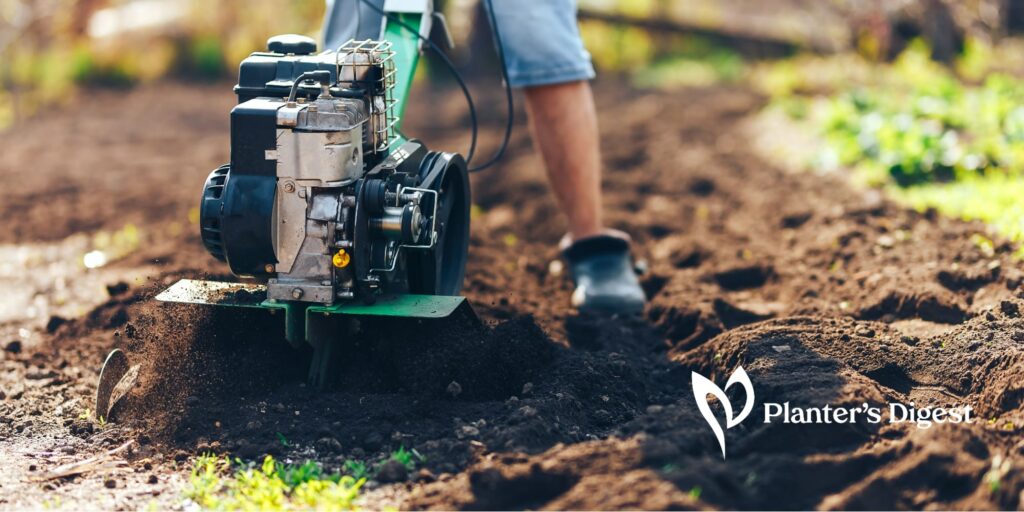
A rototiller, also called a rotary tiller or garden tiller, is a powerful garden tool for soil aeration and breaking. Rototillers prepare the soil for planting, encouraging better seed germination and root growth.
While it does seem intimidating at first, it’s actually a great piece of gardening tool for both novice and experienced gardeners and landscapers.
Rototillers do more than just loosen the soil. They can incorporate green manure crops like alfalfa into the soil, restoring nutrients like nitrogen to your garden.
They also bring up nutrient-rich soil from below, making it accessible to shallow-rooted plants. Plus, they eliminate matted roots, such as those remaining from prior gardening or weeds cut above the surface.
Just be careful of rocks when using it, as these harm your rototiller. If you can, remove larger rocks from your soil before using the rototiller.
Key Features of a Rototiller
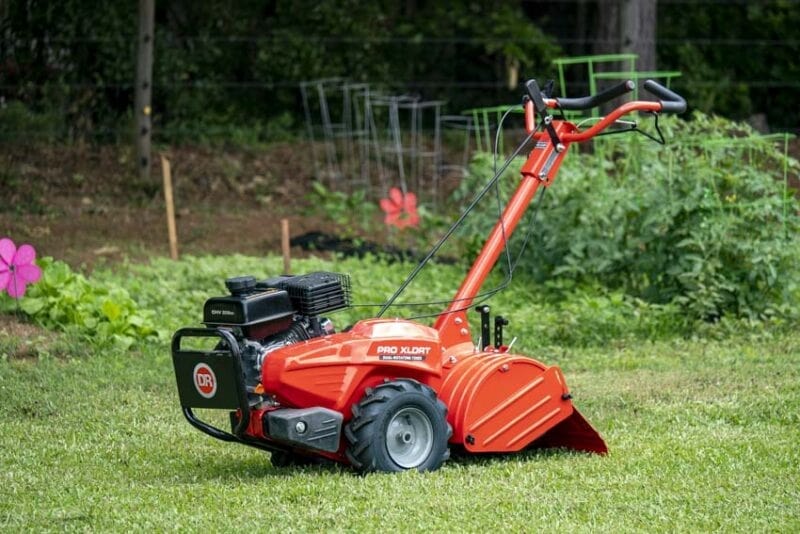
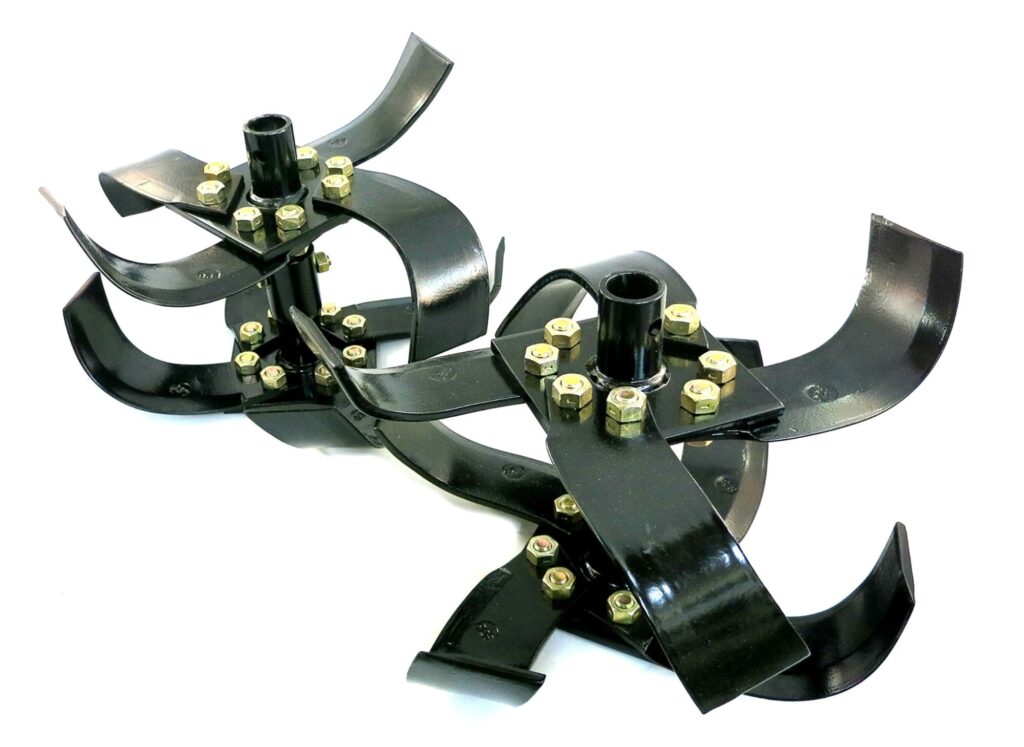
A rototiller’s main job is to loosen soil using motor-driven metal blades, known as tines. These blades rotate and are powered by either gas or electricity.
Rototillers are distinguishable by 3 features: tines, engine, and depth adjustment. Let’s look at each briefly.
Tines
| Rototiller Type | Ease of Use | Suitable Garden Size | Power | Pros | Cons |
| Front-Tine Tillers | Easy ●○○○○ | Smaller gardens | Light to Moderate | – Simple to handle and navigate. – Beginner-friendly design. | – May struggle with tough or compacted soil. – Less suitable for larger gardens. |
| Rear-Tine Tillers | Moderate ●●○○○ | Larger areas, heavy-duty tasks | High | – Suitable for large gardens and demanding soil conditions. – Comes in both counter-rotating and standard rotating models. | – Can be challenging to maneuver, especially for beginners. – May be overkill for small gardens. |
| Mini-Tillers | Easy. ●○○○○ | Small-scale gardening, tight spaces | Light | – Ideal for confined spaces and raised beds. – Easy to maneuver and store. | – Not suitable for heavy-duty tasks or large areas. – Best for small-scale gardening. |
Tines, or metal blades, break up compacted soil. Rototillers are handy for soil that’s become compacted due to various factors like flooding, root matting, or prolonged inactivity in gardening.
No matter the cause of compacted soil, a rototiller can break it up, making gardening tasks easier, like digging and planting. This makes the rototiller perfect for adding soil enhancements such as compost.
Rototillers come in three types: front tine, rear tine, and mini-tillers each with its unique advantages and drawbacks. Based on the table above, you can easily tell which ones work best for you now and even for the future.
Rototillers can be either pushed from behind or mounted behind a tractor and pulled along. They save gardeners and farmers considerable effort by eliminating the need to manually dig and turn soil with a shovel.
Some tillers are pulled behind tractors, and these are wider, covering more ground per pass.
For instance, front tine rototillers tend to be lighter but have less power compared to the heavier front tine counterparts. Some rototillers are quite heavy, with larger models weighing up to 200 pounds, which can be challenging to handle if you’re not used to it.
Engine
| Engine Type | Ease of Operation | Costs | Pros | Cons |
| Gasoline Engines | Generally easy to start, may require some maintenance. | Initial purchase cost and fuel expenses can be higher. | – Suitable for various soil types and garden sizes. – No reliance on electrical outlets. | – Can be noisy and produce emissions. – May require periodic maintenance and fuel refills. |
| Electric Engines | Very easy to start, minimal maintenance required. | Usually more affordable upfront, lower operational costs. | – Produce no emissions and are quieter. – Little to no engine maintenance required. | – Tethered to an electrical outlet by a power cord. – Generally less powerful for heavy-duty tasks. |
| Battery-Powered Engines | Easy to start, minimal maintenance needed. | Initial cost may be higher due to the battery purchase. | – Cordless and convenient for medium-sized gardens. – Minimal noise and emissions. | – Limited runtime, may require battery recharges during use. – Not as powerful as some gasoline models for tough soil. |
Most rototillers are powered by gasoline engines. Some models, designed for smaller gardens, might have electric or battery-powered options.
Many rototillers come with gasoline engines, providing a solid mix of power and mobility for various gardening tasks. Gasoline engines come in different sizes, as larger engines tackle tough, compacted soil, while smaller ones handle lighter tilling.
Gasoline rototillers don’t rely on cords, giving you the freedom to move around your garden.
Some rototillers, especially for small gardens or light-duty work, feature electric engines. They tend to be less powerful than their gasoline counterparts.
Electric rototillers are quieter, emission-free, and low-maintenance, making them an environmentally conscious choice. But there’s a catch.
Electric rototillers need an outlet connection, limiting their range. They work best for compact gardens with nearby power sources.
Battery-driven rototillers are cordless and run on rechargeable batteries. They strike a great balance between gasoline power and electric mobility.
These tillers are easy to start, produce no emissions, and require minimal maintenance. They’re a great choice for medium-sized gardens and projects where mobility is important.
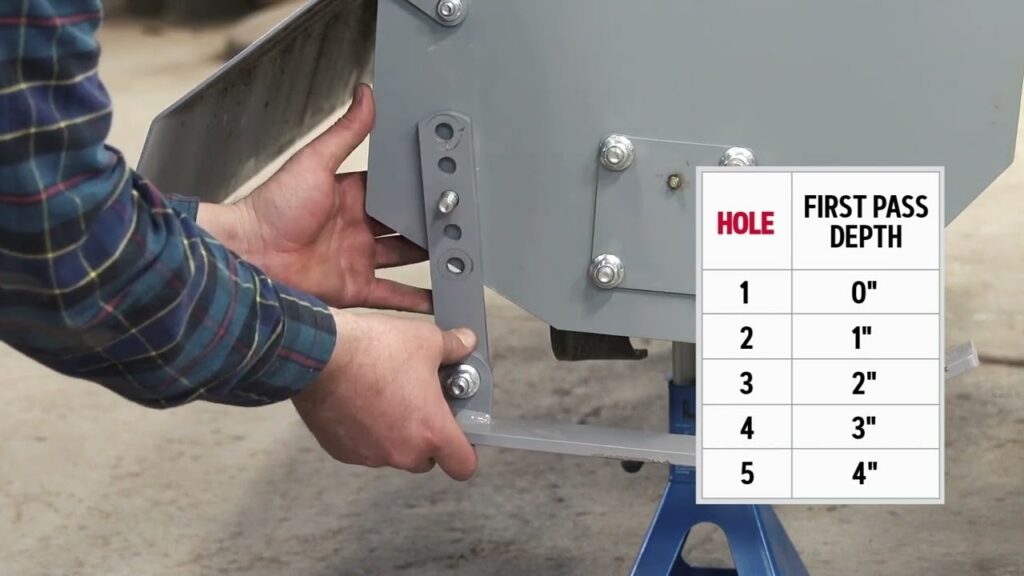
Plus, you can typically adjust the depth at which the tines dig into the soil. This feature is crucial for different types of gardening tasks.
Depth Adjustment
| Depth Adjustment | Ease of Use | Specific Applications | Pros | Cons |
| Soil Preparation | Reduces overworking soil | Tailored for planting, weeding, aeration | – Versatility: Fits various gardening tasks. | – Learning curve for beginners. |
| Planting Depth | Optimizes seedling depth | Ideal for germination and root growth | – Precision: Ensures proper planting depth. | – Requires occasional adjustment. |
| Weed Control | Targets surface weed roots | Effective weed suppression | – Maintains desired planting depth. | – Occasional fine-tuning may be needed. |
| Soil Aeration | Enhances soil structure | Promotes robust root growth | – Contributes to overall garden health. | – Consistency in depth may require attention. |
| Ease of Use | User-friendly controls | Simple lever or knob adjustments | – Prevents tilling mistakes. | – Precision may need practice. |
| Adjustment Process | Quick and convenient | Easily raise or lower tines | – Tailors the tiller to specific tasks. | – Consistency in depth requires attention. |
Depth adjustment is one important feature in rototillers when it comes to gardening tasks since it allows you to control how deep the tines dig into the soil.
Depth adjustment is your key to success. Different tasks require varying levels of soil disruption and aeration, like preparing for planting, tackling weeds, or aerating your garden.
When sowing seeds or transplanting, you need the soil tilled at a specific depth. Depth adjustment helps you create the ideal planting environment, loosening the soil just right.
Shallow tilling fights weeds by disrupting their growth near the surface. Adjusting the depth targets weed interference effectively.
For healthier gardens, deeper aeration is sometimes necessary. Adjusting the depth enhances soil structure, allowing better air and water penetration for robust root growth.
Depth adjustment isn’t just about customization as it makes gardening more efficient. Setting the desired depth prevents overworking the soil and ensures you cover essential tasks.
Rototillers come with user-friendly depth controls, often a lever or knob. Simply raise or lower the tines to your desired depth before tilling, tailored to your specific gardening task for the best results.
Planter’s Tips on Using Rototillers
- Wear appropriate safety gear, including gloves, eye protection, and sturdy footwear.
- Be cautious around the rotating tines, keeping hands and feet away.
- Read and follow the manufacturer’s instructions for your specific rototiller model.
FAQs on Rototillers
A rototiller can be used to get rid of grass. By tilling the soil, the grass is uprooted, making it easier to establish a new garden or planting area.
Tilling is not harmful to the soil. In fact, tilling can be beneficial for soil aeration but over-tilling or excessive tilling can disrupt the soil structure, so keeping a balance is a must.
You can plant right after tilling. However, it’s best to allow the soil to settle for a few days to ensure optimal conditions for planting.
Tilling eliminates weeds. Tilling works by uprooting the weeds, reducing their growth. However, it may not eliminate all weed seeds, so additional weed control methods may be necessary.
You can sow seeds immediately after tilling. However, we recommend waiting a few days for the soil to settle. This allows for more accurate planting depths and improves seed-to-soil contact.
It’s not necessary to rototill the garden annually. We recommend assessing your garden’s needs regularly. In some cases, light tilling or soil amendment might be more suitable than annual deep tilling.
It’s not recommended to till the soil when it’s wet. Tilling when the soil is too wet can lead to soil compaction and clumping. We recommend waiting until the soil is moist but not saturated for the best results.


