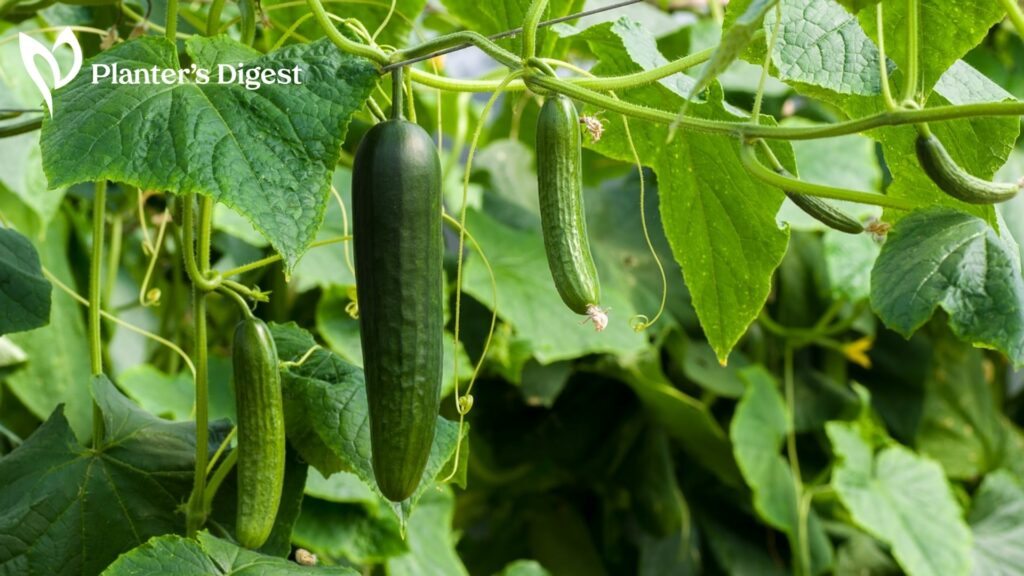
Newbie gardeners are often leery of growing and transplanting cucumber seedlings because of their perceived delicate sensitivities. We’re here to debunk that.
The best time to transplant cucumber seedlings outdoors is after the last frost, when the soil reaches about 60°F (15°C) and the risk of frost has passed. This is often in late spring or early summer, although timing may vary by location.
The secret is to give your cucumber seedlings a proper hardening-off period and they’ll do just fine. And to do that, we’ll check the factors needed to transplant your cute cucumber seedlings for the outside garden.
Things To Check Before Transplanting Cucumber Seedlings
Transplanting cucumber seedlings outside means looking at the last frost dates, current soil temperature, and the present condition of your seedlings. Confused? We’ve made things simpler for you by listing the factors for easier reference.
Last Frost Date
Find the average date of the last spring frost in your area. You can get the details from your local agricultural extension office, online resources, and even gardening apps.
Soil Temperature
Cucumber seedlings grow best when the soil temperature gets at least 60°F (15.55°C) consistently. You can monitor the soil temperature using a soil thermometer.
Seedling Age and Health
Wait to transplant cucumber seedlings until they have at least two true leaves and reach a height of 3 to 4 inches. Make sure they’re visibly healthy without any signs of stress, pests, or diseases.
Timing
You should give about a week or two after the last frost date when thinking about transplanting your cucumber seedlings. Make sure this timeframe works well with soil temperature that is at least 60 F without any fluctuations.
Starting Cucumber Seedlings Properly
| Expertise Level | Easy to Moderate ●●○○○ |
| Materials and Tools Needed | Cucumber seeds Seed starting trays or pots High-quality seed-starting mix Watering can or spray bottle Plastic wrap or a humidity dome Grow lights or a sunny windowsill Heat mat (optional) |
| Possible Issues | Overwatering can lead to root rot so make sure there’s enough soil moisture without waterlogging. Low light can result in leggy seedlings. Thinning seedlings is essential if they grow too close together. |
Even though you know what factors to look out for in transplanting doesn’t mean that you can just start seedlings willy-nilly. If you’re going to do things right, then we have to start with growing cucumber seedlings properly.
Before we think of transplanting our cucumber seedlings, we have to make sure that we grow healthy ones first. Here’s our tried and proven technique for starting cucumber seedlings properly.
How to Start Cucumber Seedlings Properly
1. Choose the right cucumber seeds.
Select seeds suited to your climate and gardening preferences. Decide if you want slicing, pickling, or specialty cucumbers for your gardening and culinary needs.
2. Fill seed trays or pots.
Use a quality, lightweight, sterile, and well-draining seed-starting mix to fill your trays or pots. We don’t recommend using garden soil as it could bring soil-borne pests and diseases.
3. Plant the cucumber seeds.
Plant seeds about an inch deep, placing one or two in each cell or pot, and then cover with soil. We suggest using a sprayer to water the soil to enhance seed-to-soil contact.
4. Provide proper moisture.
Keep the soil consistently moist, but avoid overwatering. Use a spray bottle to mist the surface to avoid disturbing the tiny soil-covered seeds.
5. Create a mini greenhouse.
Cover your trays or pots with a clear plastic lid, plastic wrap, or a humidity dome. This creates a mini greenhouse effect, preserving moisture and warmth.
You can buy one or make your own from recycled transparent bottles.
6. Maintain ideal temperature.
Cucumber seeds germinate best at temperatures between 70° and 85°F (21.11° and 29.44°C). If you live in a cold area, you can use a heat mat if needed to maintain steady warmth in the face of fickle temperature fluctuations.
7. Provide adequate light.
Position the trays in a spot with indirect sunlight as cucumber seedlings need about 12 to 16 hours of light daily. If you don’t have a spot with these lighting conditions, you can use grow lights instead.
8. Thin out seedlings when necessary.
Once your cucumber seedlings have a few leaves, thin them to one healthy seedling per cell or pot. Trim weaker ones at the soil level to avoid disturbing the remaining plant’s roots.
Cucumbers can grow in pots for about 6 weeks, but you don’t want them to get too big, or they’ll become overripe.
How To Transplant Cucumbers
| Expertise Level | Moderate ●●○○○ |
| Tools Needed | Garden shovel Compost or organic matter Watering can or hose Mulch Stakes or trellises (if required) Row covers or cloches (if required) Gardening gloves Pest control tools Fertilizers |
| Possible Issues | Overly hot weather, lack of hardening off, incorrect planting depth, overwatering or underwatering, pest infestations, disease susceptibility. |
Transplanting cucumber seedlings is pretty easy once you know the factors (which we’ve covered) and how to do the transplant properly, which we’ll focus on now. Let’s get on with it!
How to Transplant Cucumber Seedlings Outside
1. Choose the right time.
Wait until the last frost date has passed, and the soil temperature has reached 60°F (15.55°C) consistently over the past few days or weeks. If your area usually experiences temperature fluctuations, you can wait it out a bit until the warmth becomes steady.
2. Prepare the outdoor site.
Select a sunny location with a minimum of 6 to 8 hours of direct sunlight daily for your cucumber plants. At this point, you can think about pre-installing covers or supports for environmental and growing needs in the future.
Also, amend the soil with compost or organic matter for improved fertility and drainage. Cucumbers are heavy feeders and the seedlings will appreciate the nutrients as they grow.
3. Harden off the seedlings.
Gradually expose seedlings to outdoor conditions a week or two before transplanting. Initially, keep them in the shade for a couple of days and then slowly introduce them to sunlight.
This prevents the seedlings from getting sunscald when you eventually move them into the ground. If you want to be doubly sure, place your seedlings under taller plants to give them some shade.
This is especially important if your garden experiences harsh sun exposure.
4. Water seedlings prior to transplanting.
This makes sure they are well-hydrated and will come off from the pots without a hitch. Plus, the moist soil helps them avoid transplant shock.
5. Transplant the cucumbers.
The best time to transplant cucumber seedlings is when they’re around 3 weeks old. At this point, they should have two cotyledon leaves, two fully developed true leaves, a third set of true leaves emerging, a fresh dark green look, and no flowers.
Choose a mild-weather day, preferably overcast, for your transplanting activity. Remove seedlings from indoor containers carefully, making sure that there’s minimal disturbance to the sensitive root system.
Dig well-spaced holes in the garden that are large enough to accommodate the root systems. We suggest placing them 12 to 24 inches apart in rows, which is the most typical spacing distance.
Place each seedling into a hole at the same soil level as in their containers. Fill the holes and gently press the soil around the seedlings.
6. Water and mulch the soil.
Water the transplanted seedlings thoroughly to reduce the risks of transplant shock. Apply organic mulch around the soil near the seedlings to retain moisture, regulate soil temperature, and suppress weed growth.
7. Provide support and covers as needed.
Depending on your cucumber variety, provide support for climbing plants. Most will need trellises, but you can also use your creativity to make your own plant support structures to showcase your ingenuity and resourcefulness.
If there is a risk of unexpected cold weather, use row covers or cloches to shield your young cucumber plants from these conditions.
8. Monitor and care for the transplanted cucumber seedlings.
Keep the soil moist all throughout the growing season but never waterlogged so that root rot is not a possibility. Watch out for pests and diseases and take appropriate action as needed.
Fertilize according to the requirements of your cucumber variety. Continue to care for them until they are ready for harvest.
Do cucumber seedlings transplant well?
Cucumber seedlings generally transplant well when done carefully. Just wait until cucumber seedlings have two sets of true leaves before transplanting to avoid root damage.
During the whole process, be as gentle as possible to avoid damaging the root systems. Ensure they receive enough water and protection from any severe weather for a smoother transition period.
Why is my cucumber plant dying after transplant?
Your cucumber plant dying after transplant is a sign of transplant shock. Plants that experience transplant shock typically wilt or die.
This happens due to abrupt changes in environmental conditions like temperature shifts, insufficient watering, or root damage during transplanting. Outdoor elements such as direct sunlight or wind, further stress the plant.
To reduce transplant shock, slowly acclimate the cucumber plant to its new environment. Ensure that there’s consistent watering, and minimize root disturbance during transplantation.
Helpful Tips For Successful Transplanting
We’ve classified some growing tips to help you out even more. Following these tips after transplanting ensures healthy, productive cucumber plants for a bountiful harvest!
- Inconsistent watering can cause bitterness and blossom end rot so make sure the soil is kept moist but not overly wet.
- Water in the morning, so leaves dry during the day as wet leaves in the evening can lead to fungal issues.
- Water at the base, not overhead, to reduce foliar disease risks so go for drip irrigation or soaker hoses for best results.
- Make sure the water reaches the roots as shallow watering leads to shallow roots.
- Apply organic mulch, like straw or leaves, around plants to keep soil moist, control temperature, and prevent weeds.
- Midway through the growing season, add more fertilizer by creating a trench near the base, sprinkle in the fertilizer, cover, and water.
- Pick cucumbers frequently to encourage more fruit as overripe ones can hinder new growth.
Common Issues and Troubleshooting When Growing Cucumbers
Cucumbers make a great addition to home gardens with their refreshing crunch and culinary versatility. But like all plants, cucumbers face their share of challenges.
Yellowing Leaves
How to Fix:
Correct fertilization and soil moisture.
Yellowing leaves, especially lower ones, can indicate a nitrogen deficiency or overwatering.
Solution: Apply balanced fertilizers.
Use a balanced fertilizer with an NPK ratio (Nitrogen, Phosphorus, Potassium) like 10-10-10 or 5-10-10, following the instructions. Enhance soil with compost or organic matter before planting for nutrient-rich soil.
Also, maintain consistent soil moisture without overwatering.
Cucumber Beetles
How to Fix:
Protect plants from pests.
These small, striped beetles can cause significant damage by feeding on cucumber plants.
Solution: Provide coverings, grow companion plants, or use both techniques.
Use row covers early in the season to prevent cucumber beetle infestations. Also, planting companion plants like nasturtiums and marigolds deter these pests.
Powdery Mildew
How to Fix:
Provide better airflow.
Powdery mildew appears as a white, powdery substance on the leaves and can weaken the plant.
Solution: Improved airflow or use fungicides for more severe issues.
Improve air circulation around the plants by ensuring proper spacing and pruning. Fungicidal sprays or organic solutions like neem oil can help manage powdery mildew.
Blossom End Rot
How to Fix:
Ensure proper soil moisture and soil calcium content.
Blossom end rot causes the bottoms of cucumbers to turn brown and rot. It’s typically a result of calcium deficiency or inconsistent watering.
Solution: Water regularly and provide calcium amendments as needed.
Maintain even soil moisture and ensure proper calcium levels in the soil through amendments like gypsum. Mulch can help regulate soil moisture.
Cucumber Mosaic Virus
How to Fix:
Removal and prevention.
Cucumber mosaic virus causes mottled or distorted leaves and stunted growth. Unfortunately, there is no real cure as prevention is the best choice.
Solution: Physical removal or growing disease-resistant varieties.
Use disease-resistant cucumber varieties, and remove and destroy infected plants to prevent the spread of the virus.
Poor Pollination
How to Fix:
Companion planting.
Insufficient pollination can lead to misshapen or underdeveloped cucumbers.
Solution: Grow companion plants.
Attract pollinators to your garden by planting flowers like marigolds. You can also think about hand-pollinating your cucumber plants by transferring pollen from male to female flowers using a small brush or cotton swab.
Vine Overcrowding
How to Fix:
Train and prune.
Crowded cucumber vines can lead to poor air circulation and increased disease risk.
Solution: Support, train, and prune your cucumber vines.
Train your cucumber vines to grow vertically using trellises or stakes to reduce crowding and promote healthier growth. Pinch off lateral shoots in the leaf axils to encourage fruit production over vine growth.
Pests and Diseases
How to Fix:
Regular inspections.
Various pests, including aphids, spider mites, and diseases like downy mildew, can affect cucumber plants.
Solution: Check plants often for pests or diseases to catch issues early and grow companion plants to attract beneficial insects.
Regularly inspect your cucumber plants for signs of pests or diseases. Use neem oil or insecticidal soap if needed and avoid using harsh chemicals that can discourage beneficial insects.
Invite ladybugs and parasitic wasps to control pests like aphids and cucumber beetles by growing companion plants like nasturtiums, marigolds, and sunflowers.


