It’s the holiday season and you might be wondering how to share your greenery with fellow plant lovers. It can be a little daunting, especially when everyone’s in a rush to finish their holiday gift shopping, wrapping, and giving.
If you feel that you’re starting to get caught in the seasonal rush and don’t have time to wrap your gifts, then worry no more. We’re here to give you creative ideas on wrapping your plants for gifting.
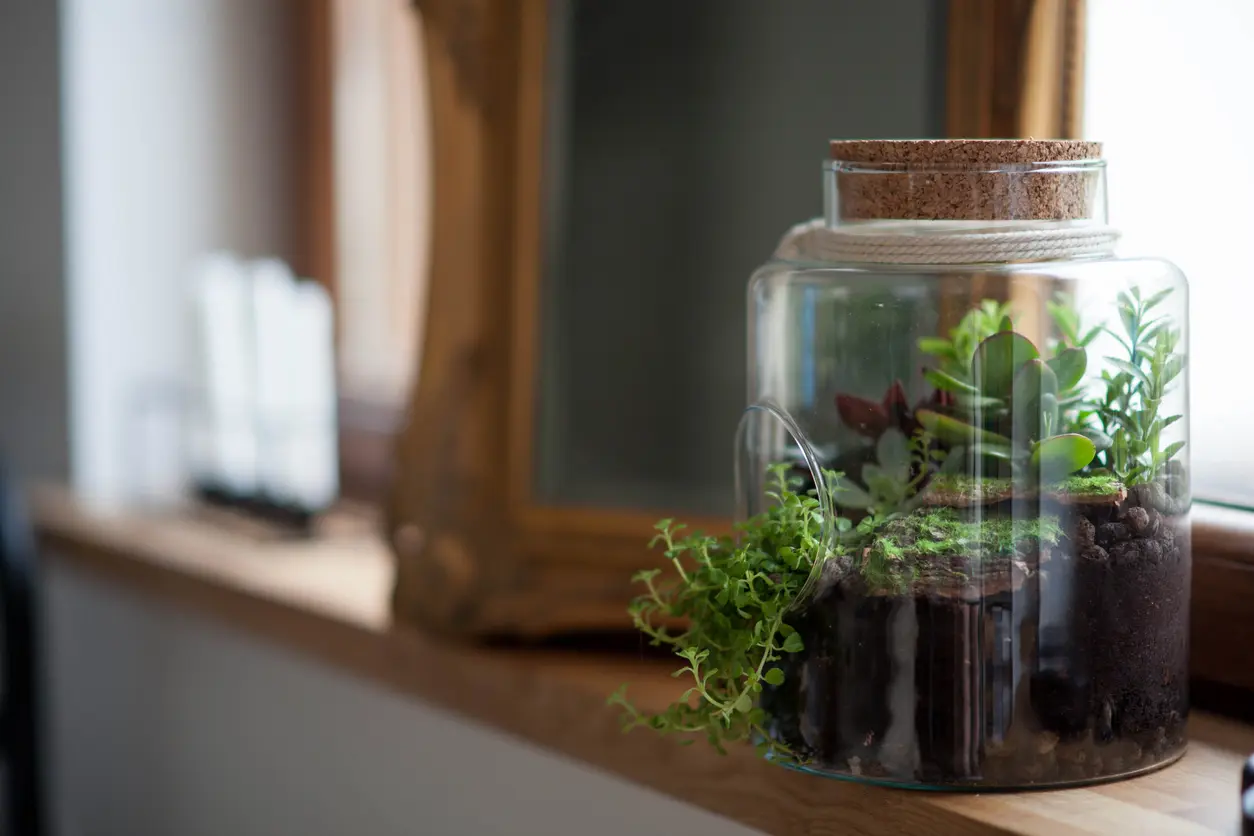
Terrarium in a Glass Jar
| Factors | Information or Description |
| Level of Expertise | Easy ●○○○○ |
| Tools or Materials Needed | Terrarium Glass jar or vase larger than the terrarium Festive ribbons Tiny ornaments Miniature figurines |
| Estimated Costs | Low, especially if using recycled materials or materials on hand |
If you have that one friend who’s not into caring for plants full-time, this one’s the perfect gift. A terrarium is a self-contained ecosystem that basically cares for itself – all it needs is a bit of light and it’s good to go.
That way, your friend can enjoy plants on a miniature scale while having the luxury of not giving too much time and thought to their care. Plus, the extra glass jar would make fantastic storage for their needs.
How To Do
1. Assemble your materials.
Get your glass containers as well as your terrarium. Bring out your preferred decorative items to make the gift more personal for the recipient.
2. Double-check the glass jar.
Make sure it’s clean, sterile, and dry.
3. Place the terrarium inside the glass jar.
Carefully position the terrarium so it’s at the best angle.
4. Decorate the inside of the glass jar.
You can get as creative as you like. You can go whimsical with cottony decor to mimic mounds of snow or add flowers or greenery or whatever items to make the gift even more unique.
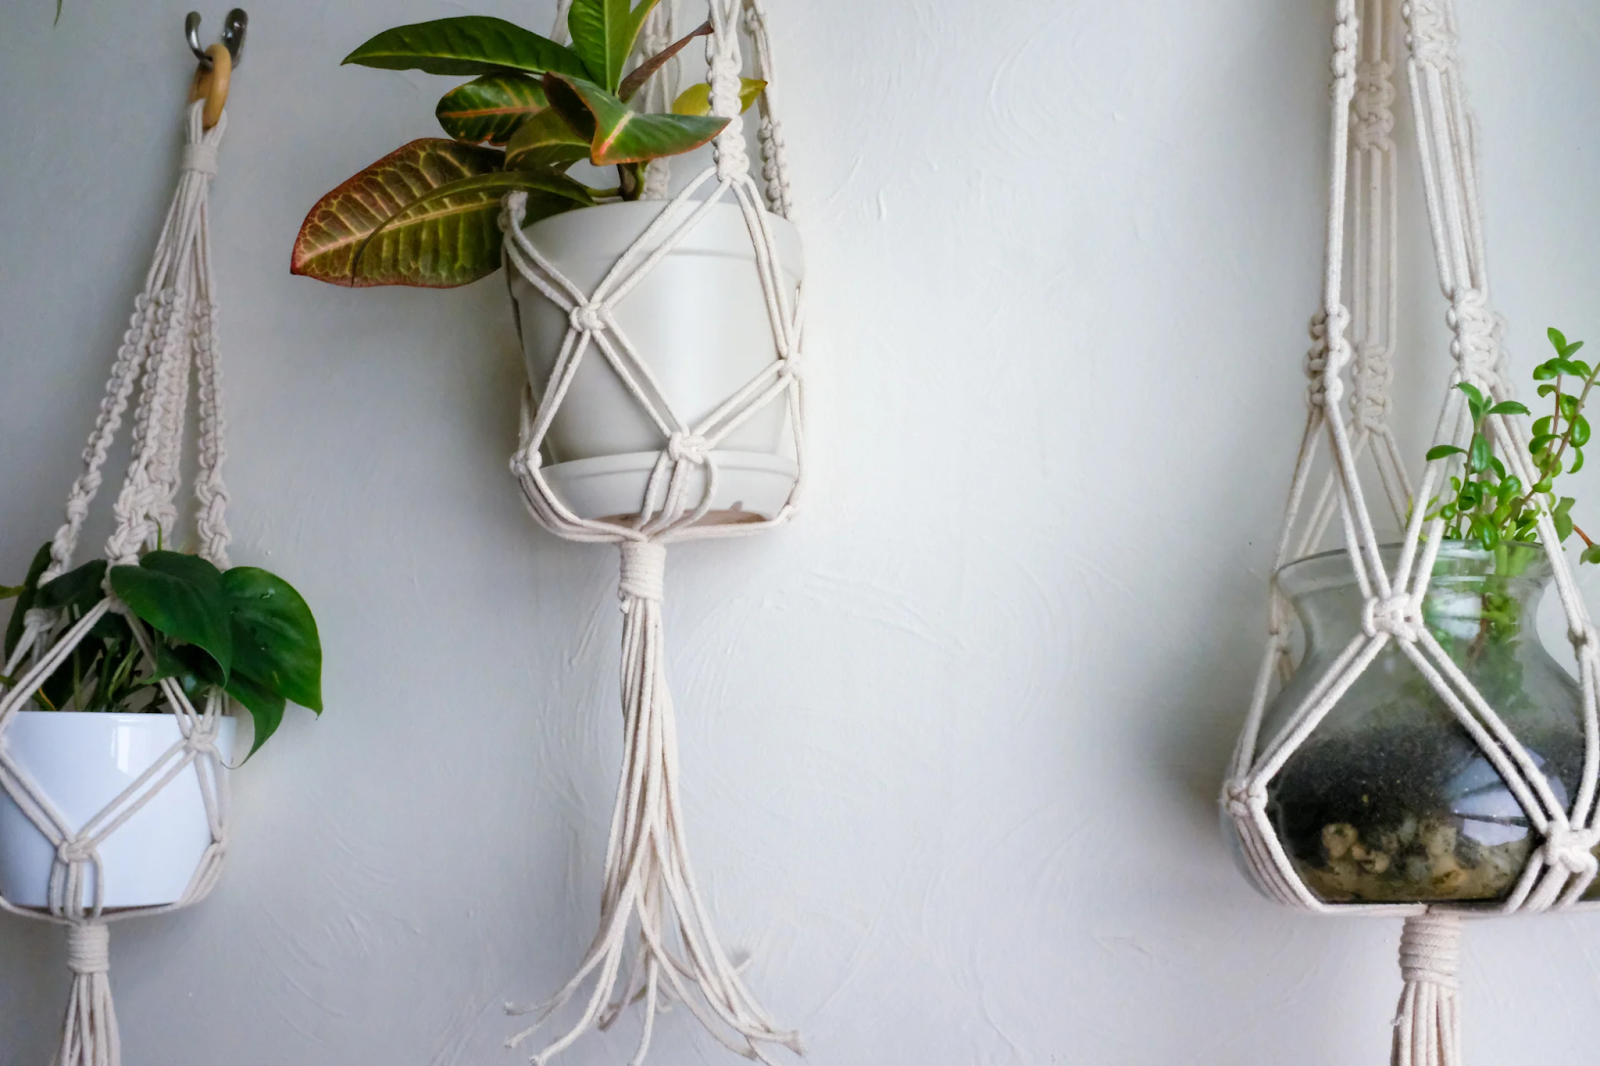
Macramé Plant Hangers
| Factors | Information or Description |
| Level of Expertise | Moderate ●●○○○ |
| Tools or Materials Needed | Decorative cloth or burlap Macramé plant hanger Potted plant of choice |
| Estimated Costs | Low to Moderate |
If your recipient is all about the bohemian chic, then gifting them a plant with a macramé hanger might just spice up the season.
You can make one yourself if you’ve got the skills, but you can also easily find one online. Who knows, you might just get some for yourself!
How To Do
1. Bring all the materials on hand.
You’ll need a decorative cloth or burlap, a macramé plant hanger, and a potted plant. Choose a plant that complements your recipient’s space.
2. Wrap up the potted plant.
This can be optional, but this adds a bit of style to your gift. You can use any decorative fabric although burlap adds to the casual bohemian feel to your macramé hanger.
3. Prepare the macramé hanger.
Unfold the hanger so that it comes out as intended. If you’re using one that’s been purchased, follow the instructions on how to unfold it.
4. Place the potted plant in the macramé hanger.
The wrapped potted plant should fit well inside the macramé hanger. Just make sure that you handle the plant well during gifting to avoid damage.
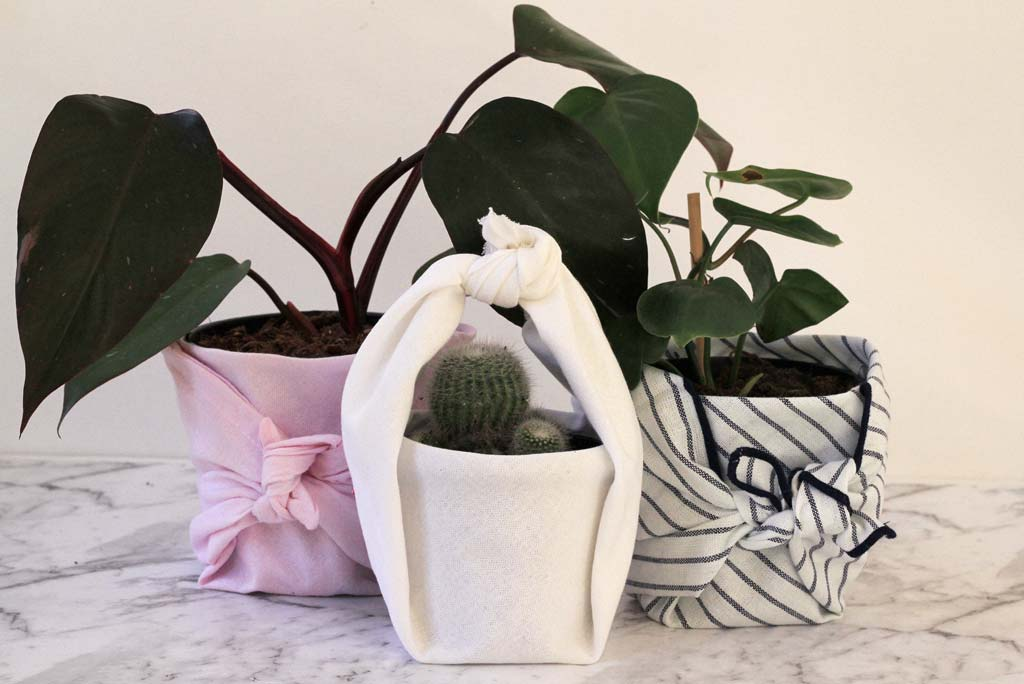
Furoshiki Fabric Wrapping
| Factors | Information or Description |
| Level of Expertise | Moderate ●●○○○ |
| Tools or Materials Needed | A square piece of fabric with a holiday-themed pattern Potted plant |
| Estimated Costs | Low |
Furoshiki is the simple but elegant art of wrapping gifts in fabrics. You can go for a holiday-themed one, or you can go for simple fabrics or even ones with a luxurious material such as silk.
Whichever you decide, your recipient is bound to end up gasping with delight at how beautiful their potted plant looks, not knowing how easy it was to package it for them!
How To Do
1. Bring out your materials.
These would be your square piece of fabric and your potted plant. You can even use fancy scarves to wrap the plant.
2. Position the plant on the fabric.
Center the plant on the fabric. Make sure that the fabric is big enough to wrap around the plant.
3. Wrap as creatively as you can.
You can go as simple or as elaborate as you want when it comes to tying and wrapping the plant. You can follow the various traditional Furoshiki wrapping techniques or make your own!
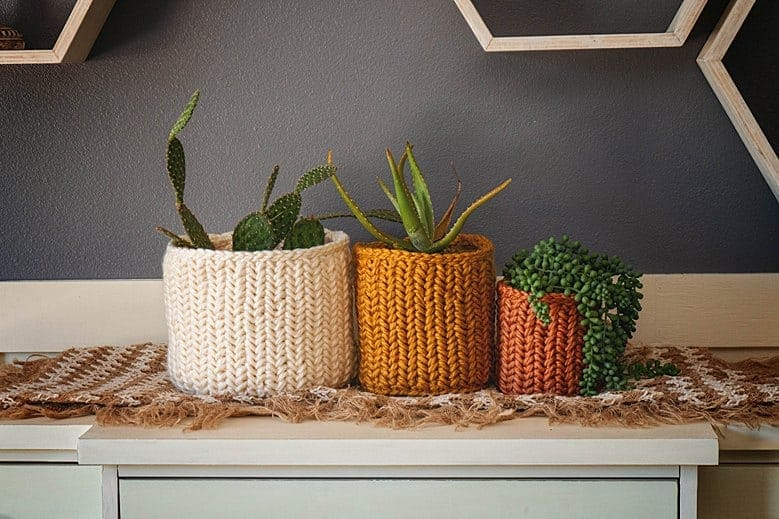
Plant in a Decorative Basket or Pot
| Factors | Information or Description |
| Level of Expertise | Easy ●○○○○ |
| Tools or Materials Needed | Decorative woven basket or rustic wooden crate or pot of choice Plant Natural filler (wood shavings or moss) Bow or ribbon |
| Estimated Costs | Low to Moderate |
Transform ordinary potted plants into amazing gifts! You can go as rustic as you want with wicker baskets or place the plant in a sleek metallic container for a bit of modern luxury.
What makes this beginner-friendly project even more fun is that you can decorate it to fit the personality and aesthetics of the recipient.
How To Do
1. Prepare the plant.
Water it beforehand to prevent the soil from drying out. Allow the excess water to drain.
2. Bring out your planter.
You have a lot to choose from, such as woven baskets, rustic wooden crates, gorgeous ceramics, and sturdy fiberglass pots.
3. Add natural fillers at the bottom of the planter.
Wood shavings or moss work great to fill out the bottom of the planter. Just make sure they’re not treated with harmful chemicals, especially the wood shavings.
4. Place the plant in the planter.
Insert the plant in the planter. You can opt to keep the pot that it came in and just stuff the sides with more of the natural organic fillings.
5. Decorate the planter.
Top off your gift by tying a bow or ribbon around the planter. Choose a color and style that complements the plant and the recipient.
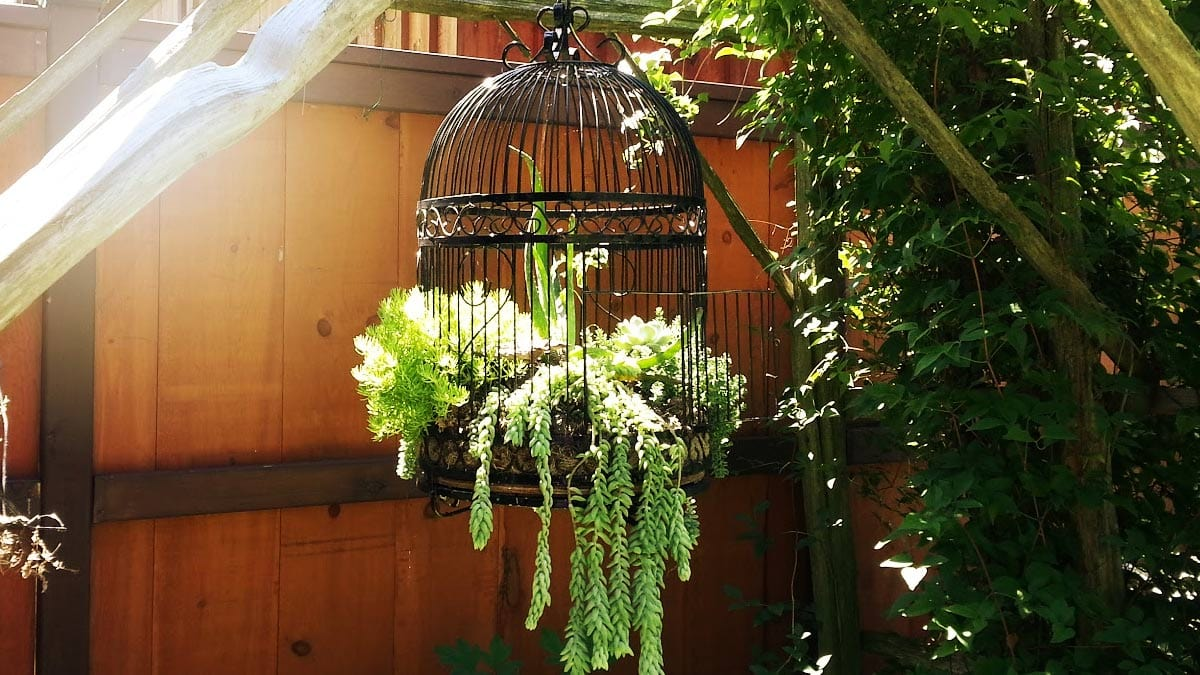
Plant in a Vintage Birdcage
| Factors | Information or Description |
| Level of Expertise | Moderate ●●○○○ |
| Tools or Materials Needed | Vintage birdcage Potted plant Greenery Colorful accents |
| Estimated Costs | Moderate |
Looking to add some nostalgia and elegance to your recipient’s gift? Place the plant in a vintage birdcage for some old-world charm!
It’s a big plus if your recipient loves vintage items or if they have birds around looking for a new home. Either way, everyone wins!
How To Do
1. Bring out your materials.
You can find vintage birdcages in flea markets, garage sales, or even thrifted from neighborhood sidewalks. Make sure they’re clean and in good condition.
2. Arrange everything.
Place the plant inside the birdcage. If you want it to be dreamier, add more greenery to trail along the sides to make the whole thing more charming and magical.
3. Decorate with accessories.
This is optional, especially if you’re going for that organic vibe. But you can always add whimsical decorations such as artificial flowers, decorative stones, miniature garden accessories, or even small figurines.