

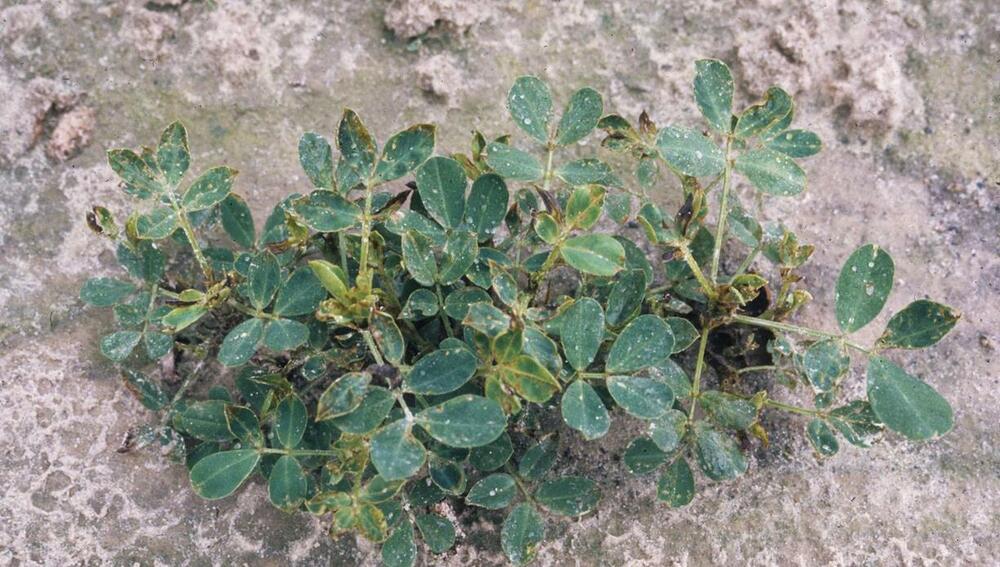
Peanuts, those little nutritional powerhouses, never fail to win over tastebuds far and wide. But hey, have you ever wondered just how long it takes for these crunchy delights to sprout their roots?
And hey, let’s not kid ourselves – can we really pull off growing these little guys without breaking a sweat?
Time to dive into the world of peanut cultivation and uncover the secrets to nurturing vibrant, bountiful peanut plants that we can proudly gather from our own backyard!
How many days does it take to grow peanuts?
It typically takes around 100 to 130 days for these peanuts to reach their full growth potential.
There are a few key factors to consider, like the specific peanut variety you choose. Each one has its own unique timeline for growing and harvesting, adding a touch of excitement to your peanut-growing adventure.
Of course, we can’t forget about our local climate and weather. Peanuts have a certain affinity for warmth and sunshine, so it’s important to select a suitable location and time when Mother Nature is feeling generous.
But wait, there’s more! The soil nutrients, water, and fertilizers are also crucial ingredients in this peanut-growing recipe. These elements need to be carefully balanced to ensure your peanuts thrive and deliver that satisfying crunch we all love.
Now, let’s dive into the peanut-growing wonderland and explore three different scenarios: growing them in the good ol’ ground, in raised beds, or even in fancy containers. No matter your preferred method, we’ve got you covered!
How to Plant Peanuts in the Ground

| Difficulty | Medium ●●●○○ |
| Speed | 3 to 4 months |
| Things You Need | • Personal protective equipment • pH tester, optional • Trowel, or other suitable gardening tools • Peanut seeds • Fungicide, optional • Spray bottle or fungicide applicator |
Planting peanuts is a piece of cake once you’re in the know. And hey, if you’re here, it’s probably because the whole peanut-planting gig has got you scratching your head.
But fret not! We’ve got your back, so you can kick back, relax, and watch those peanuts thrive like nobody’s business. So, let’s dig into it, shall we?
1. Choose the right time
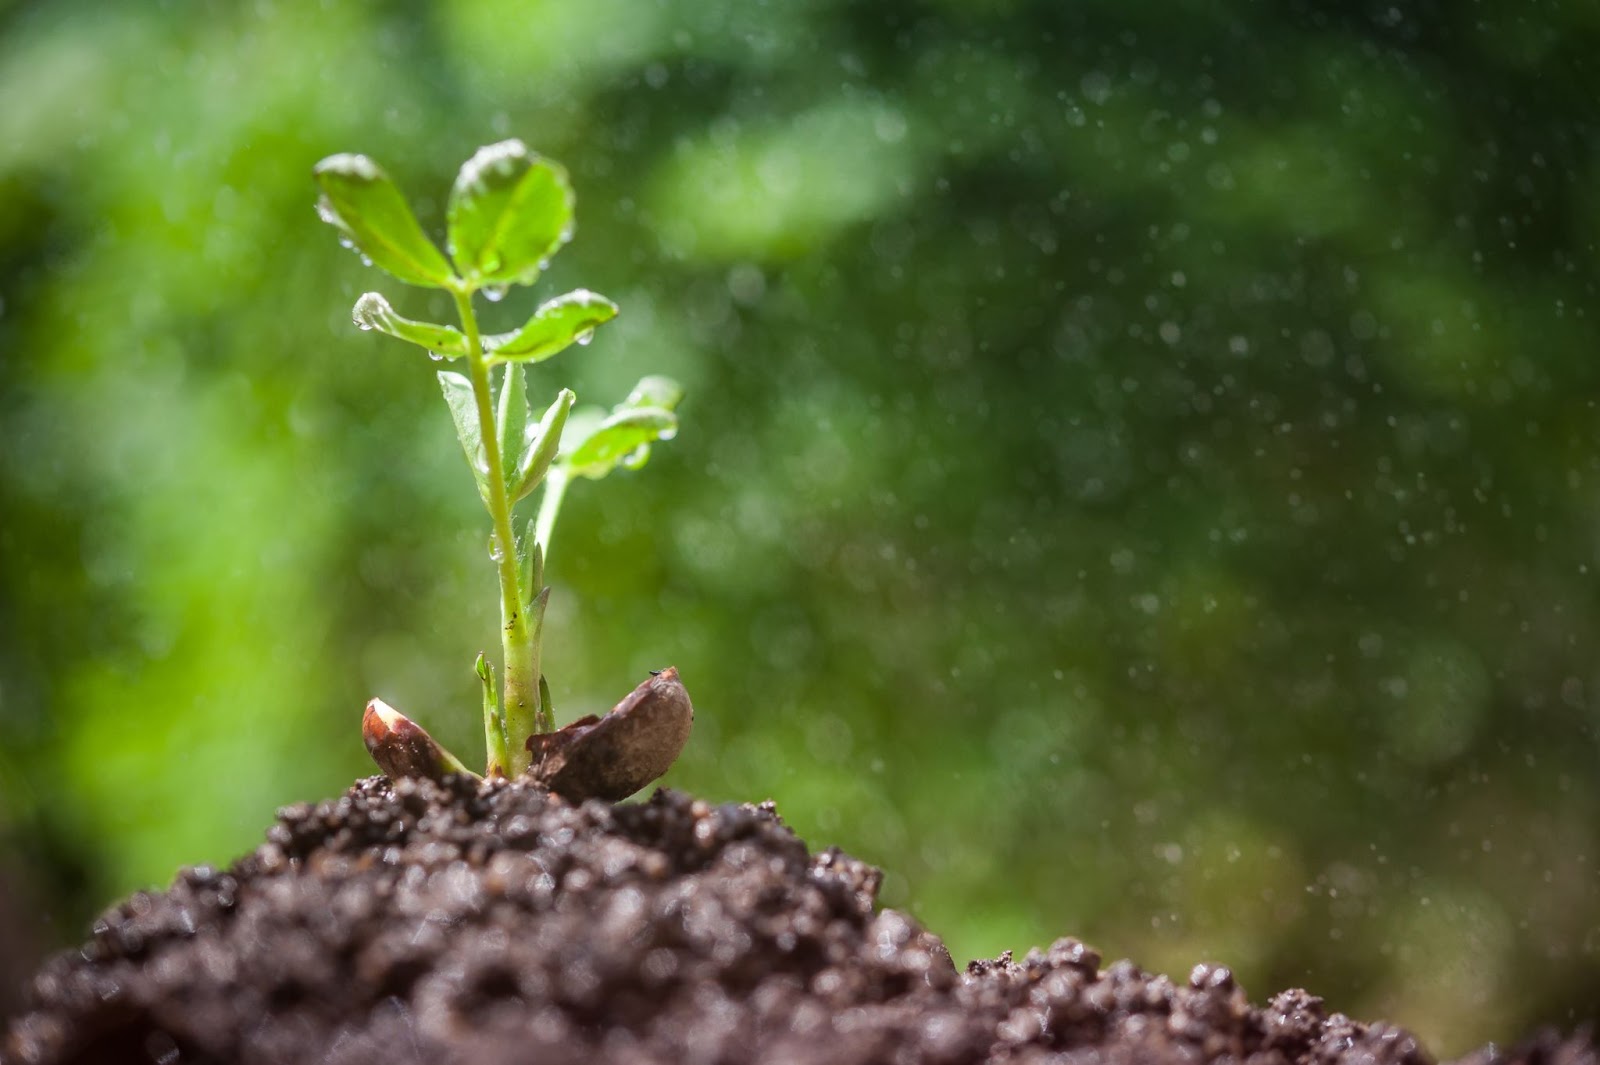
Peanuts, just like sunbathers, prefer to be planted after frost has bid its chilly farewell. Picture this: it’s spring, the birds are chirping, and the soil thermometer hits a cozy 65 F.
That’s the perfect time to let those nutty delights settle into their warm, sun-kissed beds. Trust me, these little fellas will thank you with a bountiful harvest.
2. Pick the ideal location
Now, let’s scout for a sun-soaked spot. Find an area that basks in glorious rays all day long. And remember, we want loose, well-draining soil. No soggy situations, please!
But be a smart gardener and steer clear of flood-prone and low-lying spots, especially if they come with a heavy dose of clay soil. We’re looking for a high-and-dry situation here, folks.
3. Prepare the soil
Now, peanuts have a thing for slightly acidic soils. So, if you really want to impress these legume darlings, it’s time to whip out the compost or dried manure.
Want to be extra precise? Grab yourself a pH tester from your local garden center and give that soil a good reading.
The magic number you’re aiming for on the pH scale is between 5.8 and 6.2.
That’s the sweet spot where peanuts can truly shine. Remember, we’re all about balance here, so keep it perfectly in between the range and not too acidic.
4. Prepare the peanut seeds

You want to make sure those seeds are all set if you want a bountiful harvest. Let us walk you through the proper technique, so you can nail it like a pro.
Use high-quality seeds
Not all peanut seeds are created equal, folks. So, when it comes to picking your peanuts, make sure you splurge on the finest ones within your budget.
Now, pay close attention to those little guys and make sure they’re as healthy as can be. No signs of damage or disease, please! And while you’re at it, give them a good look-over for uniformity in color and size.
Oh, and steer clear of any discolored or cracked seedlings. Trust me, they’re not the cream of the crop, if you catch my drift.
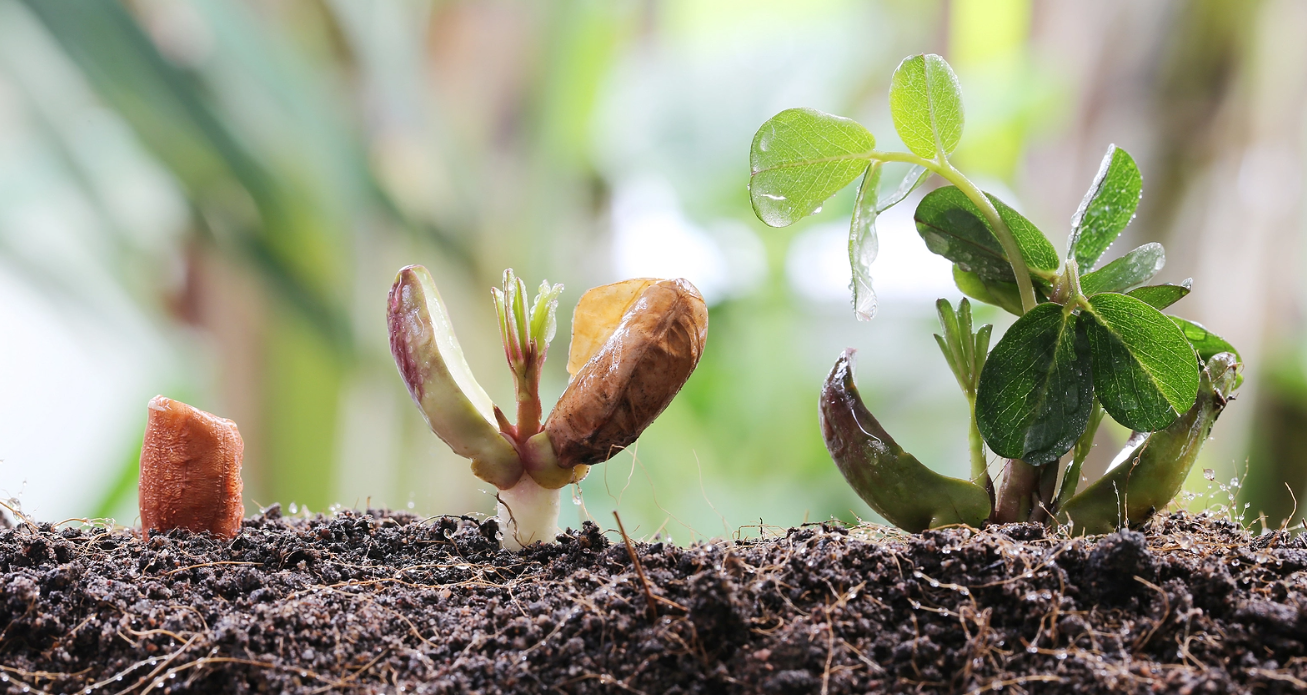
Soak the seeds

Now, let’s talk about those hard outer shells that peanuts have. They can be quite the tough cookies, making it a bit harder for the seeds to sprout.
But fear not! There’s a simple trick to soften those shells up and give those peanuts a little nudge in the right direction.
All you need to do is give those little guys a nice soak in some water for about 24 hours. It’s like a spa day for peanuts! After their luxurious dip, you’ll find that the shells have become much softer and more accommodating to our little seedlings’ needs.
So, go ahead and give your peanuts a little water vacation. Trust me, they’ll thank you for it by breaking through that shell with ease and sprouting up in no time.
Apply fungicide
Peanuts, bless their hearts, can sometimes fall victim to a pesky fungus. And let’s face it, no one wants their precious seeds damaged and put on hold when it comes to sprouting.
But, fear not! There’s a handy solution to keep those peanuts thriving and fungus-free. Just grab yourself some trusty fungicide and give those seeds a little preventative TLC.
Of course, we mustn’t forget to mind the instructions on the label, as these chemicals can pack quite a punch. Safety first!
Store the seeds properly
After you’ve given your fancy seeds some special treatment, it’s time to find them a cozy spot for storage. Opt for a cool, dry place where they can chill until planting season rolls around.
Remember, just like us humans, these seeds aren’t fans of extreme temperatures or soggy situations. Exposing them to heat or excessive moisture can seriously cramp their style and lower their chances of sprouting into something fabulous!
5. Plant the seeds
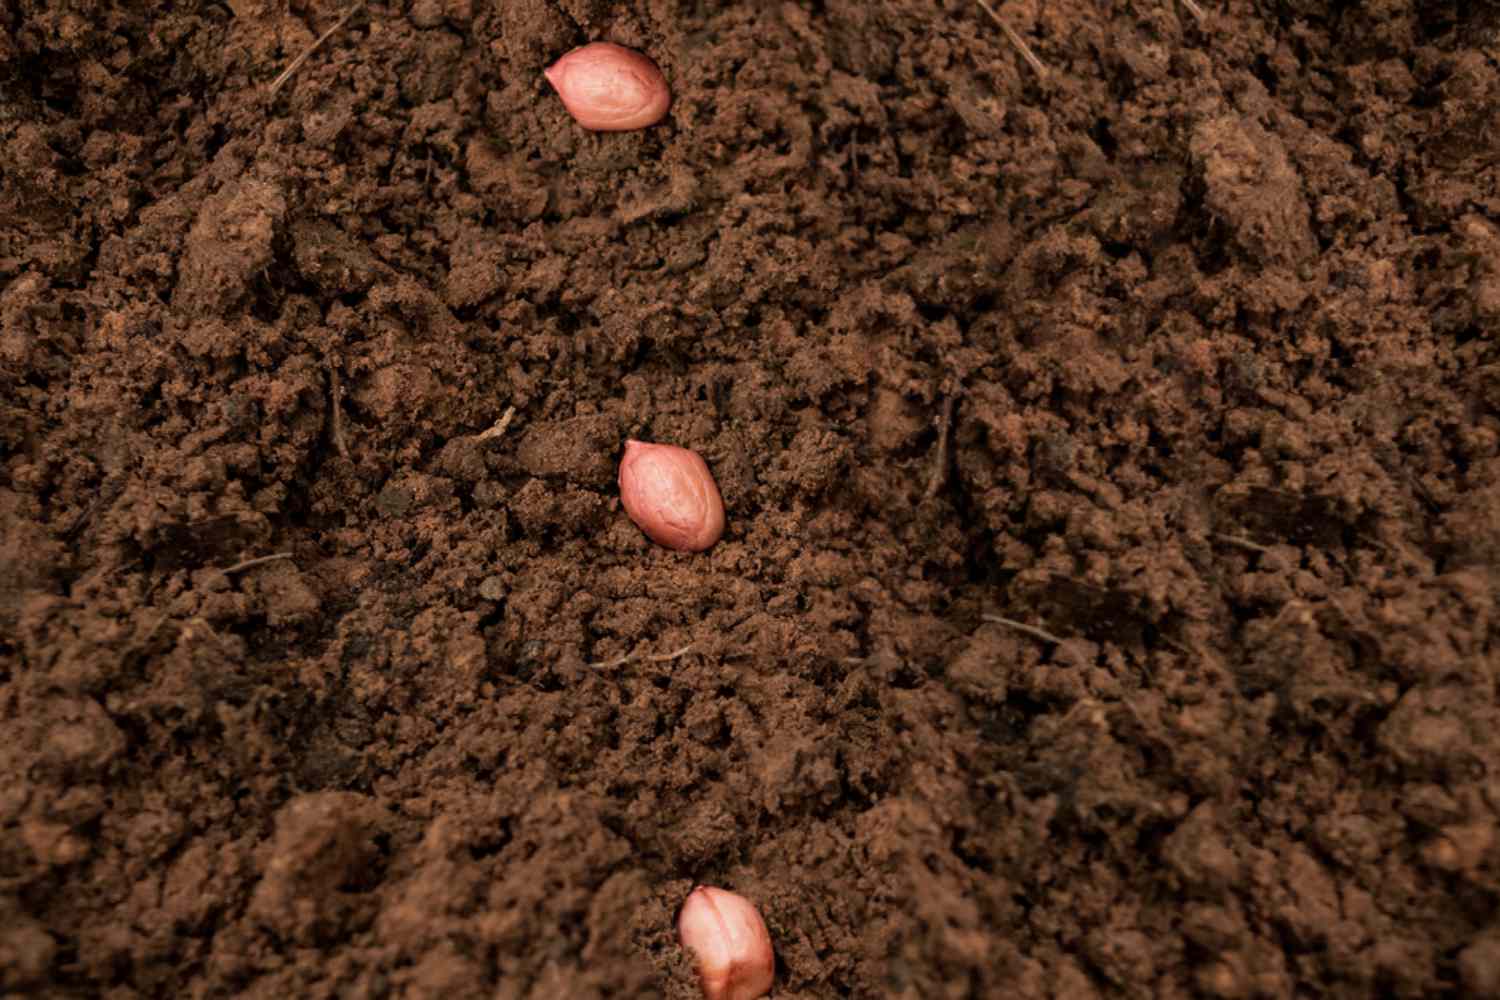
Alright, it’s time to get those seeds in the ground. Pop them in about two inches deep and give them some space, like 12 to 18 inches apart.
Now, if you’ve got a bunch to plant, you can go all fancy with a mechanical planter. But hey, getting your hands a little dirty never hurt anyone. So feel free to do it the good ol’ manual way. Just make sure to cover ’em up with soil and give ’em a gentle watering.
Oh, and one more thing, don’t go burying those seeds too deep. They’ll struggle to break free and show themselves if you do.
And on the flip side, if you barely tickle the surface, those peanuts won’t be too thrilled about sprouting. So find that sweet spot, my gardening geniuses!
6. Care for the peanut plants
Now, when those little peanuts of yours decide to sprout, give them a good drink. About an inch of water per week should do the trick, but keep an eye on your local climate and weather just in case they need a little extra TLC.
Oh, and here’s a pro tip: keep that soil moist, but don’t drown them in water. If things get too soggy, your peanuts might just throw a tantrum and start to rot (nobody wants that drama, right?).
To give them a little boost, a touch of fertilizer every few weeks should do wonders. Look for a balanced one with equal parts nitrogen, potassium, and phosphorus.
7. Manage weeds, pests, and diseases
You can use herbicides to keep those pesky weeds from invading your peanut patch. They come in different types, some are more preventive while others go all out and attack existing weeds.
When it comes to protecting your precious peanuts, pesticides are the go-to solution. They’ll help you deal with the usual suspects like spider mites, aphids, and thrips.
Now, if you’re still dealing with those stubborn fungal issues, fungicides can come to the rescue. Just keep in mind that these chemical treatments are a bit toxic, so be a smart cookie and follow the safety instructions on the labels.
But hey, if you’re not into chemicals, companion planting is a pretty nifty alternative. It’s like having a peanut party where plants protect and nourish each other. It’s a win-win!
Speaking of peanut parties, some top-notch peanut companions are cucumbers, squash, tomatoes, and melons. They’ll be the life of the garden party and keep those peanuts thriving.
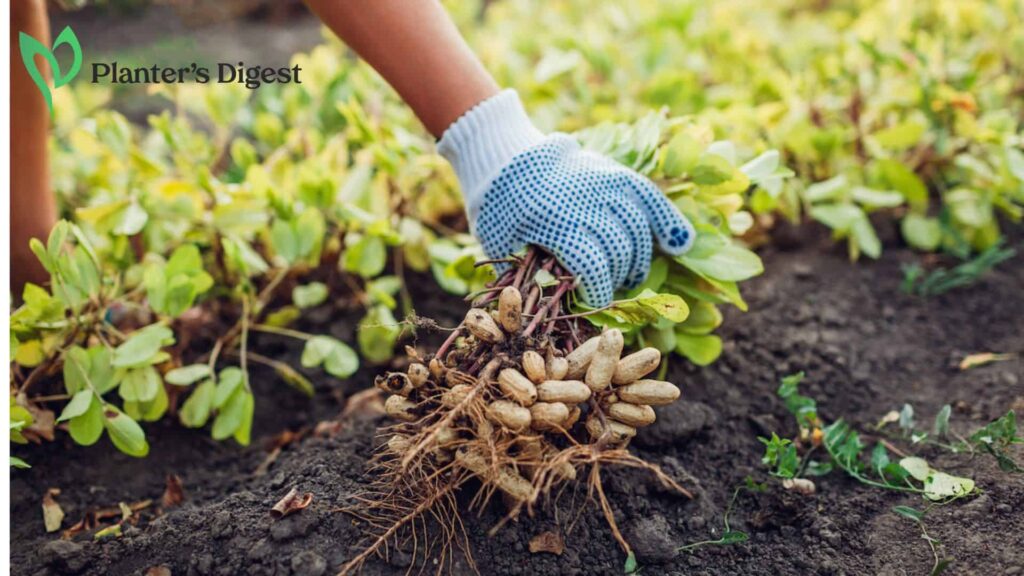
8. Harvest the peanuts
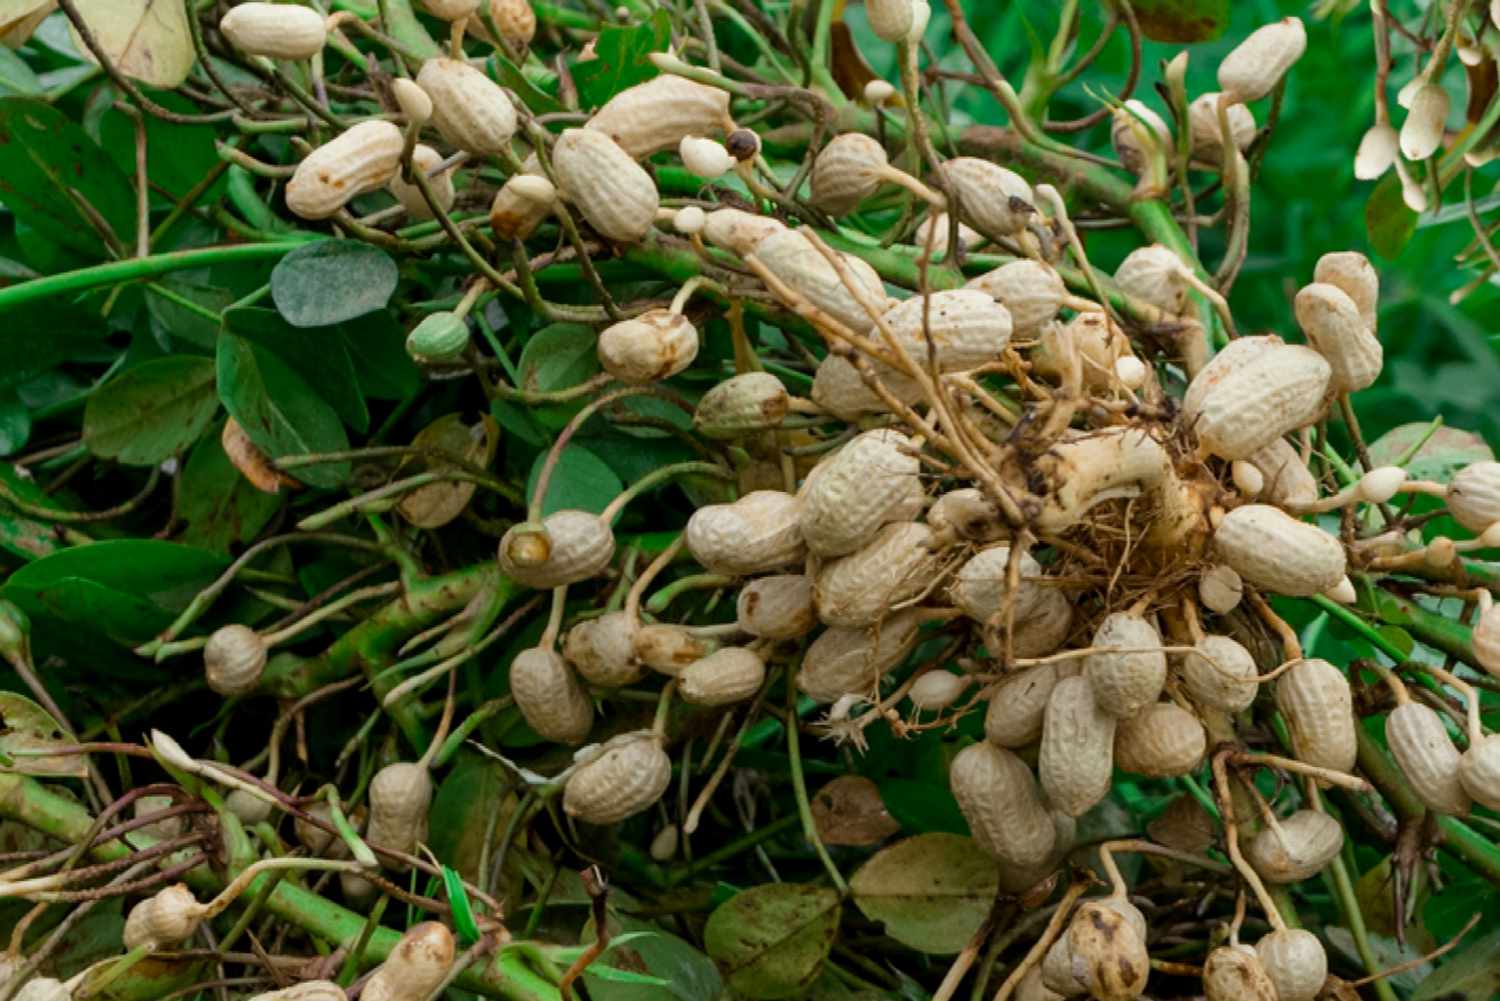
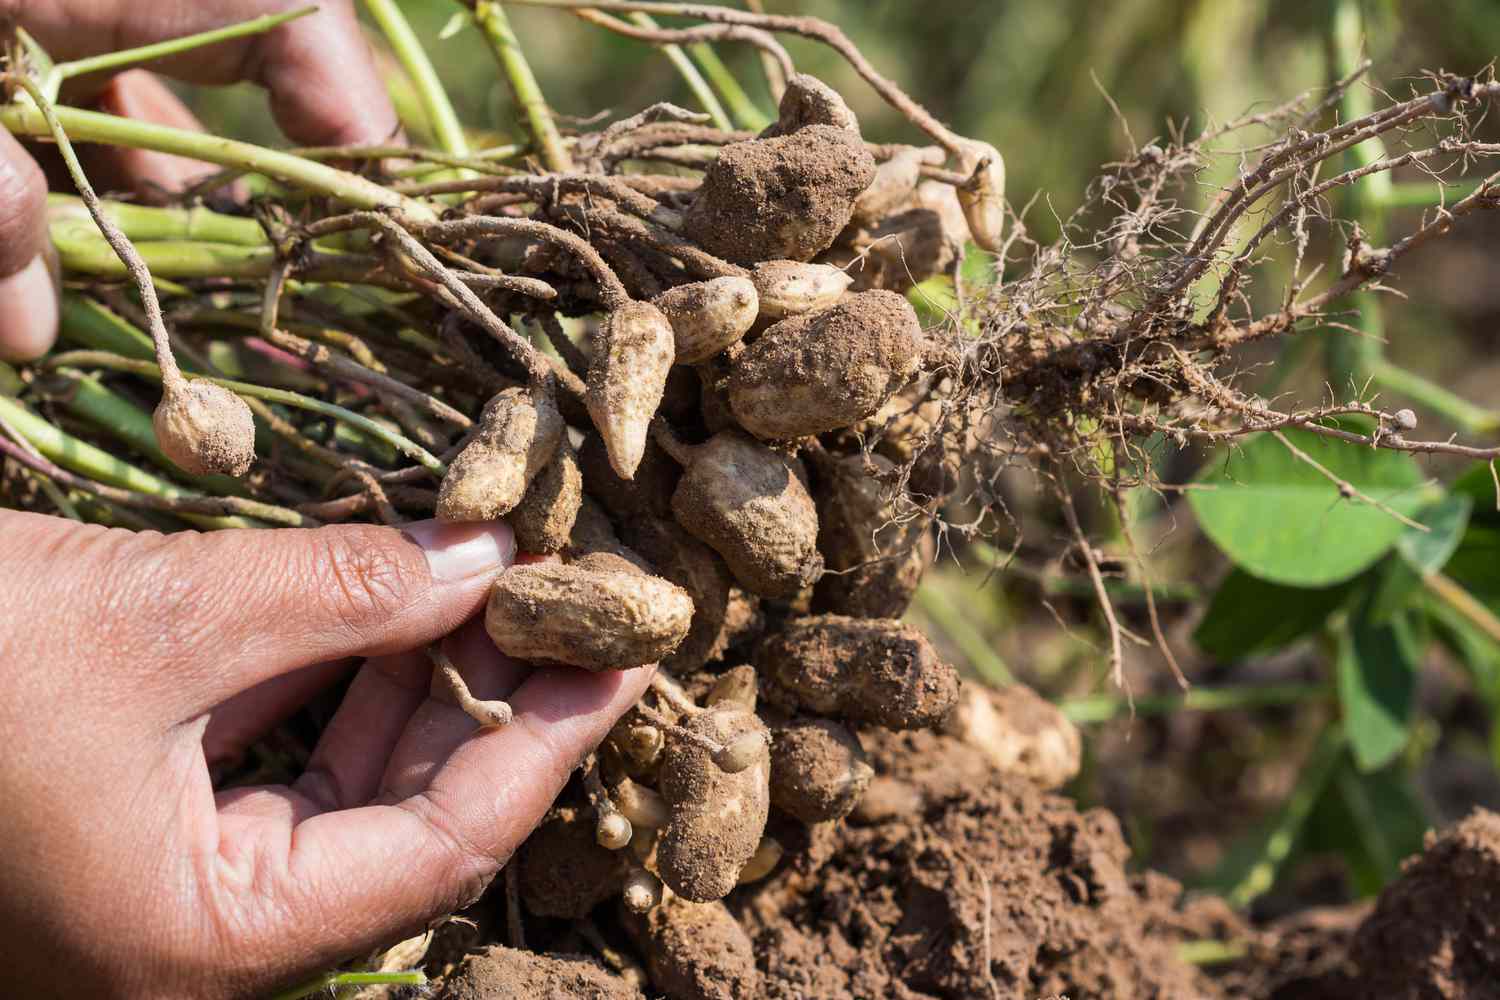
When your peanuts start showing off their yellow attire, that’s your cue to harvest. And if you spot those little pods confidently hanging out on the plants, then it’s time to rejoice!
Gently raise the plant and voila! You’ll be greeted with the sight of those promising peanut pods, proudly saying hello since you planted them just two inches deep.
Now, to get your peanuts in hand, it’s time to dig up those plants and give them a good shake to free them from the soil’s embrace. Then, let the sun work its magic as you let those plants bask in its warmth for a few days.
Once they’ve basked to perfection, it’s time to free the precious peanuts from their cozy pods. Feel free to bid farewell to the remaining pods or toss them into your compost pile, they’ve served their purpose.
How to Plant Peanuts in Raised Beds

| Difficulty | Medium ●●●○○ |
| Speed | 3 to 4 months |
| Things You Need | • Personal protective equipment • Peanut seeds • pH tester, optional • Trowel, or other suitable gardening tools • Herbicide, pesticide, fungicide • Spray bottle or treatment applicator • Raised beds or raised bed materials |
Raised beds are simply divine for cultivating those delightful little legumes called peanuts. And let me tell you a little secret, these beds also do wonders in deterring those pesky underground and crawling critters.
So, if you’re a newbie to this peanut-growing game, fret not! We’ve got your back with a step-by-step guide that’ll have you growing peanuts like a seasoned pro in no time.
1. Find the right place
Just like growing peanuts in the ground, you’ll need a sunny spot for your raised beds. Think of it as finding the perfect spot for a little sunbathing.
Aim for areas that soak up at least six hours of sunlight, giving your plants their daily dose of vitamin D. After all, they deserve some too, right?
2. Build your beds
Your raised beds can be crafted from a plethora of materials. From the ever-classic wood and timeless brick to the surprisingly versatile plastic, the choice is all yours!
Oh, and here’s a nifty tidbit for you: garden stores offer some fabulous prefabricated raised beds. These little gems are a breeze to set up, making the DIY option feel like a time-saving superhero!
3. Fill the raised beds
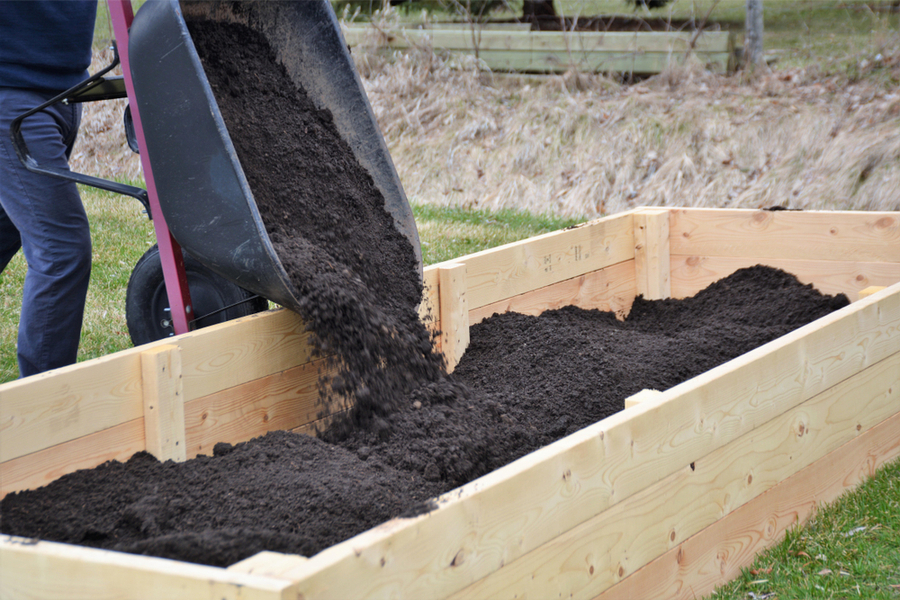
Now, when it comes to your garden soil, you’ve got two options: go with what you’ve got or splurge on some quality potting soil. Personally, we recommend the latter because, let’s face it, pests and diseases aren’t exactly the life of the party.
Once you’ve made your choice, go ahead and fill those raised beds with your soil of preference.
If you’re feeling a little adventurous, throw in some compost and dried manure to really jazz up the acidity and nutrients. Your plants will thank you for it!
Oh, and if you really want to take it to the next level, consider adding sand, perlite, or vermiculite to give your potting soil some serious drainage game. Because, let’s be honest, no one likes soggy bottoms in their garden beds.
4. Prepare the soil
Get your hands on a trusty garden fork or tiller and give the soil a little massage. We want it feeling loose and crumbly, like the perfect cookie dough.
And while we’re at it, let’s check the pH levels. Aim for that sweet spot between 5.8 and 6.2 on the pH scale.
You can play scientist with a pH meter or opt for a fancy soil test kit. Either way, we’ll make sure your plants are feeling right at home.
5. Plant the peanut seeds
Alright, time to get our hands dirty! Take those peanut seeds and give them a cozy spot in the raised bed, about two inches deep in the soil.
We don’t want these little guys to feel claustrophobic, so make sure to give them some breathing room by spacing them about 12 to 18 inches apart.
Now, here comes the fun part. You have two options: you can either channel your inner green thumb and do it by hand, or if you’re feeling a bit fancy, you can whip out a mechanical planter.
Once all the seeds are snug in their new homes, cover ’em up with some soil and give them a nice, gentle drink. Show that soil who’s boss!
6. Cultivate the plants

Just like tending to your plants, keeping the soil evenly moist is crucial for peanut growth. Think of it as giving your little legume buddies a refreshing drink.
Now, peanuts typically thrive with about an inch of water per week, but remember, location matters! If you happen to reside in a scorching hot and bone-dry area, you might need to quench their thirst a little more often.
Keep an eye out for any signs of dehydration – if that top layer of soil looks as parched as a desert, it’s time to break out the watering can.
Now, if you really want your peanuts to show off their full potential, it’s time to give them a little boost. Think of it as a peanut power-up!
Every few weeks, grab yourself a balanced fertilizer with equal parts nitrogen, potassium, and phosphorus. Your peanuts will thank you for the extra nutrients without even having to say “Thank you!”
7. Control weeds, pests, and diseases
Weeds, those sneaky water and nutrient snatchers, can really put a damper on your peanuts’ growth. So, keep an eye out and give those troublemakers the boot!
When it comes to those pesky weeds and pest invaders, herbicides and pesticides are your trusty allies. Wave goodbye to these unwanted guests and create a haven for your precious peanuts.
But hey, even with all the TLC you’ve given your plants, sometimes infections still happen. No worries though, just grab your trusty fungicide and nip that problem in the bud, pronto!
And here’s a nifty trick: companion planting. It’s like having a little entourage of peanut bodyguards.
So, consider cozying up your peanuts with lettuce, spinach, snow peas, or radishes for some extra protection. They’ll have each other’s backs, just like good pals should.
8. Harvest the peanuts

Finally, it’s time to reap the literal rewards of your hard work. In this case, we’re talking about the fruits, or should I say legumes, of your labor.
Once your peanut plants start to wither and their leaves take on a yellow hue, that’s your cue for harvest time. Simply lift the plants with care and uncover the hidden treasure trove of pods beneath the soil.
Once you spot those plump, fully matured pods, it’s time to dig them up. Shake off the earth from the roots and give them a few days of sunbathing to dry out.
After they’ve basked in the sun, it’s time to crack open those pods and reveal the precious peanuts within.
How to Plant Peanuts in Containers
| Difficulty | Medium ●●●○○ |
| Speed | 3 to 4 months |
| Things You Need | • Personal protective equipment • Peanut seeds • Trowel, or other suitable gardening tools • Containers |
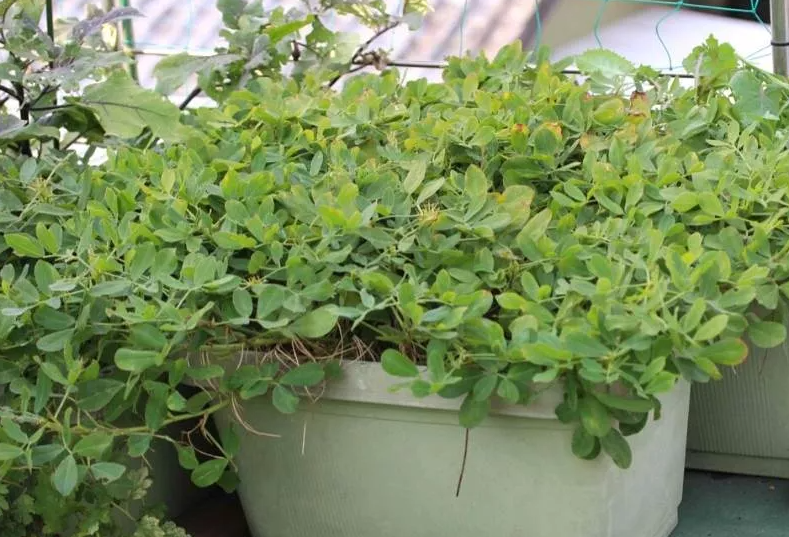
We’ve got a little surprise in store for you – did you know that you can actually grow peanuts in containers? Yep, it’s true! No need to go digging up your backyard or anything.
We’ve taken care of all the nitty-gritty details and made it super easy for you. Just follow our simple instructions, and you’ll be harvesting your very own peanuts in no time.
Here we go!
1. Select the right container
Let’s hunt for a pot or container that’s got some depth, at least 18 inches. Don’t forget, we need it to be spacious enough to squeeze in two to three peanut plants.
Drainage holes are important to keep the soil from becoming wet with stagnant water. Make sure that your selected pots have good drainage holes.
2. Use the right soil
If you’re cultivating peanuts in containers, opt for potting soil. To give it a little acidity, sprinkle in some compost and dried manure.
Peanut plants go bananas for soil with a pH level of 5.8 to 6.2. To be sure your soil isn’t playing any pH tricks on you, whip out a pH tester and do a quick acidity check.
3. Prepare the soil
Give that soil a gentle pat down, like you’re playing a little game of hide and seek with those pesky air pockets. Trust me, peanuts don’t like surprises either, so let’s make sure they have a cozy, pocket-free home to grow in.
4. Plant your peanut seeds
Now, let’s get our hands dirty and plant those little seedlings, but not too deep! Just two inches into the soil will do the trick.
And hey, let’s give them some personal space too, about 12 to 18 inches apart. We don’t want them elbowing each other for sunlight, do we?
Alright, time to tuck them in with a cozy blanket of soil. Oh, and don’t forget the hydration!
Water the soil, but not like you’re hosting a wild pool party. Keep it evenly moist, just enough to keep those little guys happy and thriving.
5. Place the container in the right location
Now, find a cozy spot for your container where it can soak up at least six hours of glorious sunshine. Peanut plants are sun worshipers, so let’s treat them to a sunbathing session that would make any beachgoer jealous!
6. Care for your peanut plants
Now that your peanuts are strutting their stuff with those lively green leaves, it’s important to give them a little TLC by keeping their soil evenly moist.
These peanut plants have a knack for sipping up about an inch of water each week. But in scorching hot and parched areas, they might need a little extra hydration.
Just a friendly reminder: your plants crave that steady moisture. So, if you catch your soil feeling as parched as the Sahara, it’s time for a little H2O surprise party!
7. Manage weeds, pests, and diseases
Sometimes, when Mother Nature gives us a run for our money with her mischievous creations, we’ve got to bring out the big guns: herbicides, pesticides, and fungicides.
It’s like a secret weapon against those pesky pests and plant troubles. We’ll show them who’s boss, no doubt about it!Just make sure you pick the right one for the job, though!
But hey, let’s not forget that these bad boys are no joke. They pack a punch and can be pretty toxic, so safety first!
Always take the necessary precautions and read those instructions like your life depends on it. Trust me, it’s so worth it.
8. Harvest your peanuts
The moment has arrived to reap the rewards of your potted peanut endeavors! Spotting the signs of readiness is as simple as a withering plant and a dash of yellowing leaves.
Now, here’s where the magic happens, my discerning horticulturist.
Tenderly lift those pods that have been snugly maturing underground. Give them a little jiggle to bid farewell from their earthy embrace.
Next up, basking in the warm rays of the sun is on the agenda for your freshly harvested peanut plants. Let them luxuriate for a few sun-kissed days before we proceed to the grand unveiling.
And voila! With the passage of time, you can gracefully separate the peanuts from their cozy pods, unlocking the true treasures within.
How to Take Care of Peanuts
Peanuts, my friend, are just like any other plant in the sense that they too require the essentials. Now, let’s get down to business and cover the basics: good soil, ample nutrients, adequate hydration, and an abundance of sunlight.
Worry not, because we’ve come up with the perfect set of guidelines to assist you in cultivating the most splendid and thriving peanuts known to humankind. Trust me, we’ve got this in the bag.
Soil Requirements
If you’re all about that peanut life, it’s time to get down and dirty with a soil test. No, not the kind that tests your patience, but the kind that tells you what your soil needs.
You can snag a test kit from the garden center or hit up the local universities or organizations for one. Soil tests are like a nutrition label for your garden.
They spill the beans on what nutrients are missing in your soil, like nitrogen, potassium, and phosphorus. And hey, sometimes your soil might be slacking in the micronutrient department, with a shortage of zinc and boron.
But fear not! There are some fancy-schmancy foliar sprays to give your soil a little boost in those areas.
Water Requirements
We’ve covered the fact that peanut plants have a real hankering for soil that’s evenly moist, not drenched like a soggy sandwich left out in the rain. So, it’s crucial to keep an eye on the moisture levels, especially during those scorching hot or bone-dry periods.
Now, here’s a nifty little trick to give Mother Nature a helping hand: an irrigation system. It’s like having your own personal water wizard.
This bad boy minimizes water loss and delivers H2O straight to those peanut plant roots, cutting out the middleman and ensuring hydration efficiency. But wait, there’s more!
We’ve got another ace up our gardening sleeves: mulching. Think of it as nature’s moisture-locking superhero.
Grab some straw or grass clippings, sprinkle them over the soil, and watch the magic happen. It’ll keep that precious moisture in the ground for longer, giving your peanuts the cozy, moist environment they crave.
Now, I’ve got to give you a friendly reminder: don’t go overboard with the watering. Too much of a good thing can spell trouble, leading to those pesky fungal diseases that have a real knack for peanut plant annihilation.
So, exercise a bit of restraint and find that sweet spot between dehydration and waterlogged roots.
Sunlight Requirements
Peanuts, like sun worshippers, thrive when basking in the glorious rays of our celestial friend. So, grant them their daily dose of sunshine, a solid six to eight hours of direct exposure.
It’s like a natural elixir for their well-being, resulting in healthier peanuts with a side of improved productivity.
Now, let’s have a little chat about shade, shall we? I kindly suggest refraining from housing your precious peanuts in areas where shadows reign, even if they’re partial.
Such surroundings would dampen their spirits, leading to stunted growth and a scarcity of peanuts to munch on.
In case you’ve got ample room to play, it’s wise to orient your peanut plants from north to south. This strategic arrangement guarantees that each plant gets its fair share of sunlight throughout the day.
For those living in regions where the sun’s love can be a little too intense, fear not! You can shield your peanuts from wilting under its fiery gaze.
Consider dressing them up in some shade clothes, the botanical equivalent of stylish sunhats. This fashion-forward choice will keep them cool and composed.
Lastly, let’s talk about companionship among plants. Growing taller friends near your peanuts is a clever move.
These friendly fellows provide just the right amount of shade, like a well-tailored umbrella, while still ensuring that the golden rays caress your peanut plants. It’s a delicate balance, fostering an ecosystem of harmonious growth.
How to Harvest Peanuts
Harvesting peanuts is as easy as whipping up a quick recipe, but before we get cracking, let’s learn the subtle signs that signal the perfect moment for peanut picking.
Picture this: when those little green leaves start waving the white flag and turn a sunny shade of yellow, that’s your cue to dig deeper. Gently lift the plant and unveil the buried treasure—those plump pods hidden beneath the soil.
If you strike gold, congratulations! Your peanut plants are all set for the grand harvest. Just give them a gentle tug, and they’ll come loose like a button from an old shirt.
Now, here’s where the fun begins. Give your plants a little shake, just like a dance move, to bid farewell to excess soil clinging to the roots and pods.
Then, bask them in the warm embrace of sunlight for a few days to dry off, much like sunbathing at a tropical paradise. Once your little sun-soaked darlings have had their fair share of rest and relaxation, it’s time to unveil their nutty secret.
Carefully crack open those pods and release the peanuts, like a magician revealing a well-kept trick. Voila! Your hard work has paid off, and you’ve earned yourself a delicious batch of freshly harvested peanuts to enjoy.
FAQs
Technically you can grow peanuts indoors, but they will not thrive as well when grown outdoors. Peanuts love sunshine, warm temperatures, and sufficient space to grow.
If you really want to grow them indoors, you can use plant grow lights to supplement the sunlight. Make sure that the indoor temperatures are warm as well.
Keep the soil evenly moist as well. And finally, place the peanut plants in containers that are wide and deep enough for their growth.
Typically, you can expect a peanut plant to produce 20 to 50 peanut pods. Of course, the number of peanuts depends on the variety that you have chosen as well as the growing conditions.
Each peanut pod can contain two or three nuts.
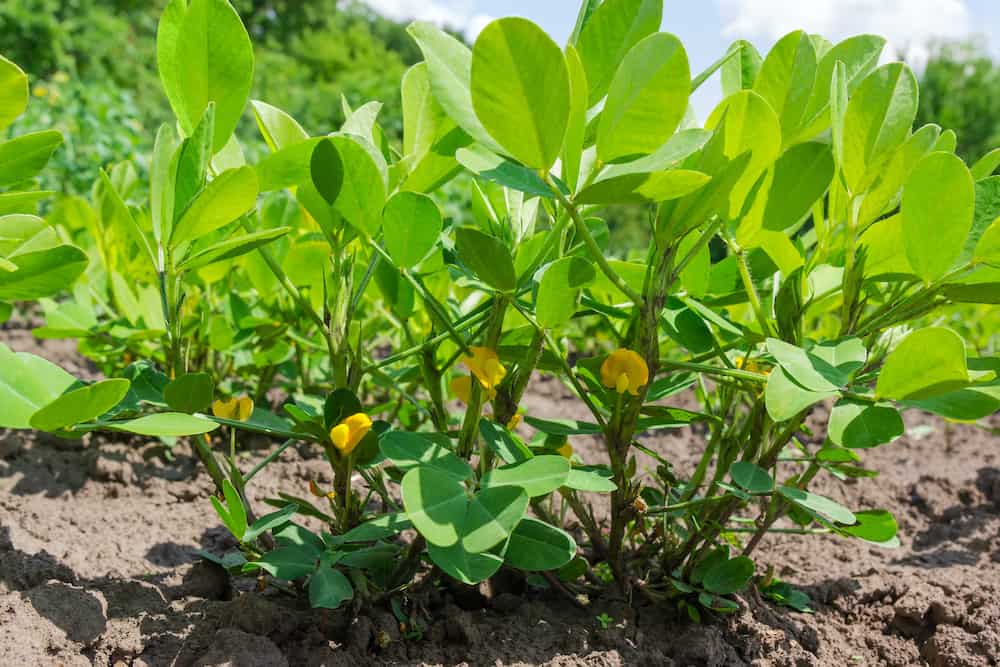
Most peanut plants take 35 to 50 days to flower after planting. Of course, this depends on the variety you picked as well as the growing conditions you have.
The flowering period can last several weeks before the plant matures. Then, it will take 100 to 130 days for the peanut to be ready for harvest.