If you’re looking to make acidic gardening soils less so, look no further than the magic of turning them more alkaline in nature.
Plus, some plants prefer alkaline soils as they improve nutrient intake and can deter soil-borne diseases. On top of that, alkaline soil reduces toxicity risks and often has better soil structure.
Cherry trees and fig trees are just some of the plants that love alkaline soils. If you’ve been waiting to switch up your gardening plans for the season, this just might be the sign!
9 Natural Ways How to Make Soils More Alkaline
Nature is so efficient that it provides us with many materials to make soils acidic or alkaline. Let’s explore these natural materials and how to use them to achieve the desired alkaline soil conditions.
Calcium Carbonate (Agricultural Lime)
| Factor | Description |
| Expertise Level | Intermediate ●●○○○ |
| Estimated Costs | Low to Moderate |
| Possible Risks | Over-application of lime, incorrect timing |
Widely used, agricultural lime is pure calcium carbonate. It effectively raises pH and provides calcium to your soil.
How to Use Calcium Carbonate (Agricultural Lime)
1. Take a soil test to determine the current pH of your soil.
Gather soil samples from different spots in your garden or lawn. Follow the guidelines in the testing kit or from your local extension office.
Send the soil samples for testing and wait for the results. The test will reveal your soil’s current pH level.
2. Apply lime in the fall or early spring for best results.
Lime works best in the fall or early spring. It reacts with the soil and adjusts the pH before the growing season starts.
Don’t use lime in heavy rain or drought, as it can impact its effectiveness and spread.
3. Evaluate the amount of lime needed based on the test results.
When you get the pH test results, check if your soil is too acidic. If it’s below the recommended range for your plants, add lime.
Use the test results and the area size to calculate how much lime you need. Soil test reports often suggest the amount of lime to reach the desired pH level.
4. Apply lime evenly across the soil surface and incorporate it into the soil.
Spread the calculated amount of lime evenly over the soil surface. You can use a broadcast spreader or simply scatter it by hand.
After spreading the lime, use a garden rake or a mechanical tiller to incorporate the lime into the soil to a depth of approximately 6 to 8 inches. This ensures that the lime is evenly distributed throughout the root zone of your plants.
Dolomite Lime (Calcium Carbonate + Magnesium Carbonate)
| Factor | Description |
| Expertise Level | Intermediate ●●○○○ |
| Estimated Costs | Low to Moderate |
| Possible Risks | Over-application, incorrect timing, magnesium excess |
This option not only raises soil pH but also supplies magnesium, which can be beneficial for certain crops.
How to Use Dolomite Lime (Calcium Carbonate + Magnesium Carbonate)
1. Take a soil test, if you haven’t already.
You can do this by getting a soil testing kit or contacting your local agricultural extension office for testing services.
Collect soil samples from various areas of your garden or lawn, following the specific instructions provided with the testing kit or by your extension office.
Submit the soil samples for testing to determine the current pH level and assess whether magnesium supplementation is necessary.
2. Add in Dolomite Lime in the fall or early spring.
Apply Dolomite Lime in the fall or early spring for best results. This helps balance soil pH and magnesium levels before the new growing season.
Avoid using it during heavy rain or drought, as it can affect effectiveness and distribution.
3. Calculate the amount of Dolomite Lime needed based on the test results.
Once you receive the pH test results, assess if your soil is both acidic and deficient in magnesium. If so, Dolomite Lime can be an appropriate choice to address both issues.
Calculate the amount of Dolomite Lime required based on the test results and the size of the area you intend to treat. Soil test reports may provide recommendations for the amount of Dolomite Lime needed.
4. Spread Dolomite Lime evenly over the soil surface, then work it into the soil..
Apply the calculated amount of Dolomite Lime evenly over the soil surface using a broadcast spreader or by hand.
After spreading, use a garden rake or mechanical tiller to incorporate the Dolomite Lime into the soil to a depth of approximately 6 to 8 inches. Ensure even distribution throughout the root zone.
5. Monitor magnesium levels and pH over time.
After applying Dolomite Lime, regularly test your soil’s pH and magnesium levels. Adjust future Dolomite Lime applications based on test results to maintain optimal soil conditions for your crops.
Hydrated Lime (Calcium Hydroxide)
| Factor | Description |
| Expertise Level | Intermediate ●●○○○ |
| Estimated Costs | Low to Moderate |
| Possible Risks | Rapid pH increase, over-application |
A faster-acting form of lime, hydrated lime can quickly adjust soil pH. However, use it sparingly, as it can raise pH levels rapidly.
How to Use Hydrated Lime (Calcium Hydroxide)
1. Get a soil test to get a more accurate understanding of your soil’s characteristics.
You can a soil testing kit from reputable online vendors or gardening stores. You can also contact your local agricultural extension office for testing services.
Take soil samples from different parts of your garden or lawn, following the instructions in the testing kit or from your extension office. Send the soil samples for testing and wait for the results to determine your soil’s current pH level.
2. For best results, apply hydrated lime during the fall or early spring.
This allows the lime to react with the soil and adjust the pH before the growing season begins.Avoid applying hydrated lime during extreme weather conditions such as heavy rain or drought, as this can affect its effectiveness and distribution.
3. Determine the amount of hydrated lime needed.
Once you receive the pH test results, check if your soil is too acidic and requires an adjustment. Soil test reports typically provide recommendations for the amount of lime required to achieve the desired pH level.
4. Apply hydrated lime sparingly and evenly across the soil surface.
Spread the calculated amount of hydrated lime evenly over the soil surface. You can use a broadcast spreader or distribute it by hand.
Since hydrated lime is fast-acting, use it sparingly to avoid raising pH levels too rapidly. Over-application can harm your plants.
5. Incorporate hydrated lime into the soil.
After spreading the hydrated lime, use a garden rake or a mechanical tiller to incorporate it into the soil to a depth of approximately 6 to 8 inches. This ensures even distribution and allows it to react with the soil.
Wood Ash
| Factor | Description |
| Expertise Level | Intermediate ●●○○○ |
| Estimated Costs | Low (if using readily available wood ash) |
| Possible Risks | Over-application of wood ash, contamination |
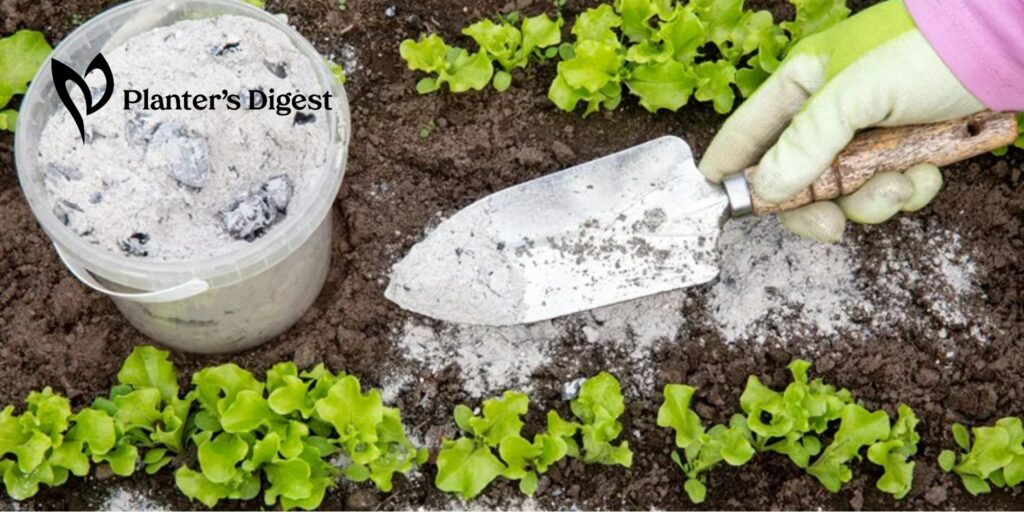
Wood ash is a natural source of potassium and can help raise soil alkalinity. However, it should be used cautiously:
How to Use Wood Ash
1. Make sure the wood ash comes from natural, untreated wood, not charcoal briquettes.
Avoid using ash from charcoal briquettes or wood that has been treated with chemicals. Contaminated ash can introduce harmful substances into your soil.
2. Apply wood ash sparingly and mix it thoroughly into the soil.
Wood ash contains potassium and can increase soil alkalinity. To figure out how much to use, either get a soil test or follow your local agricultural extension office’s recommendations.
Spread the wood ash evenly over the soil as directed. Afterward, mix it into the soil using a garden rake or a mechanical tiller to prevent pH imbalances in one spot.
Seaweed Mulch
| Factor | Description |
| Expertise Level | Intermediate ●●○○○ |
| Estimated Costs | Low (if collected locally) to Moderate (if purchased) |
| Possible Risks | Excessive salt content in seaweed, over-application of mulch |
Seaweed is not only an excellent organic mulch but also a source of minerals beneficial for alkaline soils:
How to Use Seaweed Mulch
1. Collect and clean seaweed for mulch.
Look for seaweed, which can be found along beaches or shorelines. Make sure it’s free from pollution and contaminants.
Rinse the seaweed with fresh water to remove excess salt.
2. Plan the time and quantity well.
Apply seaweed mulch during cooler seasons like early spring or late fall. Avoid using too much seaweed mulch as it can compact and impede water flow.
A mulch layer of 2 to 4 inches should do.
3. Apply the seaweed mulch.
Leave space around plant stems to prevent rot and encourage air circulation.As the seaweed mulch decomposes, it enriches the soil with vital minerals, particularly beneficial for alkaline soils.
4. Monitor your plants.
Check your plants for their response to seaweed mulch and adjust as needed.If you notice any problems or if the mulch becomes too thick, remove some or reduce the amount applied.
Bone Meal
| Factor | Description |
| Expertise Level | Beginner to Intermediate ●●○○○ |
| Estimated Costs | Low to Moderate |
| Possible Risks | Over-application, inappropriate use for specific plants |
Bone meal is rich in phosphorus and calcium, making it a good choice for increasing alkalinity.
How to Use Bone Meal
1. Get a soil test if your soil needs bone meal components.
Bone meal is rich in phosphorus and calcium, which can raise soil alkalinity. This is why you need a soil test to check if your soil needs it and how much of it is needed.
2. Determine the amount of bone meal you’ll need.
If your soil test shows it needs more alkalinity or your plants need extra phosphorus and calcium, calculate the amount you need. You can do this using the recommended rate on the product label or advice from your local agricultural extension office.
3. Apply bone meal evenly across the soil surface.
Do this in the area where you plan to grow your plants. You can use a handheld spreader or distribute it by hand.
4. Incorporate bone meal into the soil.
Go for a depth of about 4 to 6 inches to ensure that the bone meal is well-mixed with the soil.
5. Water the soil deeply.
This will make bone meal nutrients accessible to the plants’ roots.
6. Consider the specific needs of your plants.
Bone meal works well for plants needing more phosphorus and calcium, like flowering and fruiting ones. Pick plants that thrive with increased alkalinity from bone meal.
7. Monitor plant health and soil pH.
Use bone meal sparingly to avoid nutrient imbalances in the soil.
Crushed Shells
| Factor | Description |
| Expertise Level | Beginner to Intermediate ●●○○○ |
| Estimated Costs | Low to Moderate |
| Possible Risks | Over-application, slow-release characteristic |
Crushed shells, such as crushed eggshells or oyster shells, are natural sources of calcium carbonate.
How to Use Crushed Eggshells
1. Get a soil test to check your soil pH for nutrient levels.
You can do this by getting a soil testing kit from a garden center or contacting your local agricultural extension office for testing services.
Collect soil samples from your garden or lawn as per the provided instructions. Send the samples for pH testing to evaluate your soil’s acidity.
2. Time the application properly.
You can apply crushed shells at any time during the gardening season, but it’s generally best to do so in the fall or early spring, similar to lime applications.
3. Calculate the amount of crushed shells needed to raise the pH to alkaline levels.
Most soil test reports provide recommendations for the amount required.
4. Apply crushed shells across the soil surface evenly.
Spread them by hand or use a garden spreader. Make sure that the crushed shells are evenly distributed.
5. Mix the crushed shells into the soil.
Use a garden rake or mechanical tiller to blend crushed shells into the soil, going 4 to 6 inches deep. This releases calcium from the crushed shells into the soil, increasing the pH level over time.
6. Monitor and repeat as needed.
Regularly check your soil’s pH to gauge the eggshell’s effectiveness. It may take several months or even a year for the pH because crushed shells release calcium slowly.
Organic Compost
| Factor | Description |
| Expertise Level | Beginner to Intermediate ●●○○○ |
| Estimated Costs | Low (if making your compost) to Moderate (if buying) |
| Possible Risks | Over-application of compost, insufficient decomposition |
Compost, when used correctly, can gradually raise soil alkalinity and benefit your plants in various ways. These materials are nutrient-rich and contribute to a healthy soil environment.
How to Use Compost
1. Prepare the compost.
Compost that has fully decomposed is packed with helpful microorganisms and nutrients. Make sure you have enough prepared.
If you’re creating your own compost, stick to the recommended methods. These involve keeping a good mix of green and brown materials, ensuring proper airflow, and turning it regularly.
2. Applying compost is best during spring and fall.
However, you can still apply compost at any time throughout the year. Layer some before planting, during bed preparation, or as a mulch around established plants.
3. Spread the compost.
Spread a 2- to 3-inch layer of compost on your garden bed. You can either put it on top or mix it into the soil.
If using it as a top dressing, spread it evenly across the soil surface. Avoid clumping around plant stems or forming uneven mounds.
4. Mix well as needed.
To add compost to the soil, use a garden fork or tiller. Mix it in about 6 to 8 inches deep and don’t disturb the plant roots too much while doing this.
5. Regularly monitor the moisture level of your garden bed.
Don’t make your compost layer too thick. It can cause moisture and nutrient problems in your plants.
Mulch
| Factor | Description |
| Expertise Level | Beginner ●○○○○ |
| Estimated Costs | Low |
| Possible Risks | Over-mulching, improper material selection |
Mulching your garden with organic materials, such as straw, shredded leaves, or grass clippings, can also help increase soil alkalinity over time.
How to Use Mulch
1. Pick the right materials.
Use straw, wood ash, crushed eggshells, or your preferred alkaline materials. Keep away from acidic materials like pine needles or pine bark.
Make sure your mulch doesn’t have diseases, pests, or weeds. Checking for these problems will help you to avoid issues in your garden.
2. Apply a layer of organic mulch.
Pick organic mulch matter like straw, shredded leaves, grass clippings, or compost. They help keep the soil moist and reduce soil acidity over time.
Apply a 2- to 4-inch layer evenly around the plant’s base. Leave a small gap around the plant stems to prevent rot and promote air circulation.
3. Reapply mulch regularly.
Add more mulch when it thins out. Before applying fresh mulch, remove the old, decomposed layer to avoid over-mulching and keep the soil healthy.
7 Common Mistakes to Avoid
It can be really tempting to go all in without thinking about the consequences. We’ve listed some of the most common missteps homeowners take and how to avoid them.
Neglecting Soil Testing
One of the biggest slips is skipping soil testing before making pH adjustments. To keep this from happening, always conduct a soil test to determine your soil’s current pH.
This guides your actions and ensures you make the right adjustments.
Over-Application of Amendments
Adding too much lime or other alkalizing agents is another blunder to avoid. Over-application can lead to excessively high pH levels, causing nutrient imbalances.
You can avoid this by following the recommended application rates based on your soil test results.
Ignoring Plant Preferences
Some plants have pH preferences. Growing them in the wrong environment can result in stunted or damaged growth.
What you can do is choose plants that thrive in the pH range you aim to achieve.
Neglecting Regular pH Checks
Another misconception is assuming that a one-time adjustment will be enough. Instead, monitor your soil’s pH regularly, as it can change over time.
Be prepared to make adjustments as needed to maintain the desired pH level.
Not Addressing Other Soil Issues
We may sometimes be so intent on alkalinizing the soil pH that we don’t consider other soil factors. This can sometimes lead to nutrient deficiencies, soil compaction, and drainage issues.
To combat this, address your soil issues as a whole, with alkalinity being one of the goals but not necessarily the only one.
Incorrect Lime Type
Sometimes, gardeners can end up using the wrong type of lime for their soil. You can reduce this risk by picking the right kind of lime amendment based on your soil test results.
Rushing pH Adjustments
Finally, we can be so impatient that we expect instant results from soil amendments. Understand that pH adjustments take time.
Plan ahead and be patient as your soil gradually reaches the desired alkalinity.


