Getting rid of horse chestnut trees? You can use various ways, ranging from mechanical means like cutting them down or using chemicals to keep them from growing and invading your area.
But which one works best for you? Don’t worry, we’ve listed the best ways how to kill a horse chestnut tree, from beginner to advanced levels!
Foliar Spray
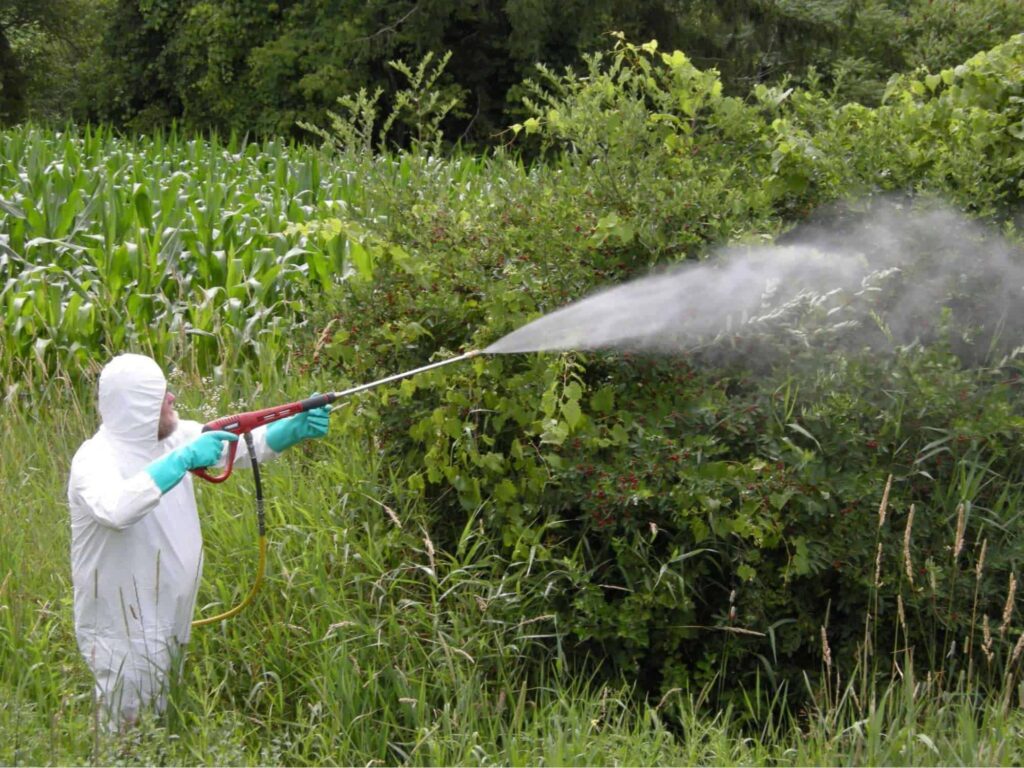
Getting the leaves to absorb toxic chemicals is one of the easiest ways you can kill a horse chestnut tree. Just make sure that your tree is small enough for your sprayer to reach the leaves without drifting onto neighboring trees!
| Difficulty | Intermediate ●●●○○ |
| Estimated Time for Tree to Die | Weeks to months |
| Ideal Tree Size | Small to medium |
| Things You Need | • Personal protective equipment • Herbicide of choice • Spray or preferred applicator |
How to Perform Foliar Spray
1. Pick the perfect time.
Timing is crucial for effective foliar spray. Apply the herbicide during the tree’s active growing season when the leaves are fully developed.
Typically, early summer is a suitable time. We suggest avoiding applications during periods of high wind or rain as it can reduce effectiveness and cause unwanted runoff.
2. Prepare the herbicide.
Follow the instructions on the herbicide label to mix the appropriate amount of herbicide with water in the sprayer. Use the recommended concentration for tree control.
3. Prepare the area.
Clear the area around the tree from any valuable or sensitive plants that could be affected by the herbicide. Cover desirable plants nearby with plastic sheets or cardboard to prevent accidental spray contact.
4. Spray the herbicide.
Hold the sprayer nozzle close to the leaves, ensuring good coverage without excessive runoff. Spray the herbicide evenly on the leaves, making sure to coat the upper and lower surfaces thoroughly.
Start from the bottom of the tree and work your way up. Be careful not to spray desirable plants or vegetation.
5. Clean up and dispose properly.
After spraying, thoroughly clean the sprayer and any equipment used with water to remove any herbicide residue.
Dispose of the herbicide containers as per local regulations, and avoid contaminating water sources or the environment.
6. Monitor and repeat sprays if necessary.
Monitor the tree’s response to the herbicide treatment. Depending on the herbicide used, it may take several weeks or months for the tree to show signs of decline.
If necessary, repeat the foliar spray following the recommended waiting period provided by the herbicide manufacturer.
Basal Bark Spray
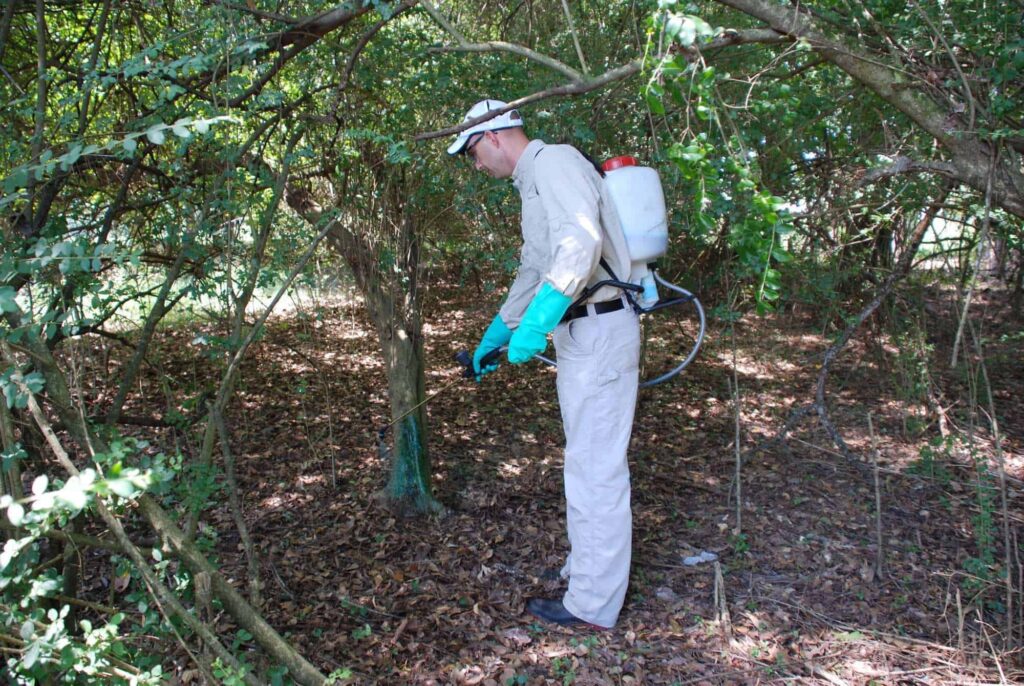
If you prefer spraying trunks over leaves, then this technique will work well for you. Basal bark spraying is a method used to control or kill woody plants by applying herbicides directly to the bark of the lower portion of the tree or shrub.
| Difficulty | Intermediate ●●●○○ |
| Estimated Time for Tree to Die | Months to years |
| Ideal Tree Size | Small to medium |
| Things You Need | • Personal protective equipment • Herbicide of choice • Sprayer or preferred applicator • Marker or flagging tape, optional |
How to Perform Basal Bark Spray
1. Select a suitable time.
Basal bark spraying is typically done during the tree’s dormant season, usually in late autumn or winter when the leaves have fallen and the bark is fully exposed.
Avoid spraying during windy or rainy conditions to prevent herbicide drift and chemical dilution.
2. Mix the herbicide solution.
Prepare the herbicide according to the instructions on the label. Dilute the herbicide with the appropriate amount of water if necessary.
Make sure to follow the recommended concentration and mixing ratios.
3. Prepare your sprayer
Fill the spray bottle or backpack sprayer with the herbicide solution. Ensure that the sprayer is clean and in good working condition.
Adjust the sprayer nozzle to deliver a low-pressure spray.
4. Identify and approach the tree.
Stand close to the tree and identify the basal area, which is the lower portion of the trunk. It should be up to a height of approximately 12 to 18 inches from the ground.
5. Spray the basal area.
Start spraying the herbicide mixture directly onto the bark of the basal area. Apply the spray evenly and thoroughly, covering the entire circumference of the trunk.
Ensure that the bark is saturated but not dripping excessively.
6. Move around the tree.
Continue moving around the tree while spraying the basal area of the trunk. Pay attention to any areas with thick or rough bark, as they may require additional coverage.
Take extra care not to spray neighboring desirable plants or vegetation.
As an option, you can mark the treated trees with a marker or flagging tape to indicate that they have been sprayed and to avoid potential confusion in the future.
7. Clean up.
After spraying, clean the sprayer thoroughly according to the herbicide manufacturer’s instructions. Dispose of any leftover herbicide or empty containers appropriately, following local safety regulations.
Cut Surface Treatment
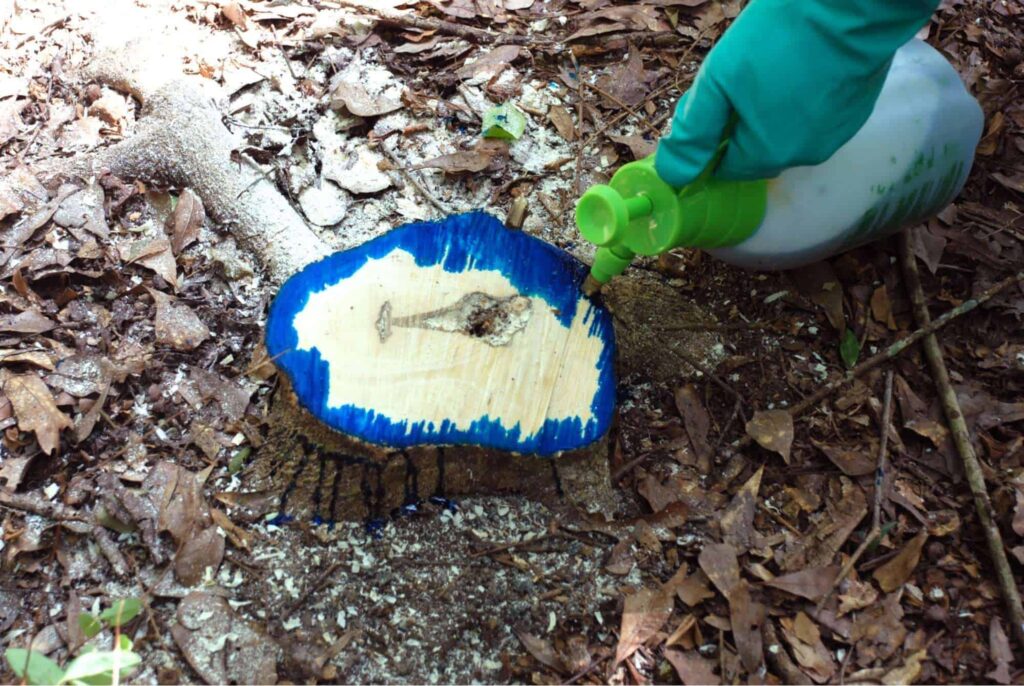
If you’re feeling for some exercise and a little paintwork, then this just might work for you. Cut Surface Treatment is a method used to kill a tree by cutting it down and treating the stump to prevent regrowth.
| Difficulty | Intermediate ●●●○○ |
| Estimated Time for Tree to Die | Few weeks |
| Ideal Tree Size | Small to medium |
| Things You Need | • Personal protective equipment • Chainsaw or handsaw • Herbicide labeled for tree stump treatment • Brush or sponge applicator |
How to Perform Cut Surface Treatment
1. Assess the tree.
Evaluate the tree’s size, location, and any potential hazards or obstacles in the surroundings. Ensure there are no structures, power lines, or other objects at risk of damage during the tree removal process.
2. Plan the cut.
Determine the direction of the tree’s fall to ensure safety and minimize any potential damage. Choose a felling direction that avoids obstacles and provides an open area for the tree to fall.
3. Make the cut.
Use a chainsaw or handsaw to make a horizontal cut as close to the ground as possible. Cut the tree as low as you can without damaging the saw or risking injury.
Ensure the cut is clean and even, reducing the chances of the tree sprouting new growth.
4. Treat the remaining stump.
Immediately after cutting the tree, apply a herbicide specifically labeled for tree stump treatment. Follow the instructions and dosage recommendations on the herbicide label.
Use a brush or sponge applicator to apply the herbicide to the freshly cut surface of the stump. Apply the herbicide thoroughly, covering the entire surface of the stump.
5. Prevent regrowth.
If the tree has multiple stems or branches, make additional cuts to treat each stump individually. Treat all fresh cuts with the herbicide to prevent regrowth.
6. Clean up everything.
Clean up any debris, branches, or wood from the area around the stump. Dispose of the tree materials properly, following local regulations and guidelines.
7. Monitor and treat as needed.
Monitor the stump regularly for any signs of regrowth. If any new shoots or growth appears, reapply the herbicide to prevent further growth.
Girdling or Ring Barking
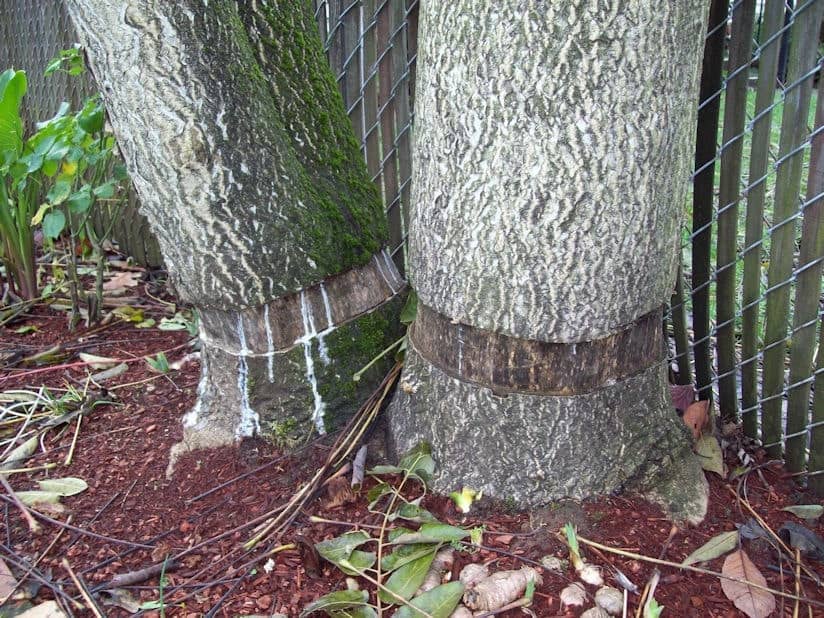
Looking for a more torturous method to kill that annoying horse chestnut tree? Try girdling or ring barking!
Girdling or ring barking is a method of tree removal that involves cutting a ring around the tree’s trunk to interrupt the flow of nutrients, ultimately causing the tree to die over time.
| Difficulty | Intermediate ●●●○○ |
| Estimated Time for Tree to Die | Months to years |
| Ideal Tree Size | Small to medium |
| Things You Need | • Personal protective equipment • Hand saw or chainsaw |
How to Perform Girdling or Ring Barking
1. Evaluate the tree.
First assess the size, health, and location of the tree. Make sure the tree is suitable for this method and that it won’t pose a risk to nearby structures or people if it eventually falls.
2. Select the cutting point.
Choose a location on the tree’s trunk where you will make the girdling cut. The cut should be made about 1.5 to 2 inches wide, encircling the entire circumference of the trunk.
This cut should be made just deep enough to penetrate the bark and reach the cambium layer beneath.
3. Clean the cutting area.
Clear away any debris, loose bark, or vegetation around the cutting point. Doing so ensures a clean surface for making the girdling cut.
4. Make the girdling cut.
Carefully cut through the bark and into the cambium layer with your hand saw or chainsaw. Double-check to make sure the cut is smooth and even, encircling the entire circumference of the trunk.
We suggest avoiding cuts that are too deep into the wood beneath the cambium layer. You can identify the cambium layer as it is a thin, actively growing layer of tissue under the bark.
It’s found between the inner bark and the wood in a tree trunk and is mainly responsible for producing new cells that contribute to the tree’s growth in girth.
To prevent any new growth or potential infections, you can apply a herbicide to the cut surface. Follow the instructions and safety precautions provided by the herbicide manufacturer.
5. Monitor the tree.
After girdling, the tree will gradually weaken and die over time. Monitor the tree regularly to assess its condition.
It may take several months to a few years for the tree to completely die, depending on its size, health, and environmental conditions.
6. Remove the dead tree and clean up.
Once the tree has died, you can proceed with its removal. If you are capable of doing this yourself, you may do so with the utmost consideration for safety protocols.
Otherwise, you may consider hiring a professional tree removal service, especially if the tree is large or poses a risk. They have the necessary equipment and expertise to safely and efficiently remove the dead tree.
Manual Removal
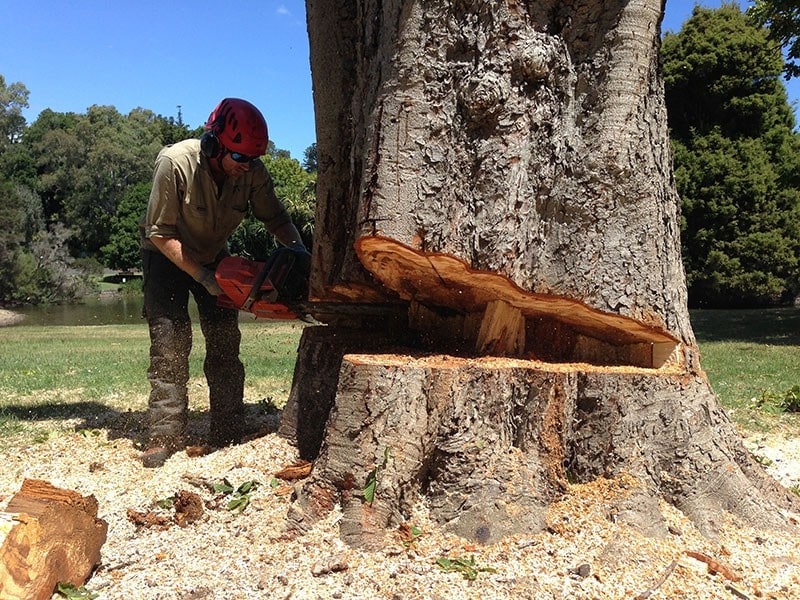
If you’re feeling a little stressed or simply want to work up a sweat for some good physical lifting, then we suggest that you consider doing this method.
Manual removal of a tree involves physically cutting down and removing the tree using tools such as chainsaws, handsaws, and axes.
| Difficulty | Beginner ●●○○○ |
| Estimated Time for Tree to Die | Immediate |
| Ideal Tree Size | Small to large |
| Things You Need | • Personal protective equipment • Hand saw, chainsaw, ax |
How to Perform Manual Removal
1. Assess the tree.
Evaluate the size, health, and location of the tree. Determine the direction in which you want the tree to fall, ensuring it will not cause damage to nearby structures or pose a safety risk.
2. Plan and clear the felling zone.
Clear the area around the tree of any obstacles or debris that could interfere with the felling process. Identify an escape route in case the tree falls in an unexpected direction.
3. Make the horizontal or felling cut.
Begin by making a horizontal cut on the side of the tree facing the desired direction of fall. Make sure your tools are sharp enough for the job.
This cut, also known as the felling cut or notch, should be approximately one-third of the tree’s diameter and go about one-third into the trunk. The notch should be made at a comfortable working height, typically waist level.
4. Make a back cut.
Move to the opposite side of the tree and make a horizontal back cut slightly above the bottom of the notch. This cut should meet the felling cut, creating a hinge to guide the tree’s fall.
Ensure the back cut is at the same level as the felling cut.
To aid in directing the tree’s fall, you can make a falling wedge cut on the same side as the felling cut, just above the horizontal felling cut. This cut creates a narrow space that helps guide the tree’s direction.
5. Retreat to safety.
Once the back cut is made, quickly move away from the tree along the predetermined escape route. Make sure others are at a safe distance from the falling zone.
6. Allow the tree to fall.
As the tree starts to fall, it should follow the path guided by the felling cut and the hinge created by the back cut. Maintain a safe distance until the tree has completely fallen.
7. Remove the branches and cut the trunk.
After the tree has fallen, remove the branches starting from the bottom and working your way up. Use appropriate cutting techniques, such as cutting limbs in sections to avoid injury.
Once the branches are removed, cut the trunk into manageable sections for easier handling and disposal.
8. Dispose of the tree responsibly.
Depending on local regulations and available options, you can dispose of the tree by chipping it, cutting it into firewood, or arranging for its removal by a waste management service.
Follow proper disposal procedures and consider recycling options if available in your area.
Chemical Injections
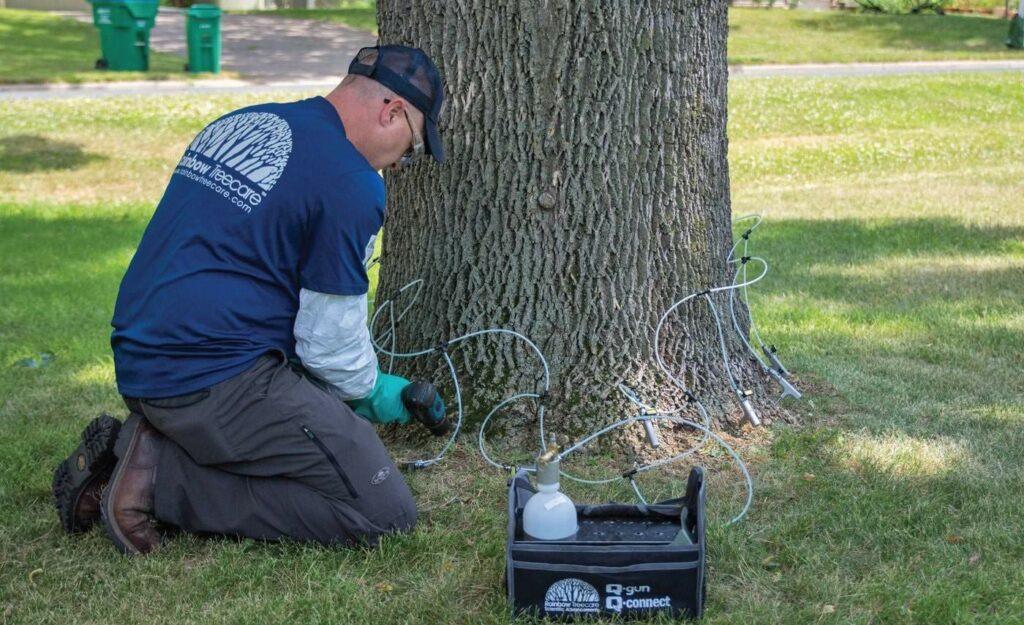
Here’s one way to play doctor: injecting horse chestnut trees with herbicides! Performing chemical injections for tree removal involves injecting herbicides directly into the trunk or root system of the tree to kill it.
| Difficulty | Advanced ●●●●○ |
| Estimated Time for Tree to Die | Months to years |
| Ideal Tree Size | Medium to large |
| Things You Need | • Personal protective equipment • Herbicide of choice • Drill, drill bits • Injection system of choice |
How to Perform Chemical Injections
1. Pick the right herbicide.
Select a herbicide that is appropriate for the tree species you want to remove and the method of injection you plan to use. You can check your local garden center or community for recommended products.
When in doubt, consult with a local arborist or garden center to determine the most suitable herbicide and its recommended dosage.
2. Prepare the herbicide mix.
Follow the instructions on the herbicide label to mix the appropriate amount of herbicide with water or any other required diluent.
Ensure you adhere to the recommended dosage and any safety precautions specified on the herbicide label.
3. Choose your injection method.
There are two primary methods for chemical injections: trunk injection and root injection. Select the method based on the tree size, accessibility, and personal preference.
For smaller trees, you can use a trunk injection system, which involves drilling holes into the tree trunk and injecting the herbicide solution directly into the holes.
4. Inject the herbicide.
For trunk injections, select the appropriate location on the trunk for injection. Generally, choose a spot about 2 to 4 inches above ground level or slightly higher.
Drill holes into the trunk at a slight upward angle, spaced evenly around the trunk circumference. The hole size should match the diameter of the injection tube or spike.
Insert the injection tube or spike into the hole, ensuring it’s secure. Pour or inject the herbicide solution into the injection tube or spike, following the recommended dosage.
Take care to prevent spillage or leaks. Once the herbicide is injected, remove the injection tube or spike and move to the next hole, repeating the process until all holes are treated.
For root injections, determine the area around the tree’s root zone where you will perform the injections. Insert the soil injection probe into the ground at regular intervals within the target area, ensuring it reaches the desired depth.
Pour or inject the herbicide solution into the probe, following the recommended dosage. Move the probe to different locations within the root zone, repeating the injection process until the entire area is treated.
5. Perform post-injection clean-up.
After completing the injections, thoroughly clean and rinse any equipment used, following the herbicide label’s instructions. Dispose of any leftover herbicide or contaminated materials according to local regulations.
Controlled Burning
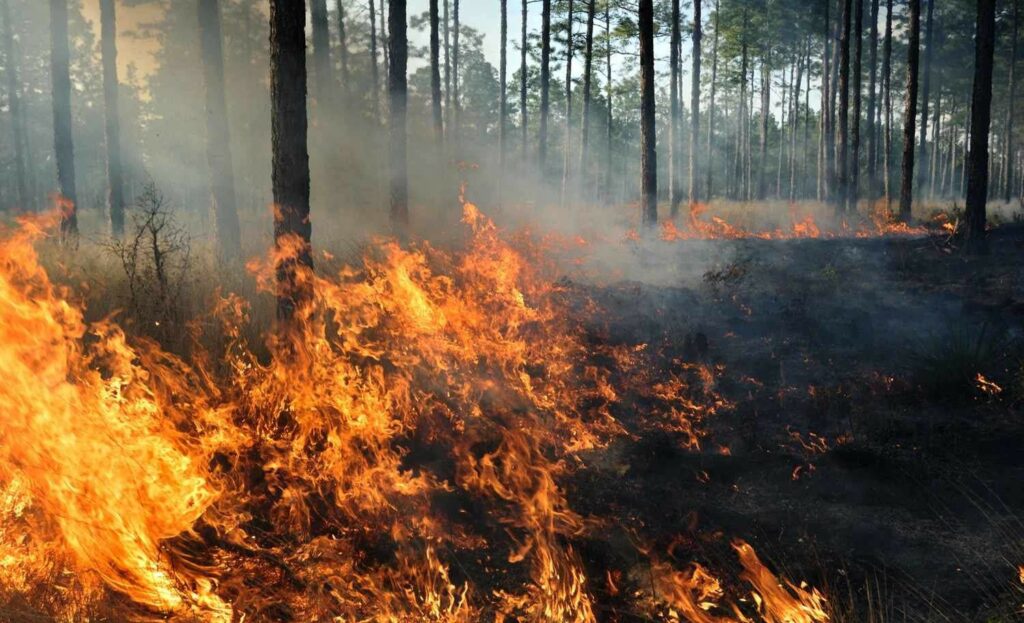
Now, this method takes an expert to perform, and if you’re not one, we strongly discourage going with this route. Controlled burning is a complex and potentially dangerous process that requires specialized knowledge, skills, and permits.
We can’t stress this enough: controlled burning should only be undertaken by trained professionals who are familiar with local regulations, safety protocols, and environmental considerations.
Generally, controlled burning is used in specific situations, such as land management practices, ecological restoration, or wildfire prevention. It involves intentionally setting and managing a fire under controlled conditions to achieve specific objectives.
These objectives can be as diverse as reducing fuel loads, promoting native vegetation growth, or maintaining ecosystem health. We can’t stress how important it is to have the specialized skills and training to perform controlled burning.
If you still believe a controlled burn is necessary for your specific situation, we highly recommend contacting your local fire department, forestry service, or land management agency.
FAQs
The best time to kill a horse chestnut tree is during its dormant season, around late fall to early spring. During this period, the tree is less active, making it more susceptible to treatments and other removal methods.
Horse chestnuts are not typically poisonous to touch. Do take note that horse chestnuts are not edible and should not be consumed under any circumstance.
The seeds of horse chestnuts contain a toxic compound called aesculin, which can cause gastrointestinal issues once ingested. Handle horse chestnuts with caution and avoid ingesting any part of the tree.
The cost of removing a horse chestnut tree can easily vary because of tree size, location, and accessibility, as well as local market service rates.
We recommend going around and getting quotes from multiple tree removal services in your area. This way, you will be able to get an accurate estimate of the costs involved.
You can definitely replant another tree in the same spot after removing a horse chestnut tree. You need to consider the current soil conditions, sunlight exposure, and sufficient space to make the vacant spot more suitable for the new tree’s growth.
Removing a horse chestnut tree can affect nearby plants or structures, especially if the tree is large or located in close proximity to them.
Be aware that falling branches, root systems, or changes in sunlight exposure can affect the surrounding plants or structures as well.
You can use wood from a removed horse chestnut tree for firewood or other purposes. Take note that it’s not usually used as firewood due to its lower heat value and tendency to produce smoke excessively.
Plus, the wood is highly susceptible to decay and has limited structural strength. Other than these issues, horse chestnut wood can still be used for certain crafts or furniture.


