So you’ve got a limited space and you want to decorate it with some living art. Now what’s a budding gardener to do?
We’ve got big ideas for tiny spaces that won’t break the bank, so you don’t have to worry about breaking the bank. We do have a warning though: you might become addicted to decorating with plants, so proceed with caution!
1. Vertical Gardens
| Factors | Information or Description |
| Expertise Level | Easy ●○○○○ |
| Materials Needed | Appropriate plants Wall-mounted planters or pallets Irrigation system Decorative elements |
| Application | Indoors, outdoors |
| Estimated Costs | Costs vary but can be budget-friendly, depending on plant and decor choices |
| Possible Risks | Overwatering Underwatering Pests Plant |
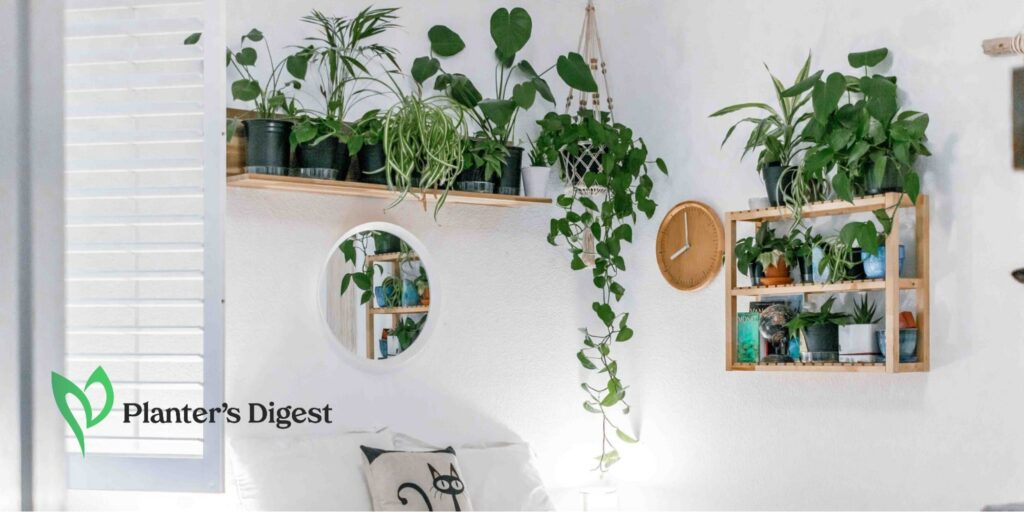
When space is a premium, there’s no other way to go but up! Make a gorgeous plant display by hanging pots, installing wall-mounted planters, or adding shelving units.
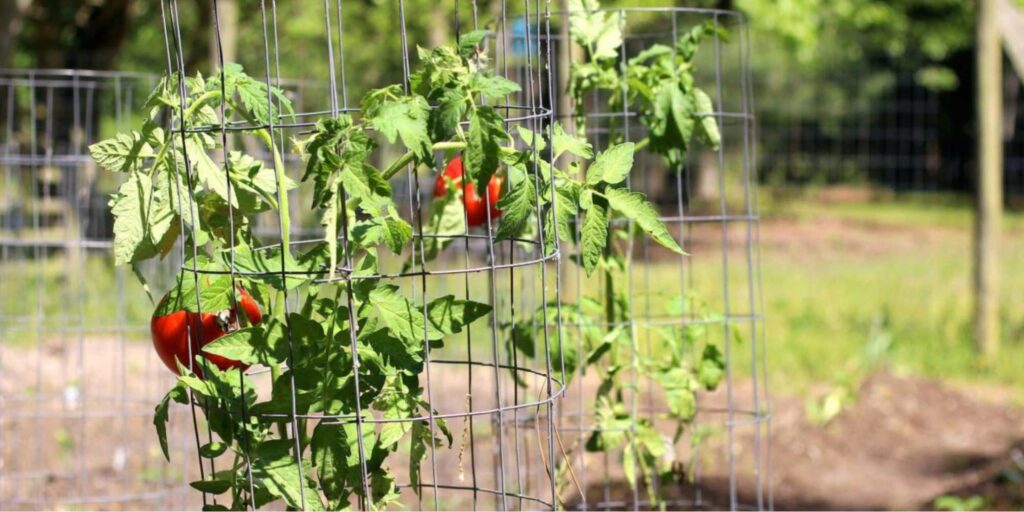
Purchasing the necessary materials is not always necessary. Use wire mesh, nets, and hanging shoe organizers as ways to decorate outside of the creative thinking box!
How to Make Vertical Gardens
1. Choose the right location.
Make sure that the spot has the ideal amounts of light, humidity, and temperature.
2. Pick the right plants.
For indoor vertical gardens, go for low-light plants like pothos, philodendrons, and ferns. You have more leeway if you’re planning to decorate outdoor spaces but you still need to think of the seasons and climates – and when to bring the plants inside.
3. Plan the layout.
For your vertical base support, you can use repurposed pallets, pocket planters, or wall-mounted planters. Depending on your available space, arrange your plants to make sure they’re easy to water and prune.
4. Care for your plants.
Given how quickly water drains from vertical gardens, they need more watering than those in the ground. To keep your plants well-hydrated, set up an irrigation system or stick to a regular watering schedule.
Of course, you can decorate with whimsical little sculptures, colorful pots, or decorative stones. Just keep an eye out for overgrowth, pests, and indications of stress in plants to help your little green friends out.
Prune and trim your plants as needed. For example, take off dead or damaged parts with clean and sterile tools to avoid contamination and spread.
2. Terrariums
| Factors | Information or Description |
| Expertise Level | Easy ●○○○○ |
| Materials Needed | Clear glass or plastic container with a lid Small stones or pebbles Activated charcoal Well-draining potting soil Small plants Decorative elements |
| Application | Indoors |
| Estimated Costs | Costs are typically budget-friendly, varying with plant and decor choices |
| Possible Risks | Overwatering Mold growth Unhealthy plant maintenance |
Terrariums are a prime example of big things coming in little packages. With just a little upkeep and care, you can cultivate plants inside these glass containers and view their little worlds like a plant-loving giant!
Not only are these self-contained miniature ecosystems low maintenance, but they also save a ton of space. An additional advantage is that terrariums let you show off your artistic side as a gardener.
How to Make Terrariums
1. Pick your container.
Select a clear glass or plastic container with a lid. Options that work well are glass jars, vases, or even fish tanks.
2. Layer the base.
Layer small stones or pebbles at the bottom. Doing this drains the water and prevents it from accumulating in the soil itself and causing root rot.
3. Use activated charcoal as a dressing.
Add a thin layer of activated charcoal. This will keep the terrarium fresh since it absorbs impurities and discourages odors.
4. Add the right potting soil mix.
Cacti and succulents need a sandy mix while ferns and tropical plants prefer a more moisture-retentive blend.
5. Pick your plant.
Choose small plants that grow well within a closed terrarium environment. Good options are succulents, air plants (Tillandsia), moss, and miniature ferns.
Arrange them inside the container according to your fancy. You can decorate your terrarium with anything you like – small figurines, decorative stones, or pieces of driftwood.
5. Water the terrarium sparingly.
After planting, water your terrarium by using a spray bottle to mist the plants and soil lightly. Don’t overwater because too much water inside can lead to mold growth.
6. Seal the container.
Once everything is in place, seal the container with its lid. This creates a self-contained ecosystem.
Over time, the water cycle within the terrarium will provide the needed moisture. This makes the whole terrarium low maintenance, functional, and highly decorative.
3. Windowsill Gardens
| Factors | Information or Description |
| Expertise Level | Easy ●○○○○ |
| Materials Needed | Suitable containers with drainage holes Potting mix Plants of your choice |
| Application | Indoors |
| Estimated Costs | Costs are generally budget-friendly |
| Possible Risks | Overwatering Pests Disease |
You don’t need a big backyard or a large living area to have your own garden. Windowsill gardens are perfect for those with limited space but big on gardening goals and dreams.
With a windowsill, some creativity, and a bit of greenery, you can turn your living space into a small oasis!
How to Make Windowsill Gardens
1. Examine your windowsill’s natural light.
South-facing windows get the most sunlight, east and west-facing provide moderate light, and north-facing windows are best for low-light plants.
2. Select pots or containers that fit your windowsill and have drainage holes.
You can use individual pots or a long planter box for a continuous garden.
3. Pick plants suited to the light conditions.
Sunny spots work for herbs like basil, chives, and parsley, while lower light is ideal for snake plants, pothos, and ferns.
4. Use a well-draining potting mix that’s suitable for your chosen plants.
Make sure your containers have saucers to catch excess water.
5. Place your pots on the windowsill to maximize sunlight.
Taller plants can go at the back and shorter ones at the front.
6. Provide the right amount of care and maintenance.
Water your plants as needed, avoiding overwatering. Look for pests or diseases, and trim or prune as necessary for healthy growth.
You can add decorative stones, colorful pots, or small figurines to make everything more attractive.
4. Plant Ladders
| Factors | Information or Description |
| Expertise Level | Easy ●○○○○ |
| Materials Needed | Chosen ladder (wooden, metal, or bamboo) Shelves Various plants Decorative accessories |
| Application | Indoors, outdoors |
| Estimated Costs | Costs vary based on the ladder and plant choices, typically budget-friendly |
| Possible Risks | Overwatering Plant stress Pests |
Plant ladders or stands can be a stylish way to display your greenery. These come in various designs and can fit neatly in the corner of your room, on a balcony, or even in a bathroom!
With that space, you’ll be able to hang not just plants. Think about decorating your plant ladder with books, figurines, or even some trinkets and jewelry.
How to Make Plant Ladders
1. Pick the right ladder.
Choose a ladder that suits your space and style. Try going for a wood ladder for a rustic feel or metal or bamboo for a more modern look.
2. Prepare the shelves.
If your ladder doesn’t have built-in shelves, you can just attach strong wooden planks or decorative boards as shelves.
3. Select your plants.
Choose plants that grow well in your location and fit on the ladder shelves. Mix and match different plant sizes, shapes, and colors to make things interesting.
4. Arrange your plants.
Bigger plants should be at the bottom and smaller ones should be at the top. Use ornamental pots, hanging baskets, or garden accessories to spruce up and personalize the appearance of your ladder.
Water, tend to, and inspect your plants on a regular basis for pests, overgrowth, or signs of stress.
5. Macramé Plant Hangers
| Factors | Information or Description |
| Expertise Level | Easy ●○○○○ |
| Materials Needed | Macramé hanger of your preferred length Ceiling hook or wall hook Drill or screwdriver Measuring tape Potted plant of your choice |
| Application | Indoors, outdoors |
| Estimated Costs | Affordable, with variations based on material and design |
| Possible Risks | Minimal risks |
Embrace the bohemian artistry in knots! Macramé plant hangers are handcrafted with precision, showcasing the artistic potential of simple materials like cord or jute.
You can hang them from the ceiling, on walls, or in front of windows. Let your plant take center stage while you get to keep your precious space!
How to Install Macramé Plant Hangers
1. Decide where you want to hang your macramé plant hanger.
You have the option whether to hang it from the ceiling or a wall. Ensure the spot gets enough light and is suitable for your plant.
2. Measure the distance from the floor or ceiling to where you want the hanger.
This measurement will help you figure out how long the hanger should be.
3. Choose the right macramé hanger.
Higher ceilings look great with longer hangers that cascade downward. Smaller spaces work well with shorter hangers.
Select a material that blends in with your interior design and the surrounding humidity levels. Jute is a great material for outdoor use, but cotton or synthetic materials are good for indoor plants.
4. Install the hook.
If you’re hanging it from the ceiling, use a ceiling hook. For a wall, use a wall hook.
If there’s a ceiling joist or wall stud there, screw the hook directly into it. If not, use a wall anchor or toggle bolt for support.
5. Hang the macramé plant hanger.
The macramé plant hanger should be hung from the hook once it has been placed there. Check that it’s level and in the middle.
Many plant hangers made of macramé have loops or knots that can be adjusted to fit a variety of pot sizes. Check to see that the plant is at your ideal hanging level.
6. Put your potted plant into the hanger.
Make sure it is securely fixed and centered on the hanger. Gently pull on the hanger to confirm it is securely anchored and make sure the tree is level and not swaying too much.
Occasionally, check the hook and bracket for signs of wear or looseness and adjust if necessary.
FAQs
To add a touch of green to your small kitchen without sacrificing counter space, try growing a hanging herb garden. Hanging herb pots or mason jars with fresh herbs near a sunny window also gives you a chance to harvest them for your cooking needs.
Some creative ways to incorporate plants into a small bathroom decor are to place small potted plants or succulents on floating shelves, on the bathroom vanity, or even hang air plants in decorative holders.
Just make sure that the chosen plants can tolerate the bathroom’s humidity levels and limited natural light.
To maintain a clutter-free look while adding plants to a small space, choose a minimalist approach. Use a color palette within the same range for pots and decor to create a visually cohesive look.
Grouping plants together in an organized and balanced placement is better than scattering them around. Also, check your plant collection regularly and consider plant swaps or gifts to friends to avoid overcrowding.
Some pet-friendly plant options for small living spaces are the Boston fern, bamboo palm, or spider plant, which are non-toxic to cats and dogs. Make sure the plants are placed out of reach to prevent curious pets from nibbling on them.


