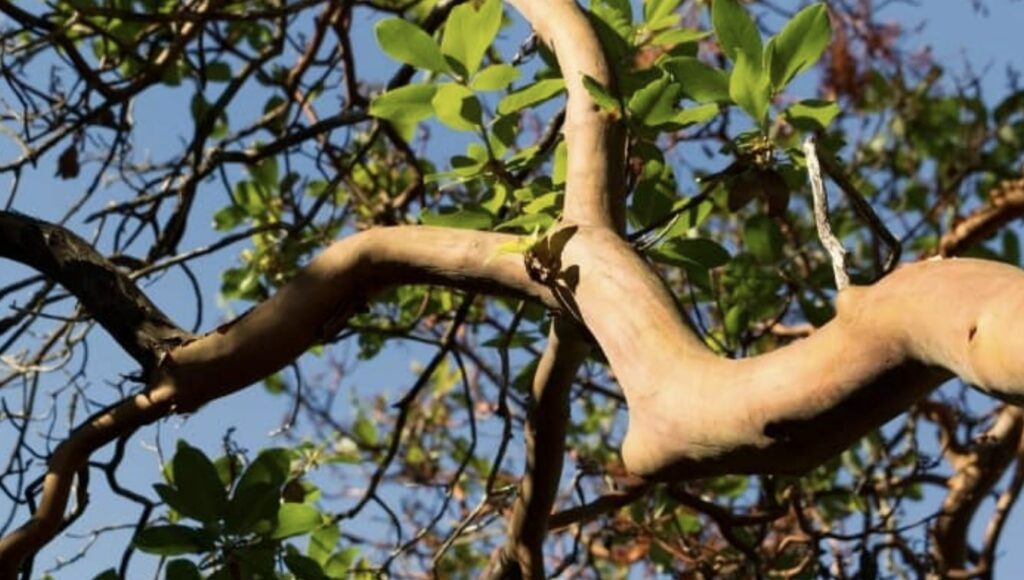

Dramatic, mysterious, and majestic, the weeping willow tree is brimming with lore and legend. While Native Americans associate it with good fortune, other cultures believe it brings grief.
Whether you believe in superstitions or not, you might need to take out this willow tree to make room for better things in your home. Let’s explore the wide range of methods for bidding farewell to your weeping willow!
How to Kill a Weeping Willow Tree
Foliar Spray

| Difficulty | Beginner ●○○○○ |
| Estimated Time for Tree to Die | Several applications |
| Ideal Tree Size | Small to large |
| Things You Need | Personal protective equipment Herbicide of choice Spray or preferred applicator |
So, you want to give your plants a little spritz of goodness? Foliar spraying is your go-to move! It’s a fancy way of saying you spray liquid stuff, like fertilizers, insecticides, or herbicides, directly onto those green leaves.
This technique lets the plants soak up the sprayed solution through their foliage, giving them a speedy dose of nutrients or active ingredients right where they need it!
How to Apply Foliar Spray
• Prepare the herbicide solution.
Dilute the substance of your choice following the product instructions or recommended rates. Grab clean water and make sure to mix the solution thoroughly, ensuring an even dispersion of the active ingredients.
• Select the spraying equipment.
Consider the size of the area and the type of solution you’re using to determine the ideal sprayer. For small areas, handheld pump sprayers work wonders, while backpack or knapsack sprayers are suitable for larger areas.
Always ensure that your sprayer is clean and in good working condition.
• Adjust the sprayer settings.
Fine-tune the nozzle or sprayer settings to achieve a fine mist or spray pattern that provides consistent coverage on the plant’s foliage. This way, you’ll maximize absorption and minimize any wasteful runoff.
• Start spraying the leaves.
Commence spraying by starting from the lower leaves and gradually working your way up. Ensure all surfaces receive an even coat of the solution, but be cautious not to overdo it with excessive dripping or runoff.
Pay special attention to the undersides of the leaves, as they tend to have more stomata, also known as the pores of the leaves, for better absorption.
• Cover the entire plant with the spray.
Remember to spray all parts of the plant, including the stems, branches, and new growth. Be meticulous in your coverage but avoid saturating the plant excessively. Overloading it may lead to runoff or potential damage.
• Clean up and properly dispose of any debris or excess materials.
After you finish spraying, it’s crucial to clean the sprayer thoroughly. This helps prevent cross-contamination or the buildup of residual chemicals.
Dispose of any leftover solution or rinse water following local regulations to ensure responsible and environmentally friendly practices.
Planter’s Tip: Just a quick heads-up: not all substances are cool for foliar spraying. It really depends on the plant, its condition, and why you’re spraying it.
Cut Surface Treatment

| Difficulty | Beginner ●○○○○ |
| Estimated Time for Tree to Die | Several applications |
| Ideal Tree Size | Small to large |
| Things You Need | Personal protective equipment Herbicide of choice Sprayer or preferred applicator |
Cut surface treatment with herbicide is like giving a final goodbye to a tree that has been chopped down. You know, just making sure it doesn’t sprout back up like a pesky weed!
How to Perform Cut Surface Treatment
• Cut the tree.
Utilize a chainsaw or an appropriate cutting tool to remove the tree as close to the ground as possible. Aim for a clean and smooth cut to maximize the surface area available for herbicide application.
• Apply the herbicide.
Once the tree is cut, prepare the herbicide according to the manufacturer’s instructions. Some herbicides are ready-to-use, while others require dilution with water.
Fill a spray bottle or use a brush to directly apply the herbicide onto the entire cut surface of the stump.
Ensure thorough coverage, paying special attention to the outer edges of the cut as they tend to have more active tissue for absorption.
• Allow some time for absorption and decomposition.
The herbicide will gradually be absorbed into the tree’s vascular system, effectively eliminating the remaining portions of the tree, including its roots.
As a result, the tree stump will naturally decay over time due to the herbicide’s effects.
• Monitor and perform additional applications.
Regularly monitor the stump for any signs of regrowth or sprouting. Should any new shoots or suckers emerge, promptly remove them and reapply the herbicide to the fresh cuts.
Repeat this process as necessary until complete eradication of the stump and root system is achieved.
Planter’s Tip: When it comes to dealing with herbicides, it’s important to keep things safe and follow the guidelines. Make sure to properly dispose of any leftover herbicide or empty containers in accordance with your local regulations.
Basal Bark Treatment

| Difficulty | Intermediate ●●○○○ |
| Estimated Time for Tree to Die | Several weeks to months |
| Ideal Tree Size | Small to medium |
| Things You Need | Personal protective equipment Herbicide of choice Sprayer or preferred applicator |
Basal bark treatment is a pretty popular method for getting rid of those stubborn woody plants, you know, like those weeping willows that just won’t quit.
Basically, what you do is apply some herbicide right onto the tree’s bark, focusing on the lower stem or those shoots close to the ground. The bark acts like a sponge and soaks up the herbicide, which then gets carried throughout the tree’s vascular system.
And voila! The plant gets the message loud and clear: time to say goodbye! It’s a real plant killer, in a good way, of course.
How to Do Basal Bark Treatment
• Prepare the herbicide mixture.
Follow the product instructions to prepare the herbicide mixture. Typically, this involves mixing the herbicide with a suitable carrier oil or diesel fuel.
The carrier aids in adhering the herbicide to the tree’s bark, improving absorption.
• Apply the herbicide to the base of the tree.
To apply the herbicide mixture, utilize a low-pressure sprayer or a paintbrush. Direct the treatment towards the lower portion of the weeping willow’s trunk, branches, or shoots near the ground.
Ensure comprehensive coverage of the bark while avoiding excessive runoff or unintended contact with non-target plants.
• Wait for the herbicide to fully absorb.
The herbicide will be absorbed through the bark, subsequently traveling to the roots and other parts of the tree, effectively eliminating the weeping willow.
Allow sufficient time for the herbicide to take effect, which typically ranges from a few weeks to a bit longer.
• Monitor and follow up with repeat treatments as needed.
Regularly monitor the treated weeping willow for any signs of decline, such as wilting or browning leaves. If necessary, perform a repeat basal bark treatment on any new shoots or sprouts that may emerge to ensure thorough control.
Planter’s Tip: Herbicides can actually have some impact on the environment, so it’s pretty important to play by the rules and follow local regulations. Being responsible with herbicide use is key, especially when it comes to removing trees.
Chemical Injection

| Difficulty | Intermediate ●●●○○ |
| Estimated Time for Tree to Die | Several weeks to months |
| Ideal Tree Size | Small to large |
| Things You Need | Personal protective equipment Herbicide of choice Chemical injection system |
You know you’ve got a pesky tree that’s causing some serious trouble. You want to get rid of it, but chopping it down or spraying it with some random chemicals just won’t cut it.
That’s where chemical injection steps in, like a superhero with a secret weapon. It’s a popular method for targeted tree control and management.
How to Do Chemical Injections
• Prepare the area for the activity.
Before injecting the herbicide, prepare the tree by removing any loose bark or debris from the injection site. Clean the area surrounding the injection points to ensure optimal contact between the herbicide and the tree’s vascular system.
• Insert the injection probes or needles into the tree.
Insert the injection probe or needle into the tree trunk at the chosen injection points. Typically, these points are evenly spaced around the circumference of the trunk, a few inches apart.
Push the probe or needle into the trunk until it reaches the desired depth, ensuring it is securely positioned.
• Inject the herbicide.
Using the syringe or pressurized device, administer the herbicide to the injection point. The herbicide will be absorbed into the tree’s vascular system and transported throughout, effectively terminating the tree.
Follow the manufacturer’s instructions regarding the appropriate dosage and volume of herbicide to be injected.
• Monitor for results.
After chemical injection, monitor the tree to evaluate the effectiveness of the treatment. Depending on the tree’s size and health, it may take some time for the herbicide to completely eliminate the tree.
Watch for signs of decline, such as wilting leaves or lack of new growth.
Girdling or Ring Barking

| Difficulty | Intermediate ●●●○○ |
| Estimated Time for Tree to Die | Several months |
| Ideal Tree Size | Small to medium |
| Things You Need | Personal protective equipment Saw or chainsaw |
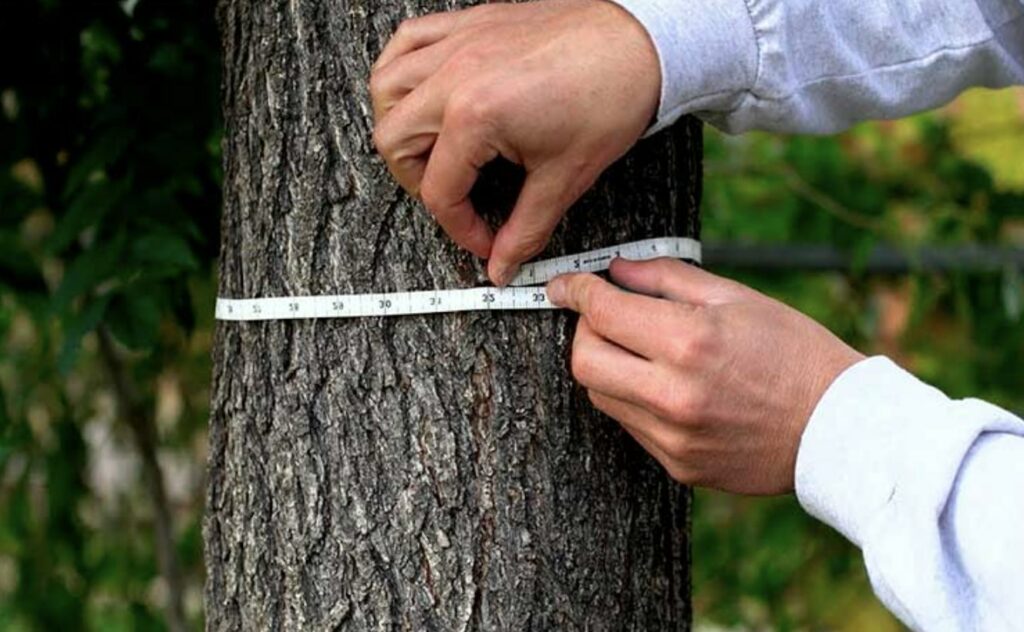
Girdling, or ring barking as the tree experts like to call it, is a sneaky way to give a tree a one-way ticket to the afterlife. It’s all about cutting off the tree’s nutrient and water supply by taking out a circular strip of bark around its trunk.
This little sabotage act severs the tree’s fancy vascular system, and before you know it, the poor thing starts waving its leafy branches in surrender. So, let’s dive into the nitty-gritty of this process, shall we?
How to Perform Girdling or Ring Barking
• Select the girdling location.
Choose a strategic spot on the trunk that will have the greatest impact. It’s generally recommended to make the cut a few inches above the ground or just below the lowest branch.
Look for a smooth section of the trunk without any previous wounds or scars.
• Make the cut.
Using your sharp knife or chisel, make a clean, horizontal cut into the bark and the underlying cambium layer.
Ensure the cut encircles the entire circumference of the trunk, creating a continuous strip of bare wood that is approximately 1 to 2 inches wide. Take care to avoid damaging the inner wood or creating a jagged or uneven cut.
• Remove the bark and cambium.
After the initial cut is made, carefully use your pruners or saw to remove the strip of bark and cambium layer along the girdling line.
It’s crucial to completely remove the bark, exposing the inner wood and preventing any chance of reconnection between the two sides.
• Monitor and follow up.
Once girdling is complete, it’s important to monitor the tree regularly for signs of decline. Gradual wilting and yellowing of leaves should become apparent over time as the tree’s nutrient supply is cut off.
Keep in mind that the tree’s complete demise may take several months to a year, depending on its size and overall health.
.
Stump Grinding

| Difficulty | Intermediate ●●●○○ |
| Estimated Time for Tree to Die | Immediate |
| Ideal Tree Size | Small to large |
| Things You Need | Personal protective equipment Saw or chainsaw |
Stump grinding is like the superhero of tree stump removal. It’s the go-to method when you want those pesky stumps gone without breaking a sweat. So, here’s the lowdown on how it works and how you can become a stump-grinding master.
How to Do Stump Grinding
• Assess the tree stump.
Before you begin the stump grinding process, it’s important to assess the size, condition, and location of the stump. Make sure there is sufficient space around the stump for safe maneuvering of the stump grinder.
• Clear the area.
Eliminate any rocks, stones, or other objects surrounding the stump that could potentially damage the grinding teeth of the machine.
• Position the grinder.
Place the stump grinder next to the stump, ensuring that the cutting wheel is directly above the stump and positioned at the appropriate angle for effective grinding.
• Begin grinding.
Gently lower the cutting wheel onto the stump surface, allowing the teeth to make contact and grind through the wood. Move the cutting wheel back and forth and from side to side to ensure consistent grinding.
Gradually work your way down into the stump, continuing the grinding process until the entire stump and major roots are ground below ground level.
• Remove the wood chips.
As you grind the stump, wood chips and debris will accumulate. Use a rake or shovel to periodically clear away the wood chips, exposing the stump and facilitating easier grinding.
• Check your progress.
Regularly evaluate the depth of the grinding to ensure the stump is being ground to the desired level. Adjust the cutting depth of the grinder as needed.
• Clean up after.
Once the grinding is complete and the stump is ground below ground level, clear any remaining wood chips and debris from the area. Consider using the wood chips as mulch or dispose of them properly.
Digging and Excavation

| Difficulty | Advanced ●●●●○ |
| Estimated Time for Tree to Die | Immediate |
| Ideal Tree Size | Small to large |
| Things You Need | Personal protective equipment Shovel or spade Additional tools, as needed Excavators or backhoes |
Getting rid of pesky tree stumps often calls for a bit of digging and excavation. Basically, we’re talking about digging up soil, rocks, and stuff to make way for cavities, trenches, or holes in the ground.
How to Dig and Excavate Trees
• Prepare the site.
Before commencing the excavation, clear the designated area of any debris, vegetation, or obstructions that may hinder your progress. Ensure a clean, unobstructed workspace to facilitate efficient digging.
To define the boundaries or dimensions of the excavation area, use stakes or marking paint. This step helps maintain accuracy and ensures that you stay within the desired parameters.
These may include reinforcing the excavation site with shoring techniques or using trench boxes to provide stability and prevent accidents.
• Break the surface ground using a shovel or spade.
Remove the topsoil or vegetation layer to expose the underlying soil.
• Gradually dig deeper, employing suitable tools to remove soil or other materials.
For larger-scale projects, excavators or backhoes can significantly expedite the process.
• Maintain the sides of the excavation at a safe angle to prevent potential collapses.
The angle should be determined based on the soil type and its stability.
• Adjust accordingly to ensure a secure working environment.
In the event of encountering rocks or other hard materials, employ picks, jackhammers, or specialized excavation equipment to break them up and remove them safely.
• Dispose and backfill the hole.
Dispose of the excavated material in accordance with local regulations. Adhere to proper waste management practices, whether it involves arranging for removal, recycling, or reusing the material on-site for backfilling.
If necessary, backfill the excavated area with appropriate materials. Compacting each layer as you progress ensures stability and minimizes the risk of settling.
• Check the area after the excavation.
After completing the excavation, carefully inspect the area for any potential hazards or issues. Look out for uneven surfaces or water accumulation, addressing any concerns promptly to maintain a safe environment.
If the excavation is part of a larger project, proceed with the subsequent steps accordingly. This may involve construction, landscaping, or the installation of utilities.
Stay organized and maintain a clear plan for seamless project progression. Remember to consider local regulations, safety guidelines, and any specific requirements related to your excavation project.
Controlled Burning

| Difficulty | Advanced ●●●●○ |
| Estimated Time for Tree to Die | Immediate |
| Ideal Tree Size | Small to large |
| Things You Need | Personal protective equipment Permits, as needed Approved and appropriate ignition materials |
Controlled burning is like playing with fire, but in a responsible way. Instead of going all wild and reckless, controlled burning is a management technique where we set fires intentionally under super careful conditions.
We do this to achieve specific goals like taking care of the environment or managing land. You can find this happening in forests, grasslands, and even wetlands.
It’s all about keeping the ecosystem healthy, controlling vegetation, and making sure things don’t go up in flames uncontrollably!
How to Do Controlled Burning
• Ignite the materials.
Use specialized ignition tools like drip torches, flares, or handheld devices to ignite the fire along the firebreaks or in designated areas. Ensure that the ignition process is conducted safely and responsibly.
During the ignition phase, closely monitor the fire to ensure it remains within the designated burn area. Promptly address any unexpected developments or issues that may arise.
• Monitor the fire.
Continuously monitor the behavior of the fire throughout the burning process. Make adjustments as necessary to achieve the desired results and maintain control.
Employ tactics such as backing fires or head fires strategically to control the spread and intensity of the fire. This helps to manage the fire effectively and steer it in the desired direction.
Utilize firefighting techniques and equipment, such as water hoses, hand tools, or specialized gear, to manage and control the fire if needed. Maintain a vigilant stance throughout the burn operation.
• Conduct post-burn activities.
After the fire is extinguished, continue monitoring the burn site to ensure there are no reignitions or hotspots that could potentially lead to uncontrolled fires.
Perform post-burn assessments to evaluate the effectiveness of the burn in achieving the management objectives set forth in the plan. This assessment helps in understanding the outcomes and planning future actions.
Implement necessary post-burn actions, such as erosion control or habitat restoration, to mitigate any potential negative impacts and restore the area to its desired condition.
Prioritize the long-term well-being of the ecosystem and the surrounding environment.
Planter’s Tips: You want to bring in the relevant agencies, landowners, and stakeholders to make sure everyone’s on the same page and working towards the same goals. It’s like a choreographed dance, but with fire. Okay, maybe not as elegant, but you get the idea. By working together and following these guidelines, we can ensure that controlled burns are a success. Safety first, and let’s make sure we’re all playing nice with Mother Nature!
Will a willow tree grow back from a stump?

A willow tree, including a weeping willow, has the ability to regrow from a stump if the stump is not properly treated or removed.
Willow trees have a knack for sprouting new shoots and roots, which can lead to regrowth if not handled properly. If you want to prevent regrowth from a stump, there are a few steps to follow.
For complete stump removal, dig out the stump along with its root system to eliminate any potential sprouting points. If complete removal isn’t possible, grind the stump below ground level using a stump grinder to minimize the chances of regrowth.
Right after cutting down the tree, apply a suitable herbicide to the fresh stump as per the manufacturer’s instructions. This herbicide will seep into the tree’s vascular system and prevent regrowth.
By combining these methods, you significantly decrease the likelihood of a willow tree regrowing from a stump.
However, keep in mind that willows are tenacious trees, so it’s important to monitor the area and promptly treat any regrowth with appropriate herbicides.
How To Kill A Willow Tree Stump

| Difficulty | Advanced ●●●●○ |
| Estimated Time for Tree to Die | Immediate |
| Ideal Tree Size | Small to large |
| Things You Need | Personal protective equipment Permits, as needed Approved and appropriate ignition materials |
How to Kill a Willow Tree Stump
• Trim down the stump.
First, grab your chainsaw or a cutting tool. Give that stump a major cut by cutting it down to ground level.
• Drill deep holes in the stump.
Take your drill and bore deep holes all around the stump. The goal is to create openings for the next step.
• Prepare the herbicide.
Select the right herbicide and follow the instructions provided by the manufacturer meticulously.
• Apply the herbicide.
Fill the drilled holes with the herbicide, ensuring that it penetrates deeply into the core of the stump. Pay attention to the exposed surface as well, and generously apply the herbicide.
• Cover the stump.
To protect the stump from rain and prevent dilution or interference from sunlight, cover the stump with a plastic sheet or tarp. Secure it in place using rocks or bricks.
Alternatively, if you prefer an eco-friendly approach, you can cover the stump with a thick layer of mulch or wood chips. This will also slowly and steadily decompose the stump over time.
• Monitor, act, and adjust accordingly.
Keep a close eye on the stump and regularly check for signs of decay or sneaky regrowth. If any new sprouts dare to appear, promptly snip them off and reapply the herbicide to the fresh wounds.
Planter’s Tips: Keep at it until that stump is nothing more than a memory. Follow the rules when handling herbicides, suit up with protective gear, and dispose of any leftovers responsibly. Remember, patience is a virtue when you’re plotting the demise of a willow tree stump. It might take some time, but with determination, you’ll have that stump waving the white flag in no time.
Will salt kill willow trees?

Salt can kill willow trees but it comes with some important considerations and potential drawbacks.
While it can work, there are a few things to keep in mind – like avoiding soil devastation and upsetting the neighborhood water supply. Salt turns the soil into a no-go zone for most plants, including those you might actually want to grow later on.
Plus, it’s not exactly a friendly gesture to the local ecosystem. Now, the effectiveness of this salty strategy depends on various factors, such as salt concentration, tree size, and environmental conditions.
The little guys are more likely to feel the burn, while the big, tough ones might just shrug it off. If you still want to unleash the salt, you’ll need to mix up a concentrated solution and shower it around the tree’s root zone.
But here’s the catch: watch out for collateral damage! Other innocent plants and tiny critters nearby might not appreciate the salty shower, so aim carefully.
Oh, and patience is key here. This salt attack is no quick fix as it takes time for the salt to work its mojo and mess with the tree’s growth.
Multiple applications and a bit of waiting around may be necessary, but remember, there are no guarantees in the salty business.
Will copper nails kill a willow tree?

Copper nails don’t always kill a willow tree. The use of copper nails as a method to kill a willow tree is a common belief, but it is not a reliable or effective approach.
So, if you’re serious about saying goodbye to that willow, better stick to proven methods like cutting it down and giving the stump a proper treatment or physically giving it the boot.
And hey, remember to handle those copper nails with care. If in doubt, call in the tree experts to make sure you’re taking the most effective and responsible route.
FAQs
The best way to kill a willow tree stump is a combination of methods that include cutting the stump as close to the ground as possible, drilling holes into the stump, and applying a suitable herbicide according to the manufacturer’s instructions.
Finally, monitor for regrowth and repeat treatments as needed.
You should cut down your weeping willow if the tree poses safety hazards or causes significant damage. Consult with a professional arborist to assess the specific situation.
The roots of the weeping willow tree can be invasive. They have a tendency to spread widely and aggressively, seeking moisture and nutrients.
It is important to consider this when planting a weeping willow near structures or underground utilities.
Vinegar alone will not kill willow trees. While vinegar can have herbicidal properties, it is generally not strong enough to effectively kill established trees, including willows.
Vinegar may be more effective for smaller plants or weeds.
Herbicides containing active ingredients such as glyphosate or triclopyr are commonly used to kill willow trees. These herbicides are systemic, meaning they are absorbed by the tree and transported throughout its vascular system, effectively killing the tree.
It is important to carefully follow the instructions and safety precautions when using herbicides.