
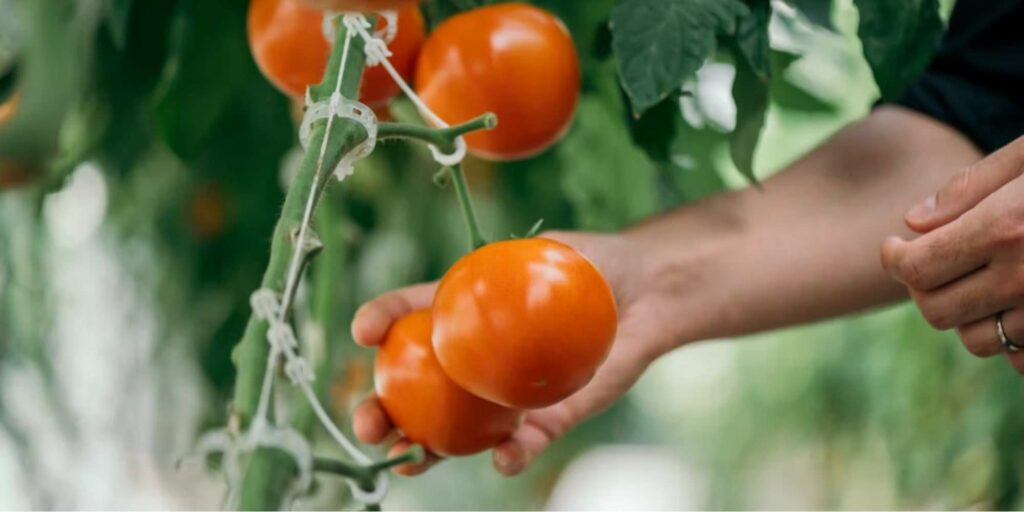
Thinking about raising your gardening game? Aside from looking spectacular, growing your tomato plants in raised beds actually brings a ton of benefits.
From warmer soil to encouraging better root developments, raised beds are many gardeners’ favorite way to grow tomatoes and various other vegetables.
Here, we’ve jotted down everything you need to know about growing your tomato plants in raised beds.
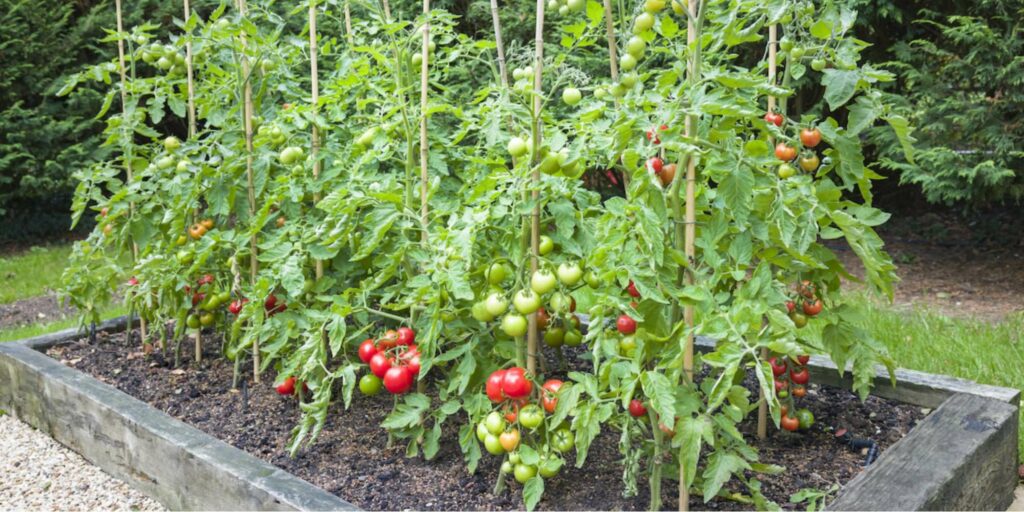
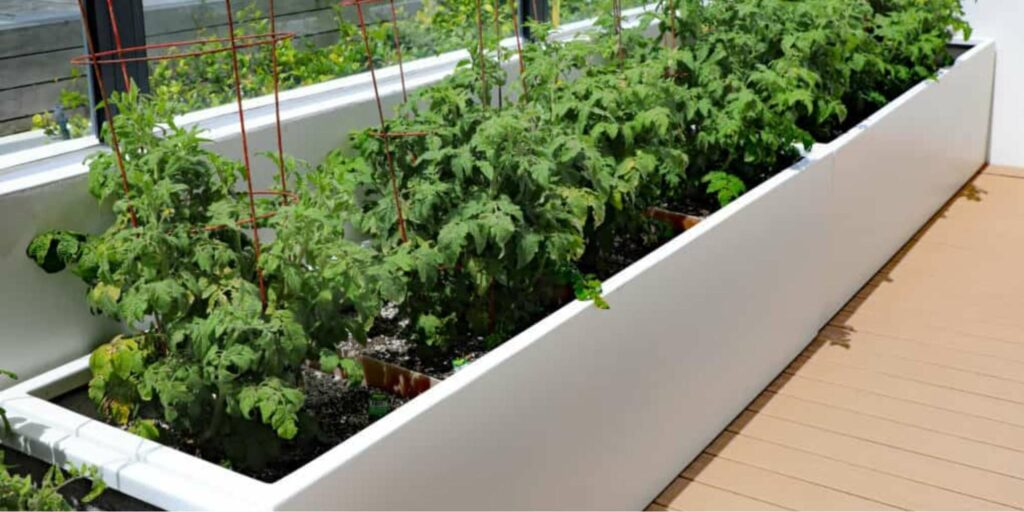
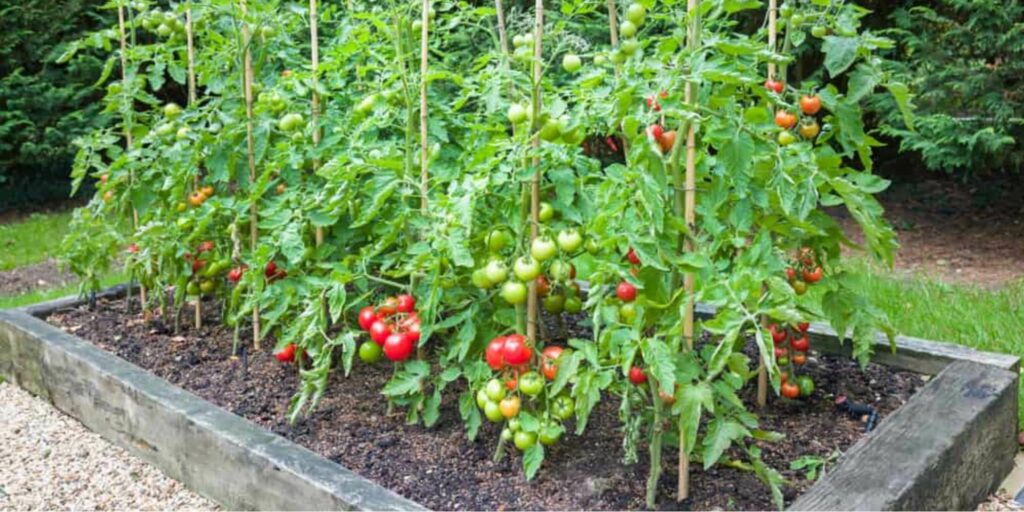
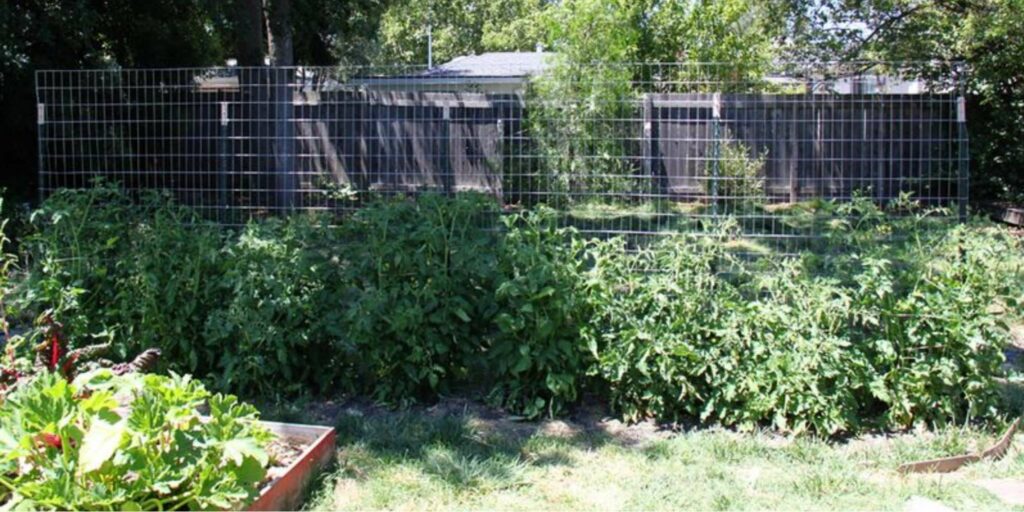
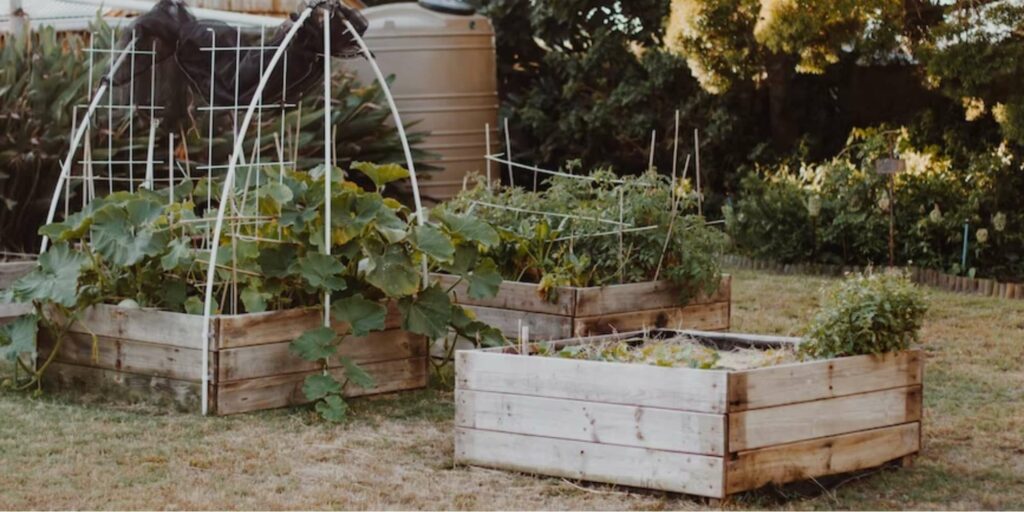
Tomato Raised Beds
Raised beds are deep, enclosed structures that give gardeners the most control of the soil they use for their plants.
You can fill it up with various nutrient-rich soils, compost, and manure, among others. Hence, raised bed gardening is mostly done for plants, such as tomatoes, that are heavy feeders.
Benefits of Growing Tomato Plants in Raised Beds
Aside from looking pretty in your garden, using raised beds to grow your tomato plants brings about a ton of benefits.
1. Warmer Soil in Spring
Did you know that the soil in raised beds actually warms up faster come springtime in comparison to soil in the ground? This is made possible because the top and the sides of the bed are exposed to more sunlight.
Unlike soil in the ground, they only rely on the heat of the sun from the topmost half. Hence, it takes a longer while for the entire in-ground plot to warm up.
In fact, you’ll notice that your raised beds will actually thaw quicker in comparison to in-ground soil come spring time if you pay close attention to your garden.
However, this also means that raised beds are the first to get cold come fall and winter. This is because more soil is exposed to the cold winds.
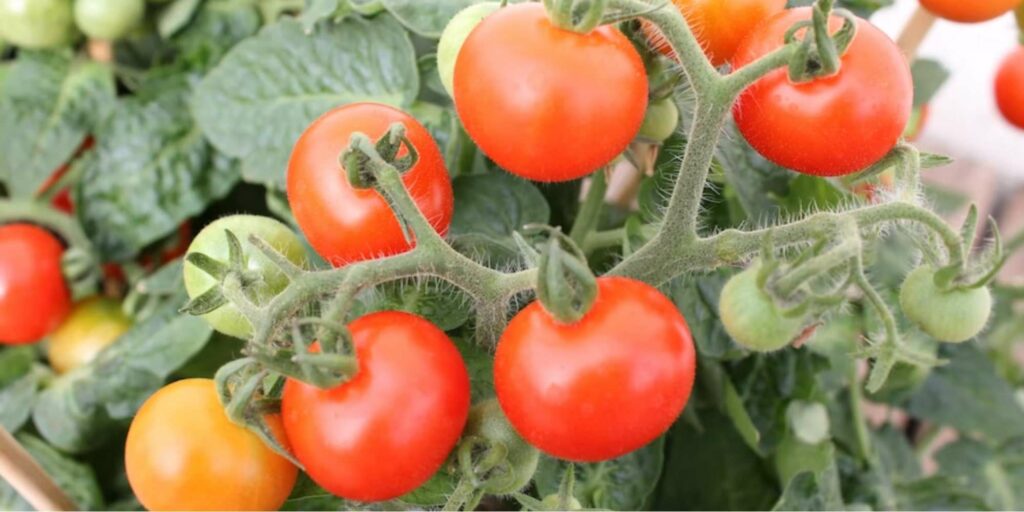
Nevertheless, warmer soil in the springtime time is great news for tomato plants as they’re heat-loving plants. This also means that they can get on with growing fruits quickly.
2. Bespoke Soil Conditions
With a raised bed, gardeners can go crazy with the types of soil and the various layers they’re putting inside.
This is more great news for your tomato plants, which if you didn’t know already, are heavy feeders.
In other words, they require a lot more minerals and nutrients to survive and perform optimally in comparison to other plants.
Aside from fertilizers, a great way to organically provide these is through rich soil. If you’re not sure about how to make the best mix, don’t fret as we’ll dive further into this later.
3. Deeper Root Development

Since raised beds are a lot deeper than in-ground beds, your tomato plants will have a lot more room to develop a healthier and more supportive root system for itself.
Many gardeners can attest to the fact that growing tomato plants is quite challenging, especially since they’re rather finicky.
They require a lot of structural support (don’t worry, we’ll get into more detail on this later!) in order to properly grow upright and alleviate stress from the stem.
Having said that, they need to be planted pretty deeply into the soil. However, the root system that your tomato plant will develop will depend on how it was planted.
| Planting Method | Root System |
| Seed | Taproot Root System |
| Cuttings | Fibrous Root System |
If you planted your tomato plant from a seed, it’s most likely going to develop a taproot system. This means that it will have a central, thick root that grows down vertically while several thinner, string-like roots growing sideways, called lateral roots.
Plants that have a taproot system are known to have roots deeply and firmly in the soil. This is because aside from having a dominant root, the lateral roots branch off of one another, giving the plant a thicker and more complex root system.
On the other hand, if you planted your tomato plant from a cutting, then it’s most likely going to develop a fibrous root system. Instead of having a central dominant root, your plant will have several thin and string-like roots similar to the lateral roots.
Regardless of the planting method, tomato plants have adventitious roots. This means that they can grow additional roots along the stem depending on how deeply you’ve planted them.
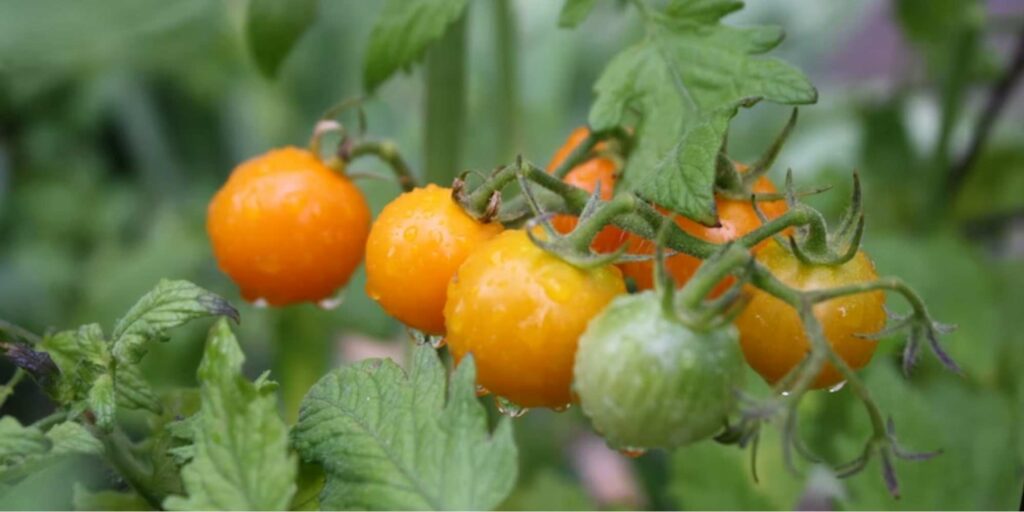
Best Tomato Varieties for Raised Beds
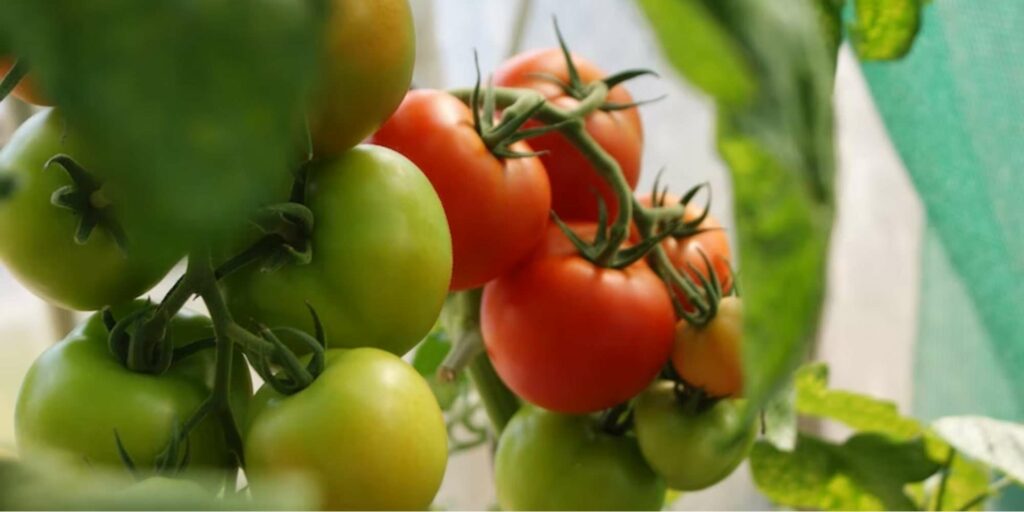
In case you didn’t know, tomato plants come in several different varieties. Hence, it’s important to know the kind of variety you’re growing to best prepare the environment for optimal growth.
Bush Tomatoes or Determinate Varieties
Bush tomatoes or determinate varieties are the kinds of tomato plants that only grow up to a certain height.
Once they start producing fruit, they slow down or completely stop growing to focus on production. That said, they don’t require as much pruning as their counterparts.
More often than not, they don’t grow past 2 to 3 feet, which is also why they’re commonly referred to as dwarf tomato varieties.
Because of their compact size, they’re perfect for growing in small spaces such as a balcony or pot (growing tomatoes in pots).
Here are a few popular determinate varieties that will do great in raised beds:
- Silver Fir
- Zebra Cherry
- Abacka
- Red Robin
- Early Annie
- Tiny Tim
- Fargo
- Andes
Vine Tomatoes or Indeterminate Varieties
Vine tomatoes or indeterminate varieties are, as their name suggests, climbers. Unlike determinate varieties that stop growing after producing fruit, indeterminate varieties keep going.
Having said that, they require a tad more pruning and maintenance as they’ll continue to grow even after bearing fruits.
Nevertheless, being a climbing tomato variety has no negative repercussions as far as using raised beds are concerned.
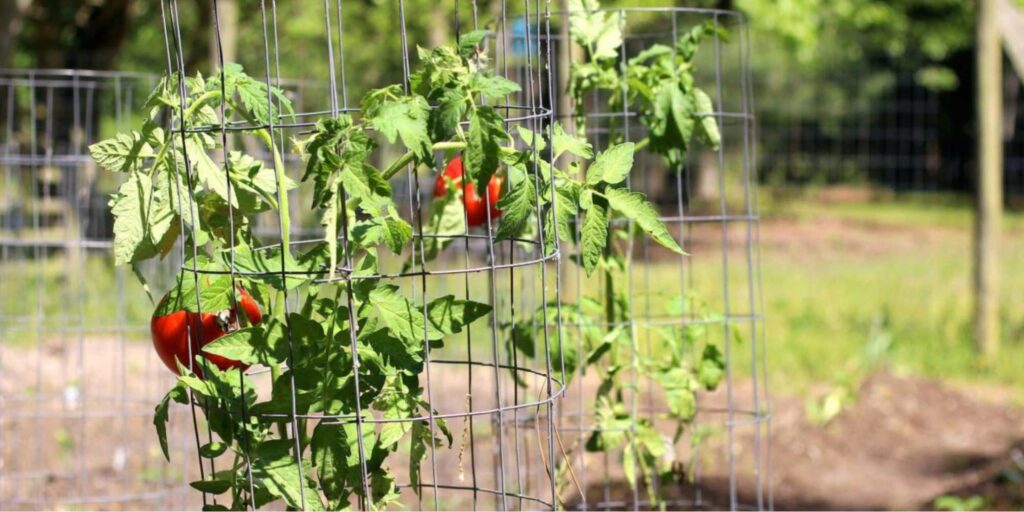
However tall they grow is entirely up to you. On a highly important note, keep in mind that they’re going to require more structural support in the form of stakes or cages (tomato cages).
Here are some indeterminate tomato varieties that will do well in raised beds:
- Alicante
- White Cherry
- Jubilee
- Cabernet
- Picardy
- Geronimo
- Juliet
- Allerbest
- Cabernet
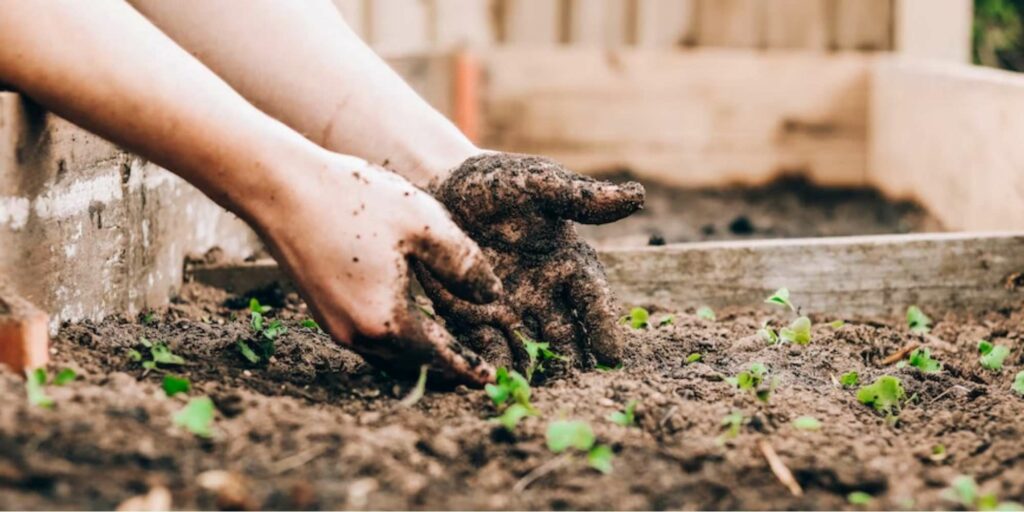
How to Prepare a Raised Bed
Preparing a raised bed is actually easier than it appears to be. As long as you’ve got all your materials ready and an idea of what you want it to look like then you’re halfway there!
Materials
When making a raised bed, you can use countless different materials and styles. With so many options to choose from, it can be quite tricky to pick just one.
There are quite a few things that you need to take into consideration such as durability, rot-resistance, and heat retention among others.
Take a look at our comprehensive guide and rating table on what factors to consider when choosing among the most popular materials for building a raised bed.
| Factors | Cement or Stone | Wood | Galvanized Metal or Steel |
| Cost | OUR 3.5/5 Cement or stone is relatively cheap. | 5/5 In comparison to other popular materials, wood is the cheapest option. | 2.5/5 When it comes to cost, metal or steel raised beds come at quite a hefty price. |
| Durability | 5/5 Concrete and stone are incredibly durable materials. If properly cared for, they can last up to 100 years. | 2.5/5 Wood is relatively durable depending on the quality and thickness. However, it has the shortest lifespan. | 5/5 Galvanized metal or steel are highly durable and damage resistant. They’ll only begin to show minimal signs of damage after about 20 years. |
| Rot resistance | 4.5/5 Cement and stone are relatively resistant to rot. However, its metals inside will begin to corrode over time. | 2/5 Wood will definitely rot, especially since it’ll get wet often. Though, you can apply varnish to seal and protect it. | 5/5 Galvanized metal or steel are both coated with zinc which protects them from corrosion. |
| Weather resistance | 5/5 Since cement and stone are primarily used for construction-related purposes, they’re meant to be weather resistant. | 2/5 Even with a varnish, wood will eventually swell when in consistent contact with liquid and swell due to heat. | 5/5 Galvanized metal and steel are used in a ton of construction projects since they can last gardeners at least 35 years. |
| Heat retention | 5/5 Cement and stone are great at absorbing and retaining heat. Hence, they’ll do a good job at being able to keep the soil of your plant warm. | 1/5 Wood doesn’t retain heat very well. In comparison to metals and concrete, its performance is poor. | 3/5 Galvanized metal and steel are pretty good at retaining heat. While they will heat up rather quickly when it’s hot out, they’ll also cool down quicker in colder temperatures. |
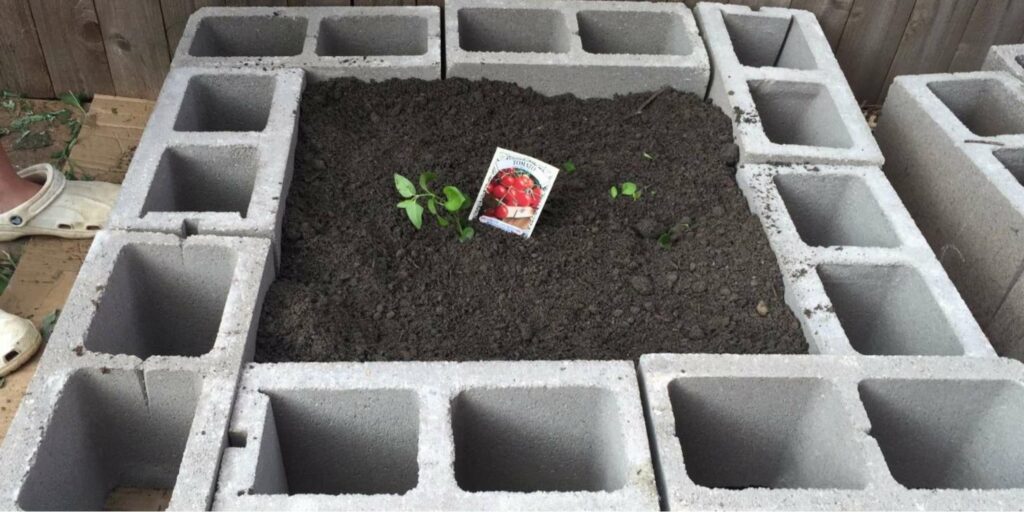
Cement or Stone
Since cement and stone will last you a long while, they’re a great cost-efficient choice because they’re relatively a cheap buy.
They both have great lifespans, to boost. In fact, they’ll most likely outlive many of the plants that it houses.
However, it’s important that you’re aware of the ingredients used in making your blocks. If it contains fly ash, it’s likely that it has mercury, arsenic, and lead, which could contaminate the soil.
To add to these materials’ plusses, because cement and stone are used for construction, they’re rot resistant. So you won’t have to worry about getting them soaking wet.
Though, the only rotting that may occur would be related to the steel reinforcements within the concrete. Nevertheless, you can expect your cement to last quite long.
As for its weather resistant properties, we can say the same thing. They’re also somewhat porous, which helps excess moisture to escape.
They’re also great at absorbing and retaining heat. Their components make them better at trapping heat and keeping your plant warmer in comparison to traditional clay pots.
Wood
In comparison to cement or metal, wood is inarguably the cheapest material. However, they aren’t as durable as other popular materials, which makes wood the least cost-efficient choice.
Though, wood is relatively durable depending on the quality and thickness. Keep in mind that the harder the wood, the stronger it is, hence the longer the lifespan.
Even so, in comparison to other popular materials, wood typically has the shortest lifespan.
There are a couple types of wood that have natural rot resistant properties, which make them an ideal choice for raised beds.
These include:
- Pine
- Cypress
- Cedar
For extra protection, you can also add wood treatments to increase the longevity of your materials.
Unfortunately, the same thing can be said for wood’s water resistant properties. Hence, you’re going to need to apply wood treatments to increase the lifespan of your materials.
You can opt for wood proofing stains or linseed oil. Don’t forget to read the instructions and ingredients carefully to ensure that it isn’t toxic to plants.
However, even if you apply varnish, eventually, your wood will succumb to the elements and rot over time. This is because wood is naturally porous, which makes it swell when exposed to moisture and humidity.
Compared to other materials, wood doesn’t hold heat as well. In fact, it’s generally considered a poor heat conductor.
Apart from that, too much heat will also cause the wood to warp, typically called “thermal expansion”.
Galvanized Metal or Steel
Galvanized metal or steel is another incredibly popular choice to use when building a raised bed. However, it does cost a hefty sum, especially if you’re planning to build quite a few.
Even so, galvanized metal or steel raised beds will last at least 10 years in your garden, similar to cement or stone. Hence, they’re often considered an economical purchase.
They’re also a gardener’s top pick when making raised beds because of their sturdiness. It’ll take about 20 years before they show signs of wear and tear, even with little to no maintenance.
Having said that, galvanized metal and steel are both rust-resistance and weather-resistant, which is why they’re popular choices for many gardeners. Their zinc coating protects them from corrosion.
In less corrosive soil they’ll last about 75 years while about 50 to 50 years in more corrosive soil. Hence, ensure that you purchase your galvanized metal or steel from a reputable seller to avoid corrosion.
Similar to cement and stone, metal and steel are also great at heat retention. While they will heat up rather quickly when it’s hot out, they’ll also cool down quicker in colder temperatures.
To boot, they’re also relatively lightweight, which makes them easy to move around the garden.
Planter’s Tip: When identifying the most optimal height for your raised bed, don’t forget to take into consideration what height would be most back-friendly for you.
It’s a popular rule of thumb to have your raised bed at least 70 to 100 cm high for easier and more back-friendly access when gardening.
Layers
Now that you’ve decided what your raised bed will be made of, let’s head onto what we’ll be putting inside of it.
As mentioned earlier, raised beds are quite deep, which means that you’ll need quite a lot of material to fill it up completely.
Don’t worry, though, as we’ll discuss the most economical way to stuff your raised beds without tearing a hole in your wallet.
Layer 1 – Lining or Base Layer
Layer 1 or the lining is the first thing you’ll fill your raised bed with. Having a bottom lining can prevent weeds from entering your root system.
Other than that, having a lining can protect your plant from pests such as moles and groundhogs. Given how deep raised beds are, this isn’t an issue you’ll want to deal with in the future.
Apart from that, having a base layer provides your raised bed with great drainage. These will soak up all the leftover moisture and will break down over time.
When lining your raised beds, you can use any of the following materials:
- Old cardboard
- Old newspaper
- Old paper
- Cloth
- Woodchips
- Fallen leaves
- Coffee grounds
- Grass trimmings
- Hay, straw, or sawdust
- Twigs, branches, or logs
Planter’s Tip: When layering your base layer, start with old cardboard or newspaper then the bulkier and heavier items such as old logs and branches.
Doing so will ensure that there’s ample space at the bottom for water to drain through. Afterwards, add the lighter materials such as grass trimmings, straw, hay, (straw vs hay) or mulch.
You’ll want your raised bed to contain as much natural and organic material as possible. Hence, don’t forget to remove any tape, stickers, and similar plastics from your recycled materials before using them as lining for your raised beds.
By the same token, don’t add any wood with varnish or finish either as these could contain chemicals. This means you can’t toss in old, stained furniture that you’ve been trying to get rid of.
Assembling Layers
When it comes to the layering itself, the most popular method is called the hugelkultur method. Essentially, this technique incorporates the use of compost and plant waste.
Not only does this reduce garden waste, but it also gives your soil added benefits as the organic material will naturally decompose and release a ton of nutrients over time.
On top of that, you won’t be spending a ton of money on expensive soil just to fill up your raised bed.
When it comes to assembling, you can opt for the simple method or the lasagna method. The former will take just about 3 layers while the latter will take 4 or more.
But before that, you need to be able to properly calculate the volume of your raised bed. This is important to keep in mind as you’ll need to ensure regulated temperatures and proper decomposition.
Among gardeners, it’s a general principle that 15% of the volume of your raised bed should be soil. If you’re not great at math, luckily for you there are a ton of raised bed soil calculators online.
Simply put in the necessary information regarding the length, width, and depth of your raised bed and you’ll be given a recipe to follow.
Planter’s Tip: After adding your base layer, water the materials to keep them in place and encourage decomposition. You’ll want this area moist as it’ll make it easier for earthworms to tunnel through the soil and decompress it.
Simple Method
| Layers | Materials |
| Layer 1 – Lining or Base Layer | Old cardboardOld newspaperOld paperClothWoodchipsFallen leavesCoffee groundsGrass trimmingsHay, straw, or sawdustTwigs, branches, or logs |
| Layer 2 – Filler | Inexpensive soil |
| Layer 3 – Topsoil | Nutrient-rich potting soil |
For the simple method, well, it’s just that – simple. It’s a 3-layer technique that only requires the lining, inexpensive soil as a filler, and nutrient-rich top soil as the finishing touch.
If you’ll notice, there isn’t any kitchen or garden waste in the process aside from the natural matter (such as grass trimmings, branches, and so on).
Nevertheless, you can opt to add manure or compost mix if you prefer. If you’re looking for a more cost-effective option, you can make your own compost mix using kitchen and garden waste instead or purchasing in bulk from the store.
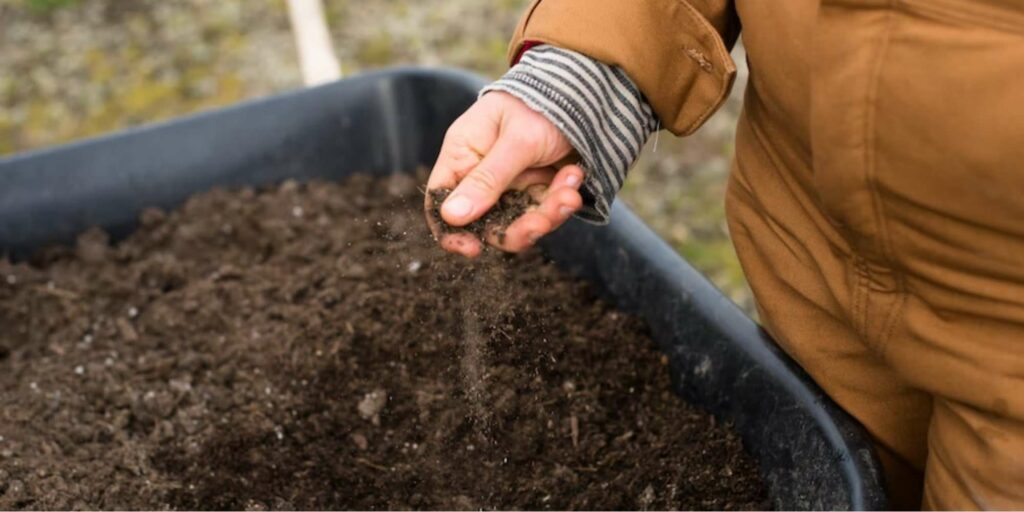
As for Layer 2, this is typically called the filler. Hence, it’s made up of inexpensive soil, which can be old potting soil, loam soil, or any leftover soil that you have laying around.
The top-most layer or Layer 3 is usually called the planting layer. Because of this, gardeners usually use nutrient-rich potting soil for optimal growing.
You can fill the last layer up completely with top soil as it’ll settle down eventually as you frequently water your bed.
Lasagna Method
| Layers | Materials |
| Layer 1 – Lining or Base Layer | Old cardboardOld newspaperOld paperClothWoodchipsFallen leavesCoffee groundsGrass trimmingsHay, straw, or sawdustTwigs, branches, or logs |
| Layer 2 – Brown layer | Dry leavesOld newspaperPine needles |
| Layer 3 – Compost | Well-rotted manureCompost |
| Layer 4 – Green layer | Vegetable scrapsGrass trimmingsHay, straw, or sawdust |
| Layer 5 – Topsoil | Nutrient-rich top soil |
The Lasagna Method requires a few more layers than the simple method. After filling in your raised bed with your initial layers (i.e., layers 1 to 4), start over again with layers 2 to 4.
As mentioned earlier, when putting together your base layer, always start with the heavier items first. This is because logs and branches will take a longer time to decompose in comparison to grass trimmings and fallen leaves.
Afterwards, go right ahead with layers 2 through 4 and repeat until you’ve reached your desired height. Though, keep in mind that your brown layer should be twice as deep as your green layer.
Once you’re happy with your “lasagna”, you can finish it off with the final layer of high-quality top soil.
Proper Drainage
As any gardener would know, proper drainage is essential to ensure that excess water doesn’t constantly keep your soil moist.
Wet soil restricts airflow which can make your plant more susceptible to diseases and root rot. On top of that, it typically results in microorganism and nutrient deficiency issues.
Here are 3 key tips to improving the drainage in your raised bed:
1. Loosen the soil.
Over time, soil will begin to compact. Pressure from watering, patting down the soil, and the like reduces the space between each of the pores.
Because of this, it’s important to regularly till your soil to allow enough room for roots to develop, microorganisms to grow, and worms to freely move about.
Aside from that, turning your soil encourages aeration and mixing of nutrients around.
You can manually loosen up the soil with a fork, trowel, or even a stick. When doing so, be gentle to avoid harming the roots, but don’t worry if you snap a couple as they’ll grow back.
2. Add soil amendments.
If your soil is sandy, this means that it could drain particularly better than clay-like soil which typically retains water and doesn’t drain as fast.
Having said that, soil amendments help loosen up the soil and provide better soil structure by promoting aeration and easy drainage.
Aside from that, they also improve the soil’s nutrient content through organic matter that releases oxygen, potassium (high potassium fertilizer), and nitrogen (fertilizers high in nitrogen), among others.
Common options for soil amendments include:
- Compost
- Perlite
- Vermiculite
- Grass clippings
- Fallen leaves
- Dead plants
- Kitchen scraps
When growing tomatoes, the best amendment options to use are perlite and vermiculite.
Perlite is primarily used to aerate compost or soil when propagating plants. Hence, it’s recommended for gardeners growing your tomato plant from cuttings or seedlings.
Meanwhile, vermiculite works best for seed germination as it’s better at water and nutrient retention. Vermiculite also has properties that work against the development of fungal diseases.
Hence, it’s a great option if you’re growing your tomato plants from scratch as vermiculite holds moisture well.
All said, there’s no rule that you can’t mix vermiculite and perlite together. This is what some gardeners do as both have their own significant benefits.
To create a holistic and balanced mixture, mix equal amounts of vermiculite and perlite together.
3. Encourage earthworm activity.
The most natural way to ensure proper drainage is to enlist the help of trusty ‘ole earthworms.
Did you know that soil beds that have earthworms are able to drain 10x faster than soil beds without them?
When these little critters move through the soil, they create burrows and tubes that expand the soil’s open spaces.
Since these underground pockets last quite a long while, these little tunnels promote aeration and soil drainage as well as reduces the tendency for the soil to compact.
This greatly reduces your involvement in having to till the soil yourself, saving you the back pain.
Another great thing about having biologically active earthworms is that their castings are great organic fertilizers (fertilizing tomatoes), which can save you a ton of money in the long run.
If you don’t have enough earthworms in your garden, you can simply purchase some at your local gardening center or pet store.
Though, keep in mind that an overabundance of earthworms can result in excessive nutrients. The abundance of organic fertilizer will eventually cause burns in your garden.
So, when adding earthworms to your garden, rule of thumb is to have around 5 to 10 worms for each square foot of surface area.
4. Ensure enough sunlight exposure.
Apart from having earthworms around, you also have the help of sunlight to naturally dry up any excess water and moisture from the soil.
Hence, it’s important that you position your raised bed in a spot that receives an adequate amount of sunlight.
This is especially crucial for tomato plants as they’re sun lovers that require at least 8 hours of sunlight daily.
Even so, keep in mind that too much direct sun can result in sunscalding. You’ll notice your tomato developing white or yellow spots, leaves curling, and stem dropping.
However, if you’re from a place with a warmer climate, you could get away with putting your tomato raised beds in a shaded area.
Otherwise, you’d want your tomato raised bed in a place that doesn’t get obstructed daylight from trees.
This is especially so during the wintertime as you’ll need as much natural warmth as you can get to kickstart your garden in preparation for spring.
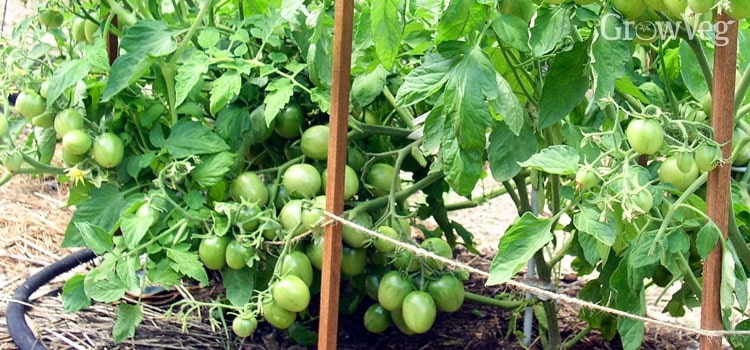
Structural Support
As many gardeners can attest to, tomatoes are quite finicky to grow and require a structural support to help carry the load of their fruits.
Hence, structural support is essential to ensure that you don’t put too much stress on your plant’s stem.
On top of that, when a tomato plant is upright, this ensures that there’s enough air circulating through.
Aside from that, it’s vital to keep your plant upright so that it isn’t susceptible to a variety of diseases and pests.
Depending on the kind of tomato varieties you’re planting and budget, there are a couple of structural support options that you can consider.
1. Stakes
Among all the options available, stakes are the easiest to do and most cost-effective. All you need to do is drive a long pole near the tomato plant’s stem deeply and firmly into the soil and loosely tie the plant to the pole.
You don’t even need to purchase a stick as you can even use a relatively thick, sturdy branch. You can opt for other materials, too, such as bamboo, plastic, and metal, among others.
Since one stake might not be strong enough to handle your tomato plant’s weight, you can opt for two stakes at either side of the plant’s stem.
Whilst easy to assemble and acquire materials for, stakes aren’t the most sturdy option at giving your plant sufficient support.
2. Cages
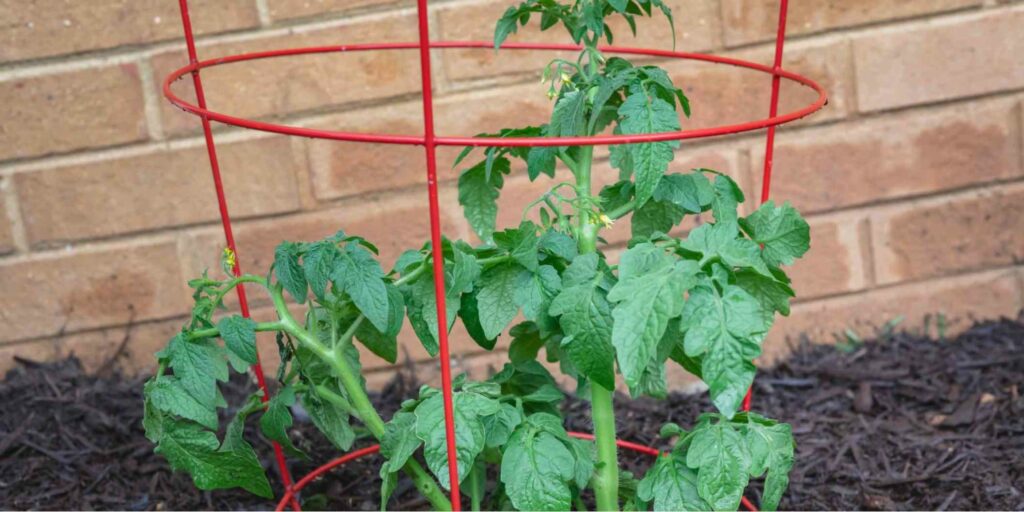
Tomato cages are one of the most popular methods for ensuring structural support to plants. They come in the following styles:
- Ring
- Cone
- Square
- Triangular
When choosing a type of tomato cage (tomato cages) style, it’s important to take into consideration the variety of tomato you’re growing. This is because you can match the level of support required by your plant to the type of cage.
Cages come in several sizes and shapes which make them great for growing various plants such as eggplants, peppers, and cucumbers, to name a few.
3. Trellises
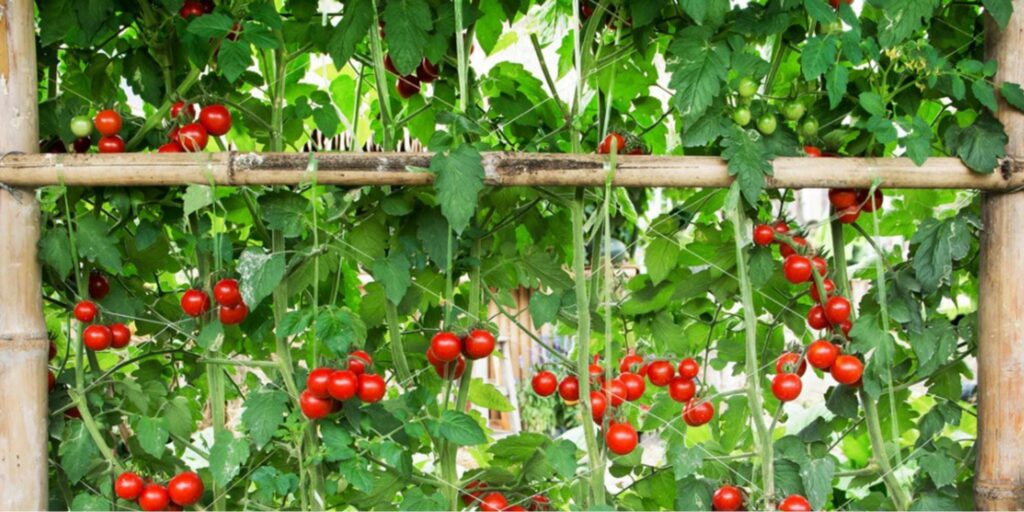
Trellises are also a gardener and farmer’s favorite when it comes to providing their plants support.
You can purchase these ready-made or opt to make them yourself and tweak them according to your raised bed’s size and tomato varieties’ needs.
Compared to other structural support options, trellises are the most structurally sound. Hence, they’re great for long-term use.
4. Fences
Similar to stakes, fences are an easy, light-weight option that doesn’t require much effort to build. You can even choose from a variety of fence sizes and materials such as nylon and metal.
To do so, firmly stake two sticks parallel to one another and tie the fence to both sticks. As your tomato plant grows, loosely secure it to the fence.
Caring for Tomato Plants in a Raised Bed
Now that you’ve got your tomato raised beds set up, you can’t just leave your tomato plants to take care of themselves.
They have a solid reputation for being quite finicky to care for after all. Hence, it’s important to provide consistent proper care to ensure that they produce a bountiful harvest.
Don’t worry, though, as we’ll share a couple of easy techniques that you can seamlessly incorporate in your gardening routine.
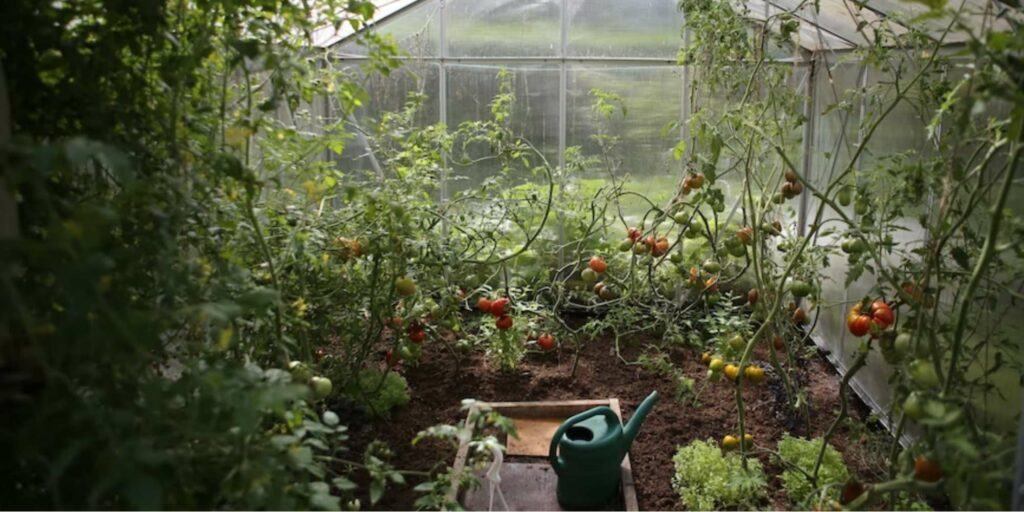
Watering Techniques
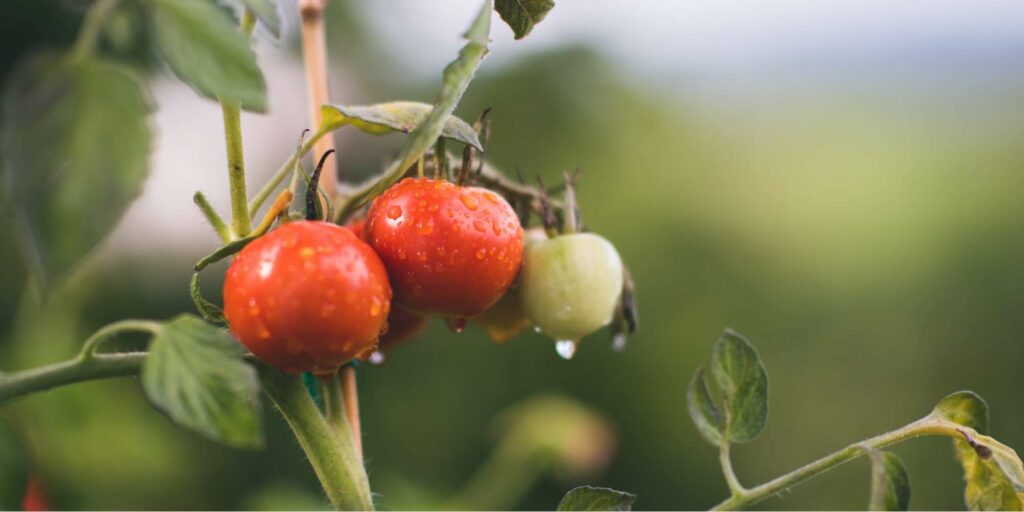
The key to ensuring that your tomato plant bears plump and perfectly ripe fruits is to practice proper watering techniques.
In a nutshell, it’s crucial that you water slowly and deeply from the base every morning.
It’s important to water slowly to ensure that your plant can absorb all the water without rush. For this, you can opt for an irrigation system or simply water gently using a watering can or hose.
When doing so, always water from the base. As with any other plant, getting the foliage wet makes them more susceptible to diseases and rot.
Having said that, sprinklers are typically gardener’s least favorite watering method for vegetables. They’re great for grass, though.
Watering in the morning is the best time to do so as this allows the sunlight to dry up any excess moisture and water.
Don’t forget to keep a close eye on your soil and tomato plant’s habits. Pay attention to signs that you may be overwatering or underwatering your plant.
Here are signs that you’ve been overwatering your plant:
- Damp soil
- Yellowing leaves
- Mushy roots
- Rotting or cracked fruit
Here are signs that you’ve been underwatering your plant:
- Wilted or curling leaves
- Dry or sand-like soil
While caring for a tomato plant can be intimidating, don’t be afraid to deeply water them again, especially when it’s hot out.
Though, try to do this as early as possible as you don’t want your soil staying wet throughout the night.
Mulch and Fertilizer
Even though your tomato plant appears to be looking healthy and strong, there’s nothing wrong with giving it a little boost. A popular way to do so is through mulch and fertilizers.
Planter’s Tip: Add mulch and fertilizer in the early stages of your tomato plant’s life so that they grow to be stronger and produce higher yields.
Mulch
Mulch is basically what covers your top soil. This regulates your soil’s temperature as it protects the top soil from heat, keeping it moist and cool.
Apart from that, mulch protects your plant from contracting fungal diseases by keeping the surface nice and clean. This also means that you can say goodbye to stubborn weeds that take all the nutrients away.
You can spread about 3 to 6 inches of mulch on top of your nutrient-rich soil. Before applying, make sure to shred any large pieces to maximize the benefits that they can bring to your soil.
The best types or organic mulch include:
- Straw
- Grass clippings
- Shredded fallen or dry leaves
- Newspaper or cardboard
Fertilizer
Fertilizers (fertilizing tomatoes), both organic and inorganic, greatly help your plant’s growth and productivity. They’re typically added to the soil to help with nutrient deficiency issues, stunted growth, and fertility, among others.
Organic fertilizers are typically made out of manure, compost, and similar naturally-made sources of nutrients. Meanwhile, inorganic fertilizers are made out of a combination of synthetic chemicals and minerals.
They also come in various formulations, from liquid to granules. Hence, it’s important to properly read and follow the instructions as directed to maximize the benefits these fertilizers bring.
When choosing a well-balanced fertilizer to use, ensure that it has the following ingredients:
- Nitrogen
- Phosphorous
- Potassium
Planter’s Tip: For a more centric boost, you can purchase fertilizers specifically made for tomatoes.
Spacing
When it comes to spacing your tomato plants, this depends on the overall size of your raised bed and the variety of tomatoes you’re planning to grow.
If you have a small raised bed, it can get quite tempting to grow them closely to one another. However, limited space means that they’re competing for all the nutrients within a single, small area.
As a result, this can bring about a ton of issues from stunted growth to poor root development. Hence, spacing is a vital component to ensuring a relatively problem-free development.
Aside from that, adequately spacing your tomato plant gives you enough room to move around when harvesting. It also allows for more space for structural support items such as tomato cages.
| Tomato Variety | Recommended Spacing |
| Determinate variety | Since determinate varieties only grow up until a certain height, you can plant them around 18 to 24 inches apart. For dwarf determinate varieties, you can get away with planting them at least 12 inches apart. |
| Indeterminate variety | Since indeterminate varieties continue to grow even after bearing, they’ll require a bit more space than their counterpart. They should be spaced at least 30 inches from each other. |
Pruning
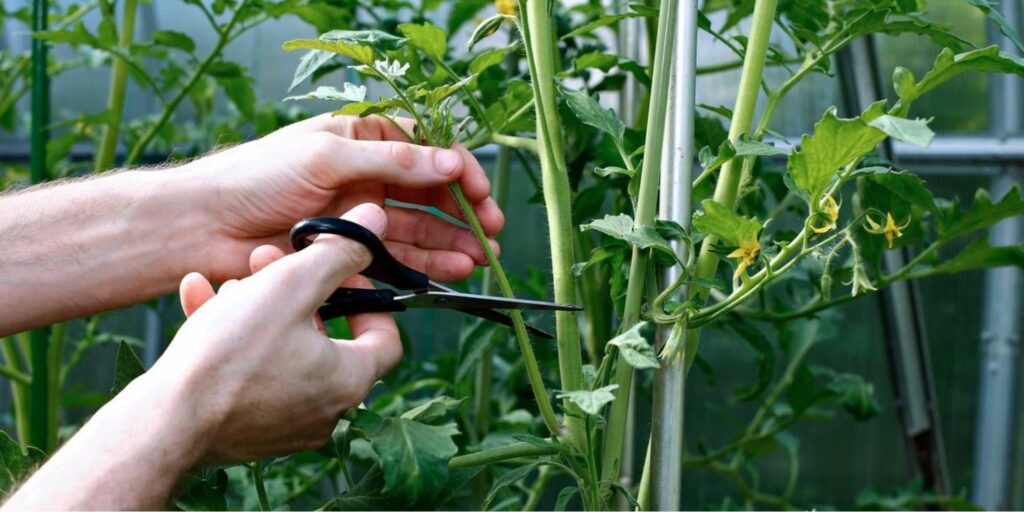
In a nutshell, pruning is essentially removing foliage from your plant for several beneficial reasons.
Gardeners typically prune excess foliage from their tomato plants to redirect nutrients and energy towards bearing more healthy fruit. More often than not, this makes your plant produce tomatoes that are larger than average.
Apart from this, taking away excess foliage improves air circulation within your garden, especially if your plants are relatively close to one another.
Proper ventilation is essential in reducing the likelihood of your plants developing fungal diseases. This also ensures that excess moisture can dry up easily.
Here’s a quick guide on the 3 different ways you can prune your plants:
1. Topping or Pinching
Pinching is when you use your fingers to pinch off the growing top part of your tomato plant seedling. This is typically done to young plants that are about 4 to 6 inches tall.
Doing so will force your tomato plant to grow thicker stems that can withstand strong winds and bear the weight of the fruits. This also facilitates branching as it helps your plant begin growing from its sides.
You can also pinch off the top part if you’d like your tomato plant to begin to focus its attention and energy on bearing fruit. Halting top growth allows more nutrients to go to your tomatoes.
How to Do It: Gently pinch off the top part of your tomato seedling’s stem. You can do this again after it has grown about 2 to 4 inches taller since your last prune.
2. Thinning
Thinning is when you remove excess foliage to control the growth of your plant. This is most often done on tomato plants that are of the indeterminate varieties because of their vining nature.
Doing so allows your plant to focus on its fruit production and bearing healthier yields rather than growing taller. Hence, this is typically done when you’ve already got fruits growing.
How to Do It: Cut away excess foliage with a sharp pair of shears. Always cut a bit before taking a step back and examining your plant’s condition.
Don’t cut too much away as over pruning can result in a weak plant that cannot withstand winds and hinder the natural growth of your tomato plant.
3. Suckers or Side Shooters
As their name suggests, suckers are tiny shooters that grow between the plant’s main stem and a branch.
They’re typically an unwelcomed growth as they suck a ton of important nutrients that could be going to the plant’s growth or fruit production instead.
What To Do: Simply cut them off using a sharp pair of shears by their base.
All said, the frequency of your pruning ultimately depends on the variety of tomato plants you’re growing, spacing, and weather conditions. Hence, it’s best to exercise your better judgment.
Planter’s Tip: Use a sharp pair of pruning shears for a clean and straight cut. Don’t forget to thoroughly clean and disinfect your gardening tools to avoid cross-contamination in your garden.
Growing Problems for Tomato Plants in a Raised Bed
Unfortunately, not everything is rainbows and butterflies. Sooner or later you’re going to encounter problems in your tomato raised beds.
Luckily for you, we’ve listed down a couple of common pests and diseases that your tomato plant may encounter throughout its lifecycle.
Pests
However, pests are foes, not friends as they can wreak havoc on your tomato plant. Because of this, it’s important to have a good grasp of the most common types of tomato plant pests (tomato pests) and how to deal with them.
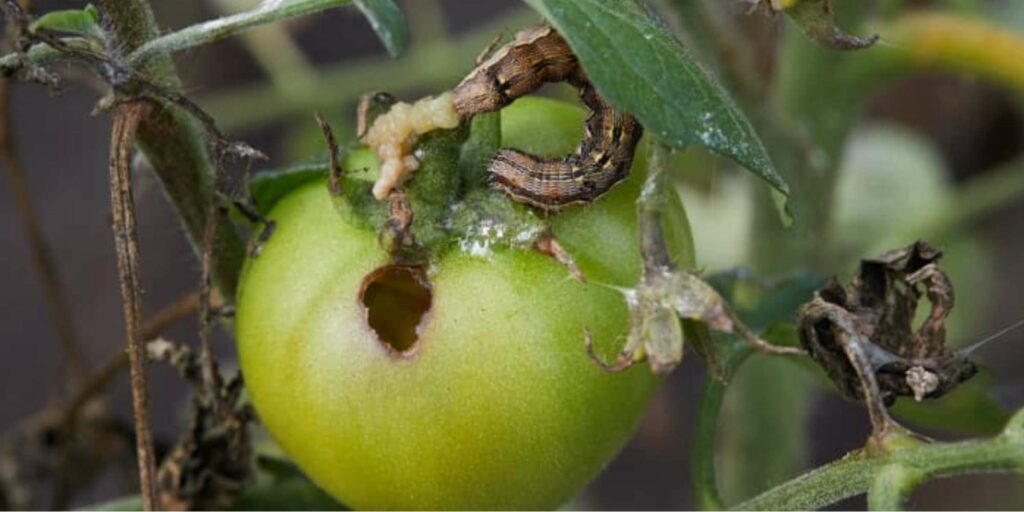
Symptoms of Pests
Tomato plant pests can make themselves known through several signs, some eye-catching while others may require more investigation.
Your tomato plant could have any of the following symptoms of a pest lurking in their raised bed:
- Wilting, misshapen, or yellowing leaves
- Chewed or missing leaves
- Holes in the fruits
- Damaged roots
- Malformed or damaged fruits
Common Tomato Pests
While there are several different kinds of tomato pests out there, here are the most common ones that you’re likely to see in your garden.
1. Aphids
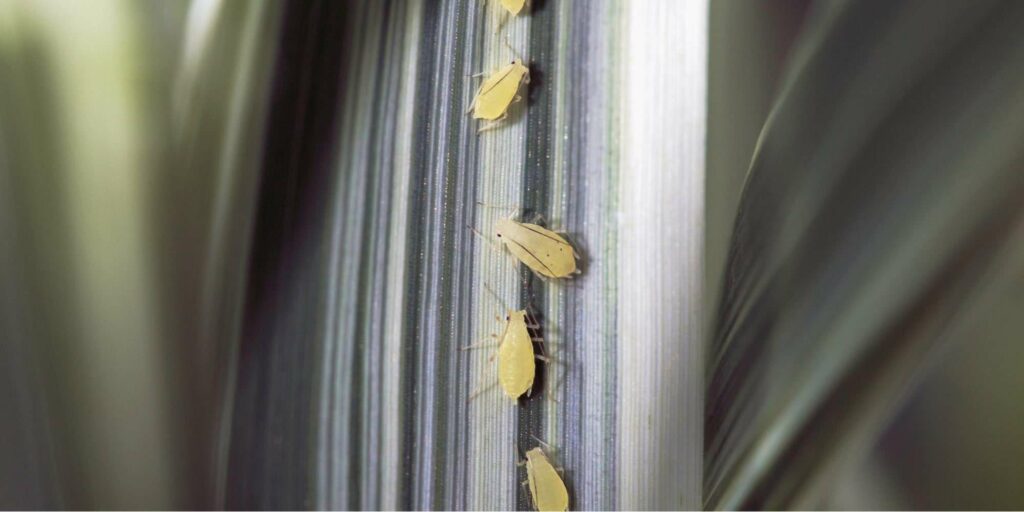
Aphids are light green or white insects that are barely a centimeter long. Since they’re so small, it’s usually hard to tell they’re even there without inspecting underneath your plant’s foliage up close.
Despite their size, these critters can do massive damage to your tomato plant, especially in large quantities.
They’re known to suck the sap out of your plant’s stem, leaving it without proper amounts of nutrients, eventually resulting in wilted stems and death.
What To Do:
Option #1: For those that aren’t fond of insecticides, you can spray horticultural oils such as neem oil.
Option #2: For less serious aphid infestations, you can simply hose them off with a strong blast of water.
Option #3: For a more natural solution, you can opt for companion planting, which is essentially bringing in plants that invite natural predators of aphids such as ladybugs into your garden.
2. Spider Mites
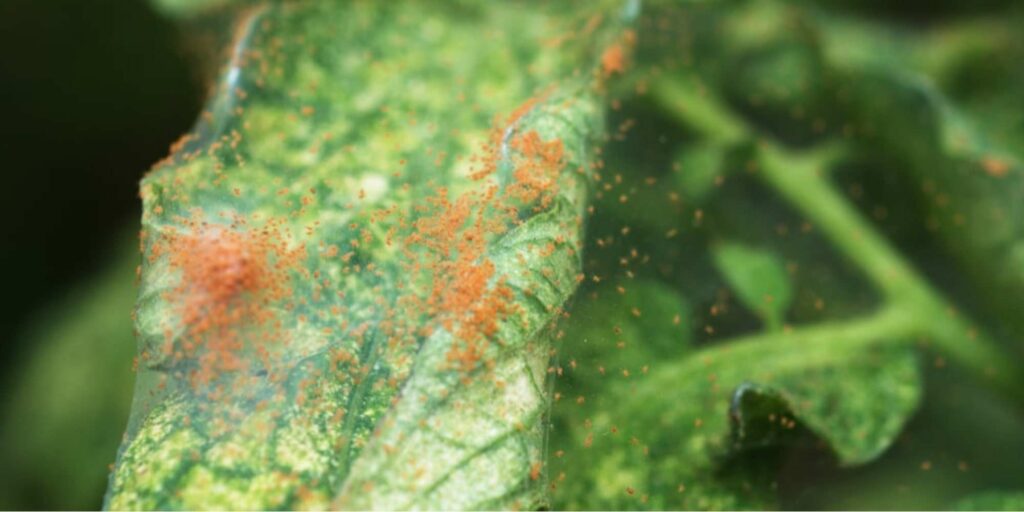
If you thought aphids were small, spider mites are even smaller, which makes them even harder to notice. However, once huddled together, their location is often given away.
Closely related to spiders, these reddish brown pests have sharp teeth that feed on the chlorophyll and contents of the plant cells.
You’ll typically find them on the underside of tomato plants. They release a webbing all over leaves which is used to build their colonies.
So, if you notice web-like substances on your leaves, that’s an indicator that your tomato plants are infested with spider mites.
What To Do
Remove the infected areas and properly dispose of the infected foliage. Douse your plant with cold water or with sprays containing synergized pyrethrins to completely eliminate any remaining spider mites.
3. Flea Beetles

Flea beetles only grow to about one-tenth of an inch, but they can easily jump between plants thanks to their strong and thick hind legs. They’re also distinct for their metallic black and bluish gray color.
At all stages of its life, flea beetles are a gardener’s nightmare because of the torment they can do on your tomato plants.
As larvae, flea beetles will eat away at your plant’s roots. Meanwhile, the adults will drill holes on the foliage.
To make things worse, they’re known to carry several kinds of diseases that could infect your plant. These include blight and bacterial wilt, to name a few.
What To Do
Sprinkle some diatomaceous earth all over your plants. This powder has a desiccating effect which will physically affect
What’s great about diatomaceous earth is that it’s non-toxic, which means it’s safe to use around humans and pets.
4. Leaf Miners
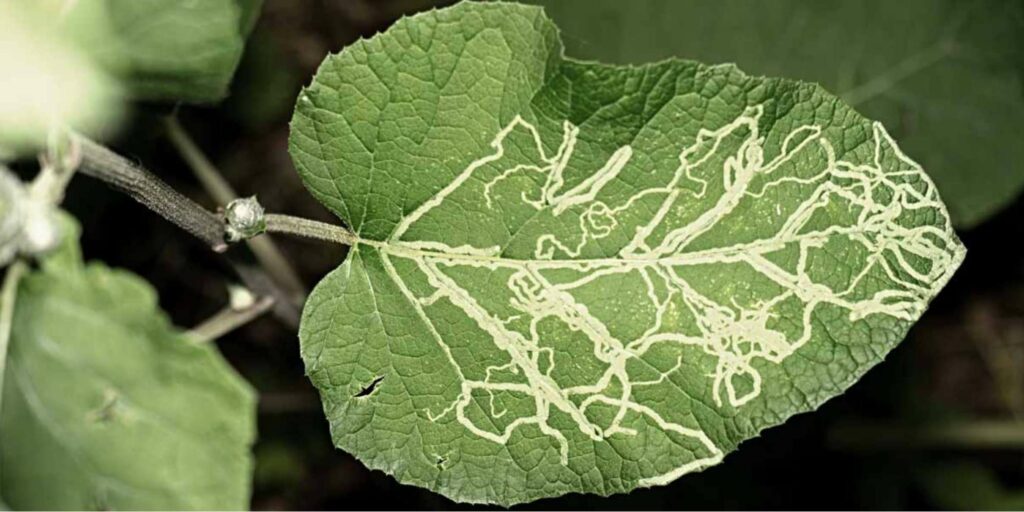
While one could argue that the work of leaf miners could be quite artistic, many gardeners would say otherwise.
Leaf miners are typically found during the spring and summer times. They’re little flies with a distinct yellow dot on their back, but it’s the larvae that does the most damage.
Adults will lay their eggs underneath the foliage and once they hatch, they begin feasting away at the leaves.
What To Do
Prune and dispose of any infected foliage immediately. Then spray a generous amount of pyrethrin, an organic pesticide, according to the prescribed instructions all over the remaining leaves.
Don’t forget to spray the underside of your foliage as well as the tiny nooks and crannies, too. If you still have larvae, they’ll die once they’ve eaten the pyrethrin on the leaves.
5. Tomato Psyllids
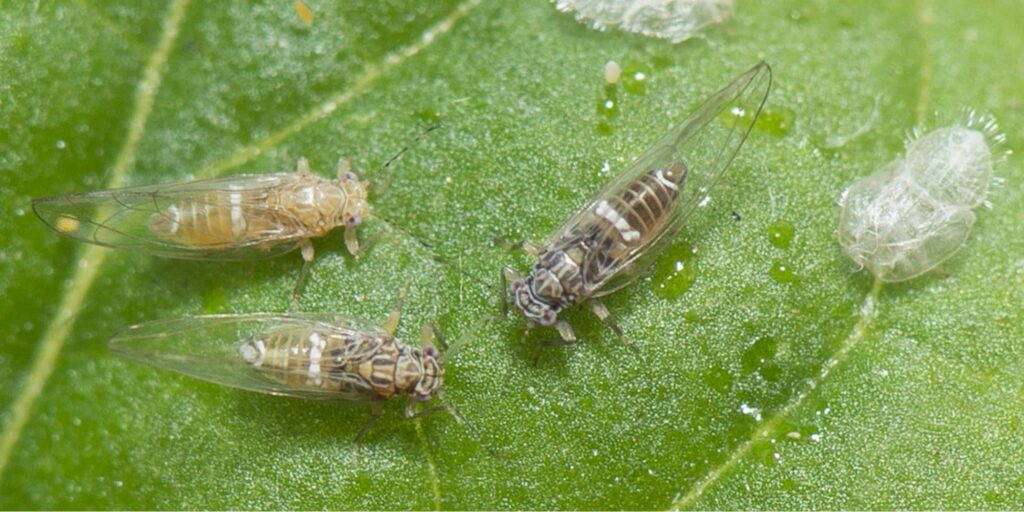
Tomato psyllids are tiny insects, typically yellowish brown in color and have faint lines on their segments. They also have rather large, clear wings that help them easily travel between plants.
However, the adults aren’t who you should be wary of – it’s the nymphs. When nymphs, tomato psyllids are rather flat, have a deep brown shade and scale-like texture.
The tomato psyllid nymphs have small, sharp mouths that enable them to easily penetrate your plant. They’re usually found on the underside of the plant’s foliage.
Similar to aphids and spider mites, they suck the sap from your plant, leaving it dry and lacking nutrients. To make things worse, they inject a plant poison called “phytotoxin” into the stem.
You’ll begin to notice the leaves of your tomato plant looking unhealthy by curling and turning yellow. You’ll barely see any fruit production, too, due to stunted growth.
What To Do
Option #1: Generously spray spinosad, a toxic insecticide, onto the foliage of your infected plant. Once ingested will destroy the tomato psyllid’s nervous system.
Ensure that you’ve properly read and followed the instructions as spinosad comes in a variety of forms. Some kinds may require you to dilute the product while others can be used straight away.
Be wary of overusing spinosad, though, as it can be harmful to beneficial garden insects such as bees.
Option #2: Spray a good amount of horticultural oils such as paraffinic oil or neem oil. Generously use weekly and as instructed by the manufacturer.
Option #3: Try companion planting to naturally invite predators of the tomato psyllid such as lady beetles, damsel bugs, and pirate bugs.
Diseases
Pests aren’t your only enemy as tomato plants are also susceptible to diseases. These can be brought by pests, fungi, or infected gardening equipment, among other reasons.
That said, it’s important to keep a close eye on your tomato plants for any symptoms that they’re under the weather.
Planter’s Tip: To avoid reinfection, always thoroughly clean and sanitize your gardening tools and work area. Also, properly and safely dispose of infected plants.
Symptoms of Diseases
Thankfully, your plant will let you know if something’s going on. Here are a few tell-tale signs that your tomato plant may have caught something nasty:
- White spots on the foliage
- Browning or yellowing leaves
- Curling leaves
- Droopy stems
Common Tomato Plant Diseases
While there are various kinds of diseases that could infect your tomato plants, here are the most common diseases that you’re more likely to encounter in your garden:
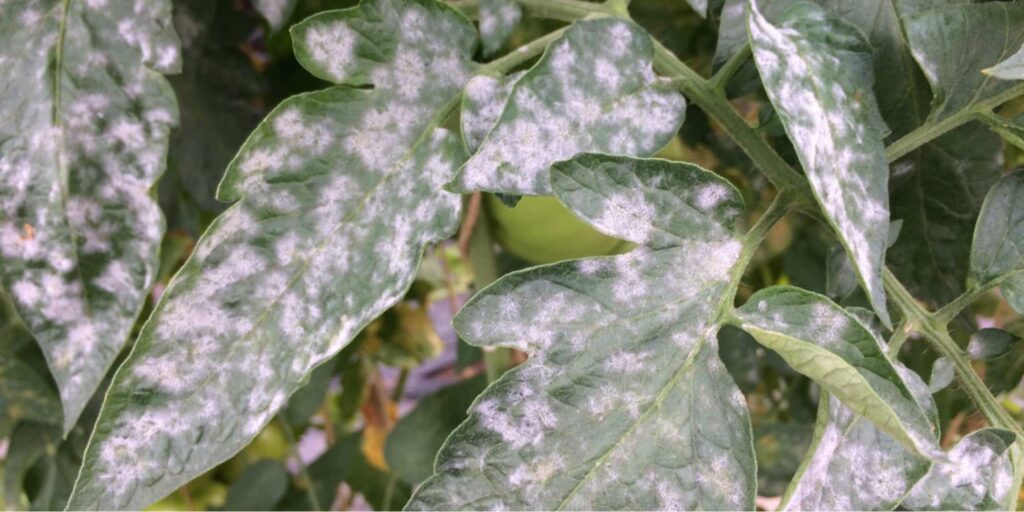
1. Powdery Mildew
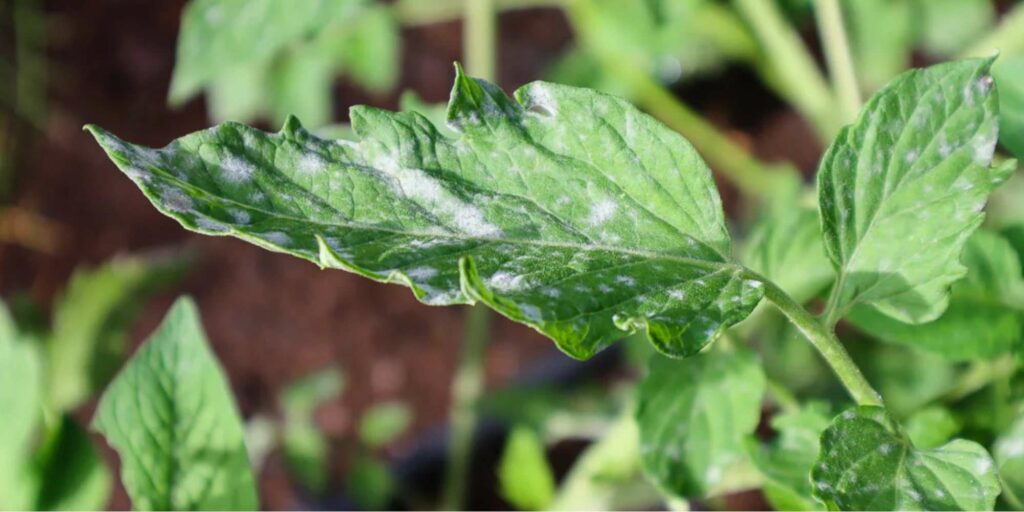
Powdery mildew is a white dust-like fungi that latches itself onto your tomato plant’s foliage. It’s actually caused by several species of fungi such as Phyllactinia, Uncinula, and Erysiphe, to name a few.
The powder is a result of the fungi reproducing, which you’ll typically begin to see on the underside of leaves first before they make their way all over.
As a fungi, powdery mildew is caused by and thrives in the following conditions:
- Poor ventilation caused by inadequate air circulation
- Humid and moist environments
- Too much fertilizer
While powdery mildew will rarely ever kill your plant, it could cause a lot of damage that could severely weaken it. Specifically, powdery mildew could cause any of the following:
- Low production and poor tasting yields
- Foliage that’s withering and curling
- Insufficient photosynthesis
- Overall weak plant
What To Do
First things first: you need to immediately get rid of all of the infected foliage and dispose of them properly. Afterwards, you can go in with any of the following:
Option #1: Mix about 4 tablespoons of vinegar with 1 gallon of water and spray generously over your plant. Repeat this every 3 days and consistently monitor for any signs of improvement.
Option #2: Combine about 1 part ethanol-based mouthwash with 3 parts water and spray all over your plant.
Option #3: For infections caught early on, spray a liberal amount of horticultural oils such as neem oil or jojoba oil over the entire area.
2. Bacterial Leaf Spot
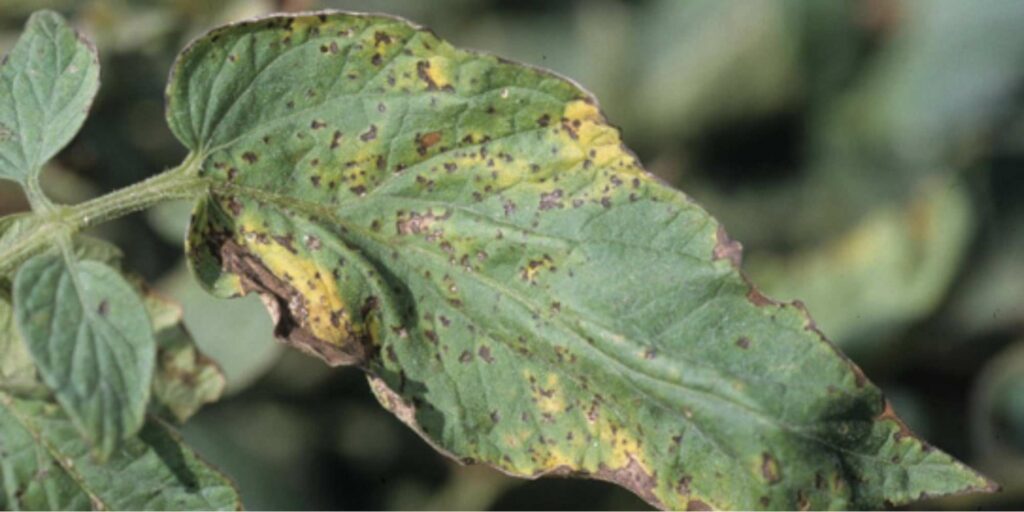
What makes bacterial leaf spot so troublesome is that it affects every part of your tomato plant that’s above ground. This means that the stem, leaves, and fruit will be compromised.
Bacterial leaf spot is caused by the Xanthomonas bacteria, which causes brown, water-soaked, ring-like spots and yellowing on your tomato plant’s leaves, stem, and fruits.
These first appear on older leaves and eventually make their way to the younger and healthier ones. After a while, bacterial leaf spot could result in severe defoliation.
Similar to powdery mildew, environmental conditions that are warm, humid, and moist are potential breeding grounds for the xanthomonas bacteria.
What To Do
After properly getting rid of the damaged foliage, lower the humidity and avoid getting any of the tomato plant’s leaves wet.
Promote better air circulation as well by removing any excess foliage, keeping your plant upright, and increasing sun exposure.
3. Curly Top Virus
The curly top virus is a disease that’s carried by the leafhopper. After feeding on an infected plant, they can easily make their way into your garden where they can transfer the disease by sucking on your plant.
Often a pale green or yellow hue, leafhoppers only grow to about 0.12 inches long, which makes them difficult to notice at first glance.
What To Do
To get rid of leafhoppers, you can blast them with water through a strong hose if you’ve only got a few. For larger infestations, you can use horticultural oils such as neem oil or pesticides containing bioallethrin or bioresmethrin.
Unfortunately, there is no chemical treatment for the curly top virus. Young plants that get infected will most likely die while adult plants will experience stunted growth.
Hence, the best course of action is to prevent leafhoppers from entering your garden.
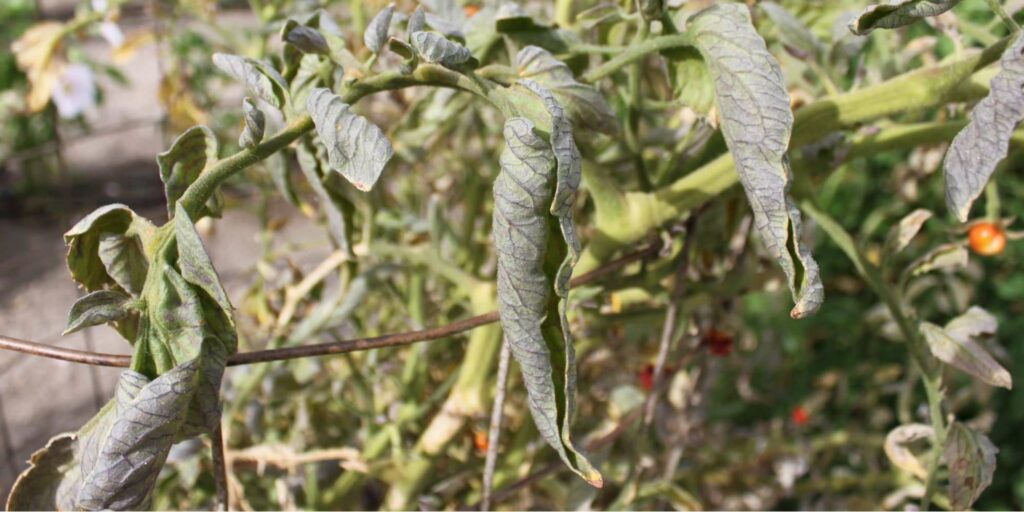
4. Tomato Yellow Leaf Curl Virus
The tomato yellow leaf curl virus is carried by whiteflies. Similar to the curly top virus, whiteflies will transfer the yellow leaf curl virus after feeding on an infected plant.
As their name suggests, whiteflies are tiny white flies that feed on the sap of plants. They’re typically found in indoor environments such as greenhouses.
It takes at least 3 weeks before an infected plant begins showing symptoms. Plants that have been infected with the yellow leaf curl virus will have foliage curling inwards resembling a bowl.
Aside from that, infected plants will also have stunted growth with severe cases often seen in younger tomato plants.
What To Do
Unfortunately, there is no cure for tomato plants infected with the tomato yellow leaf curl virus. Gardeners can only properly dispose of damaged plants and control the virus by spraying a neonicotinoid insecticide.
5. Early Blight
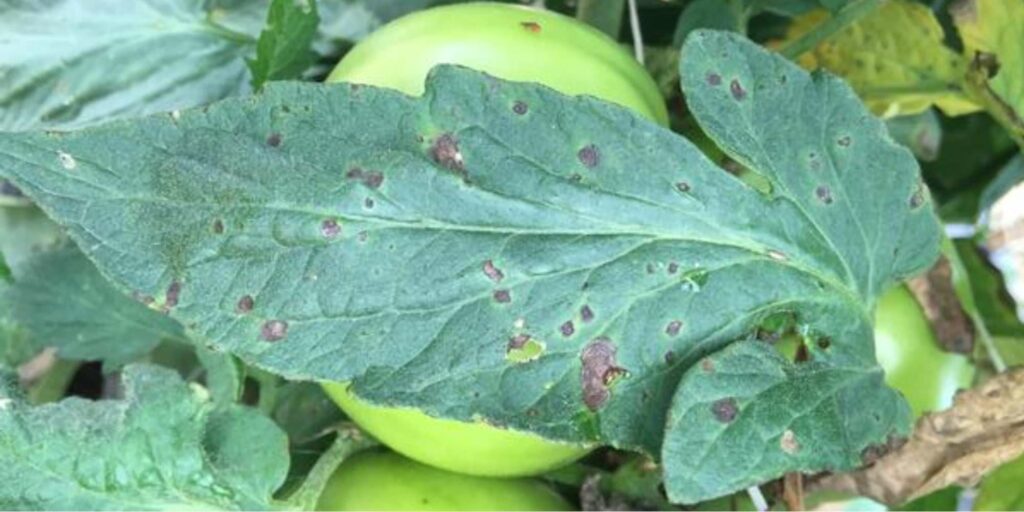
Early blight is caused by Alternaria, a fungus primarily found in environments with warmer temperatures. An infected plant will have black specks on its leaves, stem, and fruits.
Similar to other types of fungi, the Alternaria thrives in warm and moist conditions. The spread of the fungus is usually caused by infected seeds, wind, air, and water.
What’s important to note about the Alternaria fungus is that it can survive in plant debris and soil. Because of this, it’s vital to properly dispose of infected plants and thoroughly sanitize anything that it’s been in contact with to avoid reinfection.
What To Do
To treat infected plants, generously spray fungicides containing liquid copper or chlorothalonil onto the foliage.
In order to avoid reinfection, improve the airflow of your plant’s environment. Also, add mulch to the soil to avoid water from splashing onto the leaves.
Top 6 Tips for Growing Tomato Plants in Raised Beds
Now that you’re all set to build your tomato raised beds, here are a few final reminders to ensure that your plants grow healthy and produce bountiful yields.
1. Water from the plant’s base.
When watering plants, it’s very important to avoid watering the leaves. This is because constantly wet leaves are the perfect breeding ground for mold and fungal growth.
As mentioned earlier, tomato plant diseases are tricky to get rid of since various fungi are known to be able to remain alive even on dead plants.
Hence, always water from the plant’s base. It’s recommended to use a hose or a watering can and closely water the soil to avoid water from splashing onto the foliage.
Having said that, sprinklers typically aren’t gardeners’ ideal form of watering their vegetables. Nevertheless, they’re perfect for keeping your grass hydrated.
2. Provide sufficient structural support early.
If you’ve grown tomato plants before, you’ll know that they have quite thin and delicate stems. So when they begin to produce fruit, this puts a lot of strain and stress onto the stem.
Without proper structural support, your tomato plant will droop. The upper portion of your tomato plant will eventually be growing on the floor.
Aside from getting your tomatoes dirty, this is a giant no-no as pests will easily be able to feast on fruits and foliage.
This also makes your tomato plant more susceptible to diseases as there’s limited airflow around the leaves.
3. Give them a light shake.
To encourage your young tomato plants to grow thicker and stronger stems, give them a gentle shake several times a day.
For a more laid back approach, you can opt for a fan instead. Leave a fan on at the lightest setting or whichever speed gets your tomato plants swaying a little bit.
While this naturally occurs outdoors during windy months, a little human intervention won’t hurt especially during windless months.
4. Remove the bottom leaves.
Once your tomato plant grows to about 2 to 3 feet tall, it’s a common practice to get rid of the bottom leaves starting at the foot of the plant’s stem.
This is because these leaves are the oldest ones, which makes them the most susceptible to fungal diseases.
Because of their location being so close to the soil, they’re also the most likely to get splashed by water.
5. Water consistently.
In order to get juicy tomatoes, you need to be giving your tomato plant about 1 to 2 inches of water weekly.
Try to establish a consistent watering routine, preferably in the morning. This is the perfect time as this is when your tomato plants are most receptive to water.
This is also before the sunlight gets too hot, which gives your tomato plant enough time to properly absorb all the water before it evaporates.
Avoid watering late in the afternoon as there won’t be enough time for the water to dry up. Constantly wet soil will cause a ton of different problems, from root rot to diseases.
6. Feed your tomato plants.
While it’s great that you’ve given your tomato plants a ton of sunlight and have been watering constantly, you also need to be giving them the proper nutrients to remain healthy.
This is best done through slow-release organic fertilizers specifically formulated to cater to a tomato plant’s nutrition needs.
Here are a few ways to give your tomatoes an extra boost:
- Mixing in crushed eggshells to the soil to enhance calcium content
- Adding in bonemeal to the soil for some calcium
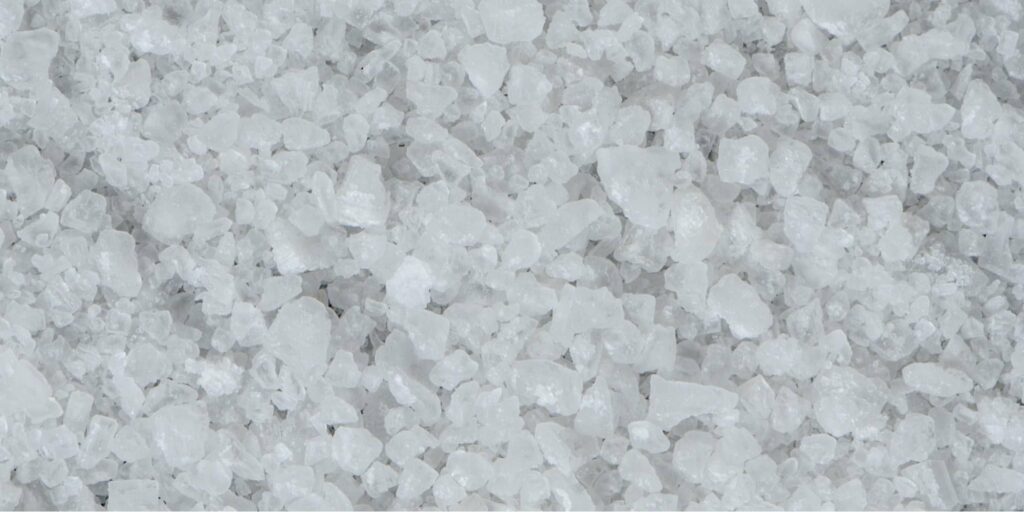
- Adding a mixture of epsom salt (epsom salt for tomatoes) and water to the soil to help with germination and adding magnesium
FAQs About Growing Tomato Plants in Raised Beds
You can refill your raised bed yearly after each harvest. The best time to do so is fall as you won’t really be able to do much gardening during the wintertime.
You can top up your raised bed with more compost, allowing it to do its thing and be all set just in time for spring.
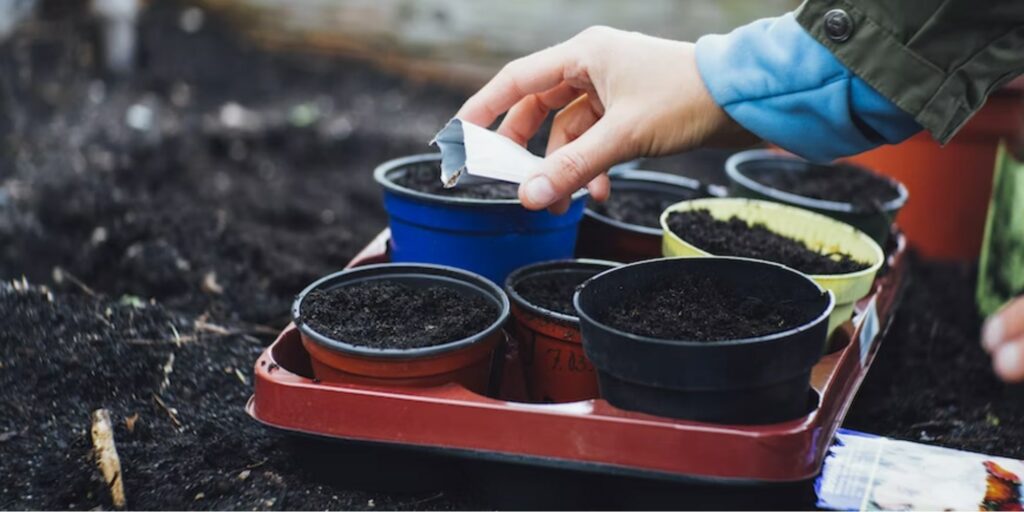
Since tomatoes love warm soil, the best time to plant tomatoes is when your climate is at its warmest. Having said that, ensure that your nighttime temperatures are consistent, too.
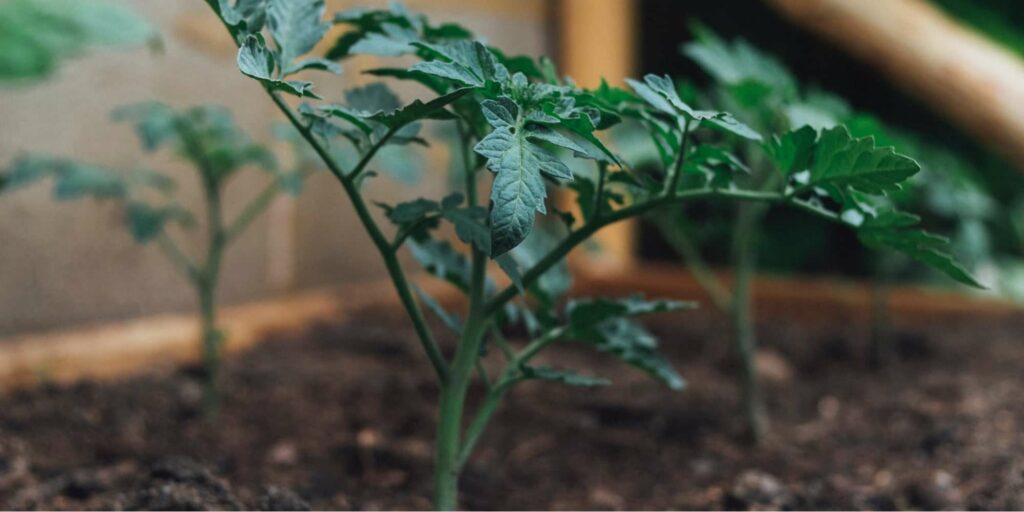
Most gardeners will grow their tomato plants indoors with a consistent soil temperature of about 60F. After about 6 weeks, you can begin to take your tomato plant out to get used to the temperature outdoors.
Once your tomato plant has successfully acclimated, you can transplant it into your raised bed.
Ideally, yes. This is because as you water your bed, the soil will begin to compact which will cause it to decrease in height over time.
Depending on how much it sinks, you can opt to add more layers.
The best way to keep your raised bed moist is to add a generous layer of mulch on top of your soil.
This keeps your soil protected from the heat and reduces the likelihood of soilborne and waterborne diseases from splashing onto the foliage.
You can most definitely reuse the soil in your raised bed for other plants as long as it’s healthy.
If your raised bed has encountered any fungal diseases, it’s a good idea to examine the soil and dispose of it. This is because some fungi can live on soil for about 2 to 3 years.
Removing the grass on the plot where you intend to put your raised bed is unnecessary because the grass will eventually die due to the lack of oxygen and sunlight.
That’s everything you need to know about growing tomatoes in raised beds! We’d love to know how your raised bed turns out, so drop us a message!
Say, do you have any tried and tested secrets to growing perfectly juicy tomatoes in raised beds? Let us know by leaving us a note.